주요 콘텐츠로 건너뛰기

JBL Charge 4 Motherboard Replacement

필요한 것

  1. JBL Charge 4 Motherboard Replacement, Speaker Grill: 1 단계, 이미지 1/1
    • Flip your speaker over and insert the plastic opening tool into the slit on the grille.

    • Pry away from yourself towards the back of the speaker to release the clip.

    • Repeat this process for the clip on the other side.

  2. JBL Charge 4 Motherboard Replacement: 2 단계, 이미지 1/2 JBL Charge 4 Motherboard Replacement: 2 단계, 이미지 2/2
    • Remove the two 8mm Phillips #0 screws from the other edge of the grille.

  3. JBL Charge 4 Motherboard Replacement: 3 단계, 이미지 1/1
    • Pull apart both sides of the grille.

    • Lift the cover off of the speaker.

  4. JBL Charge 4 Motherboard Replacement, Passive Bass Radiators: 4 단계, 이미지 1/2 JBL Charge 4 Motherboard Replacement, Passive Bass Radiators: 4 단계, 이미지 2/2
    • Using the plastic opening tool, lift the tab on top of the speaker to release the radiator from the clips.

    • Repeat this process on the other clips around the radiator to release it from the frame.

  5. JBL Charge 4 Motherboard Replacement: 5 단계, 이미지 1/2 JBL Charge 4 Motherboard Replacement: 5 단계, 이미지 2/2
    • Push the radiator off of the frame of the device.

    • Repeat on the other side.

    • The passive bass radiators seal out water from inside the device. Removing them multiple times may compromise the waterproof nature of the speaker.

  6. JBL Charge 4 Motherboard Replacement, Battery: 6 단계, 이미지 1/2 JBL Charge 4 Motherboard Replacement, Battery: 6 단계, 이미지 2/2
    • Remove the two 6mm Phillips #0 screws on the front side of the port bay cover.

  7. JBL Charge 4 Motherboard Replacement: 7 단계, 이미지 1/1
    • Gently slide the cover back and off the hooks.

    • Remove the port bay cover.

  8. JBL Charge 4 Motherboard Replacement: 8 단계, 이미지 1/3 JBL Charge 4 Motherboard Replacement: 8 단계, 이미지 2/3 JBL Charge 4 Motherboard Replacement: 8 단계, 이미지 3/3
    • Remove the two 6mm Phillips #0 screws.

    • Remove the four 8mm Phillips #0 screws.

  9. JBL Charge 4 Motherboard Replacement: 9 단계, 이미지 1/1
    • Lift up the battery cover.

  10. JBL Charge 4 Motherboard Replacement: 10 단계, 이미지 1/3 JBL Charge 4 Motherboard Replacement: 10 단계, 이미지 2/3 JBL Charge 4 Motherboard Replacement: 10 단계, 이미지 3/3
    • Remove the sticky tape to expose the white ribbon cable ZIF connector.

    • Flip up the black locking flap on the ZIF connector with the tip of a spudger or your fingernail to release the cable.

    • Remove the white ribbon cable from the battery cover and place the cover to the side.

  11. JBL Charge 4 Motherboard Replacement: 11 단계, 이미지 1/2 JBL Charge 4 Motherboard Replacement: 11 단계, 이미지 2/2
    • Remove the battery from the battery socket by gently pulling on it.

  12. JBL Charge 4 Motherboard Replacement: 12 단계, 이미지 1/3 JBL Charge 4 Motherboard Replacement: 12 단계, 이미지 2/3 JBL Charge 4 Motherboard Replacement: 12 단계, 이미지 3/3
    • Pull out the battery enough to expose the battery's wire connector.

    • Push down on the white tab and gently pull out the battery-device connector.

  13. JBL Charge 4 Motherboard Replacement, Speaker: 13 단계, 이미지 1/2 JBL Charge 4 Motherboard Replacement, Speaker: 13 단계, 이미지 2/2
    • Flip the device so that the speaker faces you.

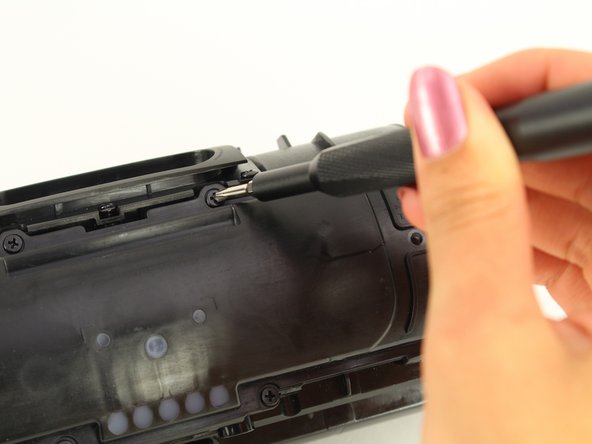
    • Remove the four 8mm Phillips #1 screws.

  14. JBL Charge 4 Motherboard Replacement: 14 단계, 이미지 1/1
    • Gently pull out the speaker.

  15. JBL Charge 4 Motherboard Replacement: 15 단계, 이미지 1/2 JBL Charge 4 Motherboard Replacement: 15 단계, 이미지 2/2
    • Desolder the red and black wires.

    • A guide for soldering and desoldering can be found here.

  16. JBL Charge 4 Motherboard Replacement, Motherboard: 16 단계, 이미지 1/3 JBL Charge 4 Motherboard Replacement, Motherboard: 16 단계, 이미지 2/3 JBL Charge 4 Motherboard Replacement, Motherboard: 16 단계, 이미지 3/3
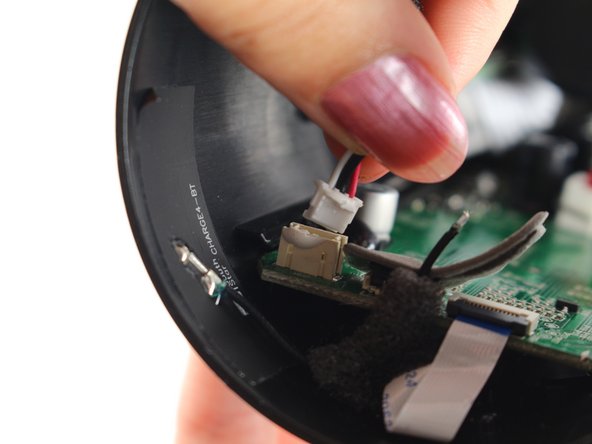
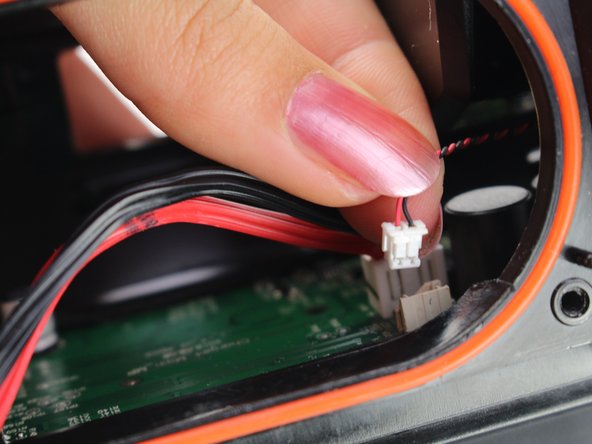
    • Remove the wire harness coming from the port bay on the left side of the motherboard by gently lifting the connector from its housing.

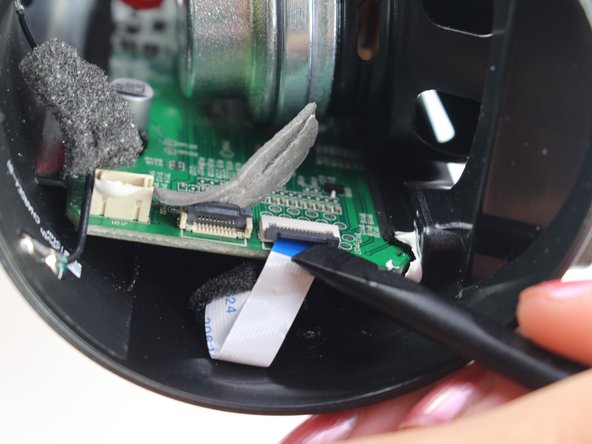
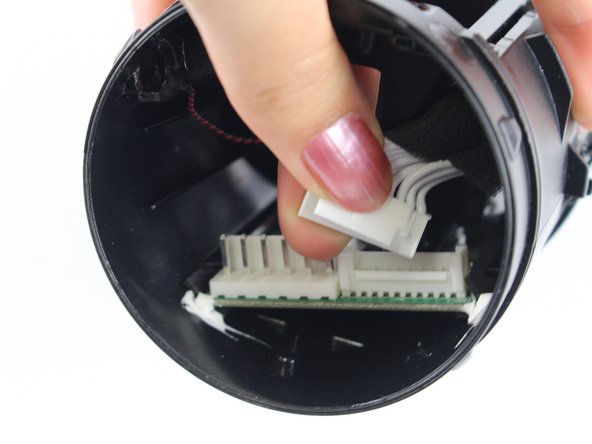
    • Remove the white ribbon cable from the ZIF connector by lifting the black locking flap on the connector with a spudger or your fingernail.

  17. JBL Charge 4 Motherboard Replacement: 17 단계, 이미지 1/2 JBL Charge 4 Motherboard Replacement: 17 단계, 이미지 2/2
    • Remove the ground cable harness next to the speaker wire by gentling pulling it from the connector.

  18. JBL Charge 4 Motherboard Replacement: 18 단계, 이미지 1/2 JBL Charge 4 Motherboard Replacement: 18 단계, 이미지 2/2
    • Flip the speaker around to the other side.

    • Remove the wiring harness leading to the port bay by pressing down on the tab and gently pulling the harness from the connector.

  19. JBL Charge 4 Motherboard Replacement: 19 단계, 이미지 1/3 JBL Charge 4 Motherboard Replacement: 19 단계, 이미지 2/3 JBL Charge 4 Motherboard Replacement: 19 단계, 이미지 3/3
    • Push the motherboard from either side of the housing along its tracks.

    • Pull out the motherboard from the speaker housing.

    • When putting the motherboard back in the housing, ensure that it is between the two tracks on the top side of the speaker.

결론

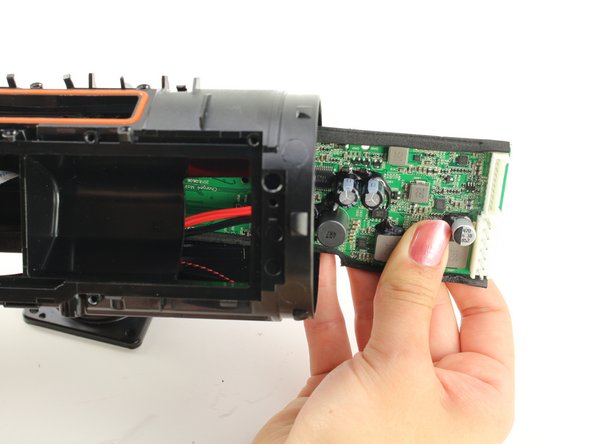
To reassemble your device, follow these instructions in reverse order.

다른 11명이 해당 안내서를 완성하였습니다.

Zachary Colwell

회원 가입일: 01/24/19

1,914 평판

안내서 5개 작성하였습니다

Cal Poly, Team S1-G1, White Winter 2019 Cal Poly, Team S1-G1, White Winter 2019 회원

CPSU-WHITE-W19S1G1

4 회원들

안내서 26개 작성하였습니다

댓글 4개

Where i could buy a replacement motherboard for jbl charge 4?thank you.

bbt8mikael_06 - 답글

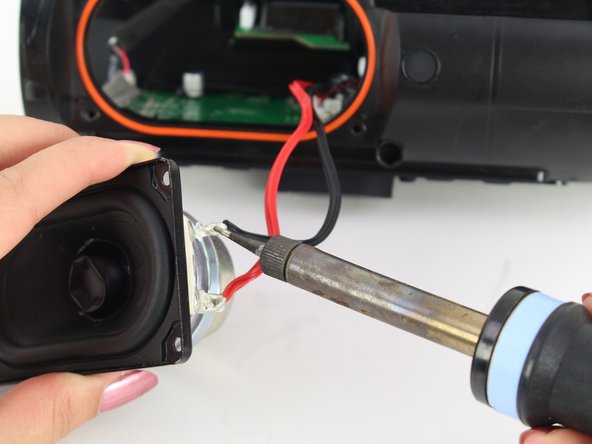
This guide has a vital flaw. Just look at the loose wire cause by a broken solder in image 16!

PAJ 101 - 답글

that's the antenna cable which was pulled out of the connector. The step of popping the antenna connector out is missing.

Dan Glogoveanu -

from where i buy or replace the motherboard of jbl charge 4?

Aman Bisht - 답글

댓글 쓰기

조회 통계:

24 시간 전: 7

7일 전: 44

30일 전: 211

전체 시간: 12,361