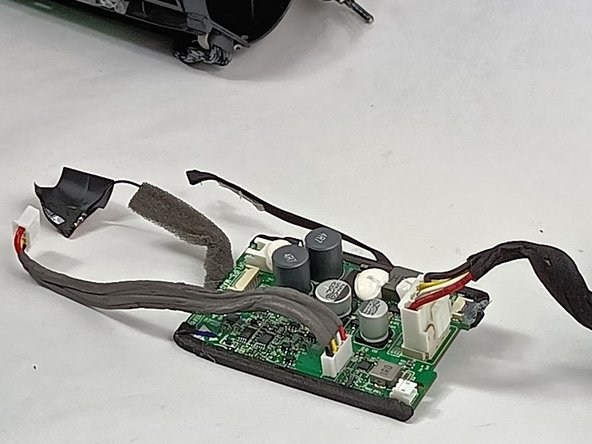
주요 콘텐츠로 건너뛰기

JBL Flip 5 Motherboard Replacement

필요한 것

  1. JBL Flip 5 Motherboard Replacement, Outer Case: 1 단계, 이미지 1/2 JBL Flip 5 Motherboard Replacement, Outer Case: 1 단계, 이미지 2/2
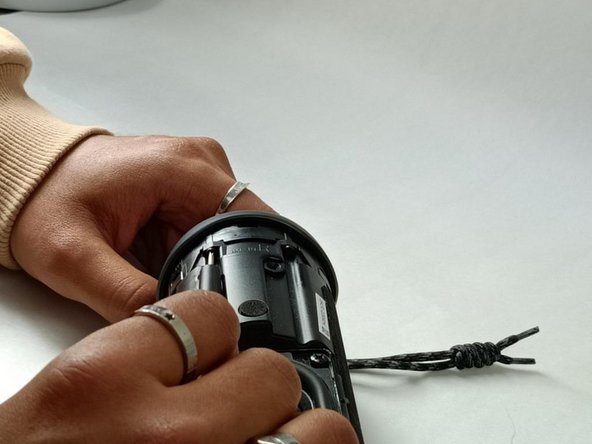
    • Insert the flat edge of the metal spudger underneath the corner of the outer case.

    • Use the spudger to pry open the plastic clips that secure the outer case.

  2. JBL Flip 5 Motherboard Replacement: 2 단계, 이미지 1/1
    • Once all the clips are released, you will be able to pull up that edge of the case.

  3. JBL Flip 5 Motherboard Replacement: 3 단계, 이미지 1/1
    • Once one side is released, complete the previous two steps with the other side.

    • This side contains the buttons, so be careful so as to not damage them while prying the case off.

  4. JBL Flip 5 Motherboard Replacement: 4 단계, 이미지 1/2 JBL Flip 5 Motherboard Replacement: 4 단계, 이미지 2/2
    • Once all the clips are removed, you can gently remove the outer case.

    • The case is now fully removed. Now a new case will be attached by putting the case into position and pushing on the clips to reattach them.

  5. JBL Flip 5 Motherboard Replacement, Speaker: 5 단계, 이미지 1/1
    • Begin by unscrewing the four 9.6 mm-long screws with the Philips #00 screwdriver.

  6. JBL Flip 5 Motherboard Replacement: 6 단계, 이미지 1/1
    • Once screws are fully out make sure to carefully pull out so the wires connected don't get damaged.

  7. JBL Flip 5 Motherboard Replacement: 7 단계, 이미지 1/1
    • Once you carefully lift up the speaker, gently disconnect the wire that connects the speaker to the motherboard.

  8. JBL Flip 5 Motherboard Replacement: 8 단계, 이미지 1/1
    • Once connection has been disconnected you can lift the speaker completely out.

  9. JBL Flip 5 Motherboard Replacement, Buttons: 9 단계, 이미지 1/3 JBL Flip 5 Motherboard Replacement, Buttons: 9 단계, 이미지 2/3 JBL Flip 5 Motherboard Replacement, Buttons: 9 단계, 이미지 3/3
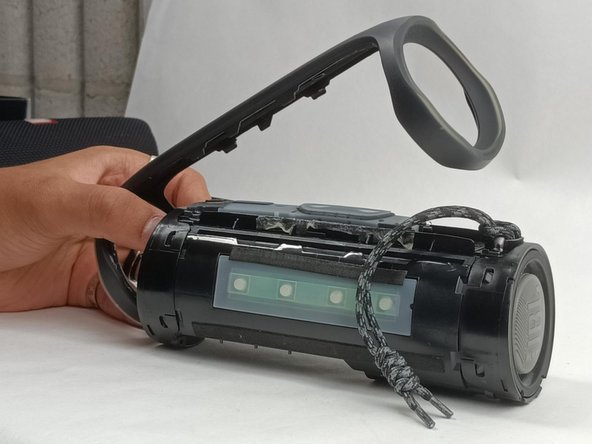
    • The next part needed to remove covers each side and the power and bluetooth buttons in a middle strip along the speaker.

    • The first picture is for reference. That is the part that will be removed.

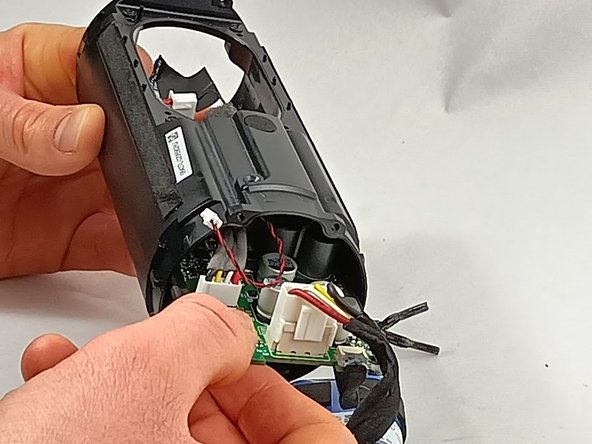
    • Begin (as shown in the second picture) by unscrewing the two screws (17mm each) with the Philips #00 screwdriver.

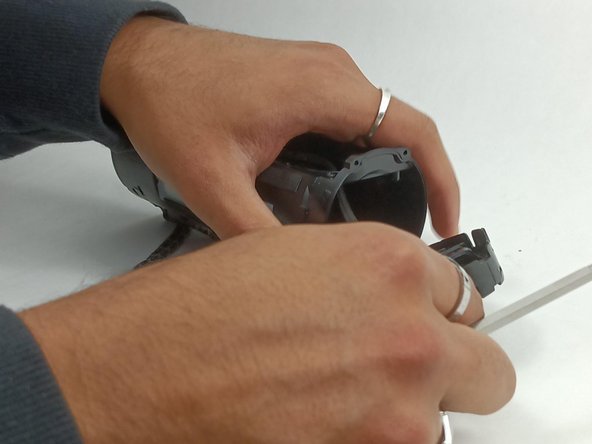
    • Then flip the device around and unscrew the other two screws (17 mm each) on the other side just the same.

    • In these pictures the speaker is still in the device. It is best to have already removed it in the Speaker Replacement Guide.

  10. JBL Flip 5 Motherboard Replacement: 10 단계, 이미지 1/2 JBL Flip 5 Motherboard Replacement: 10 단계, 이미지 2/2
    • Once all the screws are removed, pull the passive radiator bracket on either end off.

    • Set the passive radiator bracket to the side. It is not needed for the buttons replacement.

  11. JBL Flip 5 Motherboard Replacement: 11 단계, 이미지 1/3 JBL Flip 5 Motherboard Replacement: 11 단계, 이미지 2/3 JBL Flip 5 Motherboard Replacement: 11 단계, 이미지 3/3
    • Next you must remove the passive radiator.

    • To do so use the metal spudger to undo the clips holding it down.

    • Once the clips on both sides are removed, you can pull the left and right passive radiators off the device.

    • Both can be set aside. They are not needed for the buttons replacement.

  12. JBL Flip 5 Motherboard Replacement: 12 단계, 이미지 1/2 JBL Flip 5 Motherboard Replacement: 12 단계, 이미지 2/2
    • Once the speaker is removed, you must go in through the hole where the speaker was for this step.

    • There you can use tweezers or your fingers to unhook the connection of the buttons board to the rest of the device.

  13. JBL Flip 5 Motherboard Replacement: 13 단계, 이미지 1/2 JBL Flip 5 Motherboard Replacement: 13 단계, 이미지 2/2
    • Peel the rubber cover off using a metal spudger. It may be very sticky, so you may need to pull hard.

    • Then peel the cover off using your fingers.

  14. JBL Flip 5 Motherboard Replacement: 14 단계, 이미지 1/2 JBL Flip 5 Motherboard Replacement: 14 단계, 이미지 2/2
    • Again use the spudger to pull the buttons board off.

    • It is glued down, so you must be very assertive using the spudger.

  15. JBL Flip 5 Motherboard Replacement: 15 단계, 이미지 1/2 JBL Flip 5 Motherboard Replacement: 15 단계, 이미지 2/2
    • In these photos, the buttons board is still on.

    • If only certain buttons are not working it may be appropriate to only replace the buttons board with play/pause and volume up/down. If you are having trouble with the power and bluetooth buttons as well, this step will allow you to replace those.

    • Use the metal spudger to again pull the board containing the power and bluetooth buttons off from the device. It is located next to the strap.

    • It's glued on, use necessary force.

  16. JBL Flip 5 Motherboard Replacement, Motherboard: 16 단계, 이미지 1/1
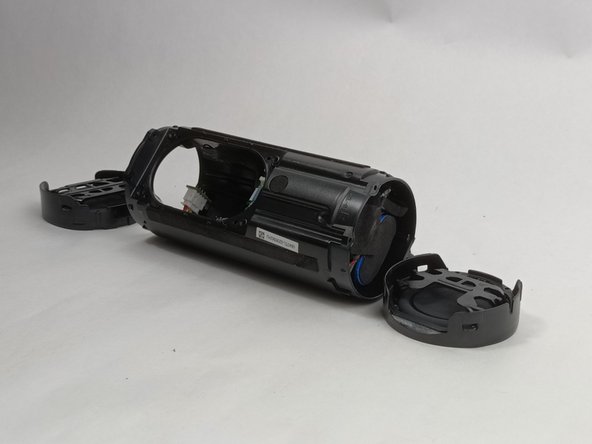
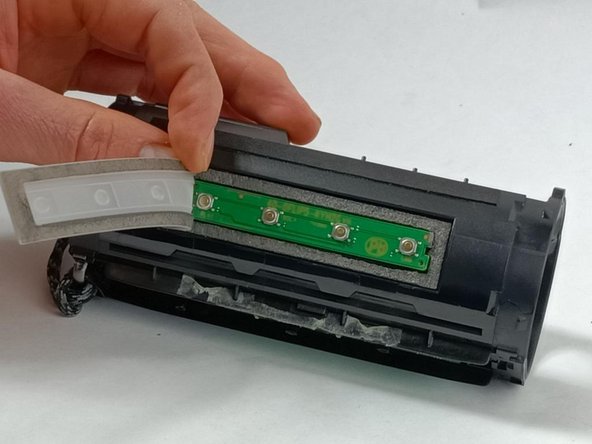
    • Remove the black tape attached to the inside of the speaker.

    • The adhesive used is strong and may need more force if there is no progress.

  17. JBL Flip 5 Motherboard Replacement: 17 단계, 이미지 1/1
    • Remove the wiring attached to the motherboard and leave it facing away when pulling the motherboard out.

    • This part is attached on and is very tight. Do not pull from the wire and pull from the plastic head to prevent damage.

  18. JBL Flip 5 Motherboard Replacement: 18 단계, 이미지 1/3 JBL Flip 5 Motherboard Replacement: 18 단계, 이미지 2/3 JBL Flip 5 Motherboard Replacement: 18 단계, 이미지 3/3
    • First, slide the battery fully out. You may need to tilt it up slightly to remove it fully and then gently start to pull the motherboard out the same way. Again, you need to gently tilt it up halfway to fully remove it.

  19. JBL Flip 5 Motherboard Replacement: 19 단계, 이미지 1/1
    • Once you have the motherboard removed, repair the motherboard before putting it back in or replace it with a new motherboard.

결론

To reassemble your device, follow these instructions in reverse order.

NoahD

회원 가입일: 11/01/23

109 평판

안내서 1개 작성함

UMass Dartmouth, Team 3-5, Konn Fall 2023 UMass Dartmouth, Team 3-5, Konn Fall 2023 회원

UMASSD-KONN-F23S3G5

4 회원들

안내서 5개 작성하였습니다

댓글 0개

댓글 쓰기

조회 통계:

24 시간 전: 3

7일 전: 11

30일 전: 78

전체 시간: 258