이 버전에는 잘못된 편집 사항이 있을 수 있습니다. 최신 확인된 스냅샷으로 전환하십시오.
필요한 것
-
이 단계는 번역되지 않았습니다. 번역을 도와주십시오
-
On the end with the buttons, remove the end cap using the flat head screwdriver to get between the rubber lining and the plastic.
-
After the cap is removed, unscrew the two 3.3mm screws using a size 1 ph screw driver.
-
-
이 단계는 번역되지 않았습니다. 번역을 도와주십시오
-
Unscrew four 3.3mm screws on each end of the JBL using a size 1 ph screw driver (8 screws total).
-
-
이 단계는 번역되지 않았습니다. 번역을 도와주십시오
-
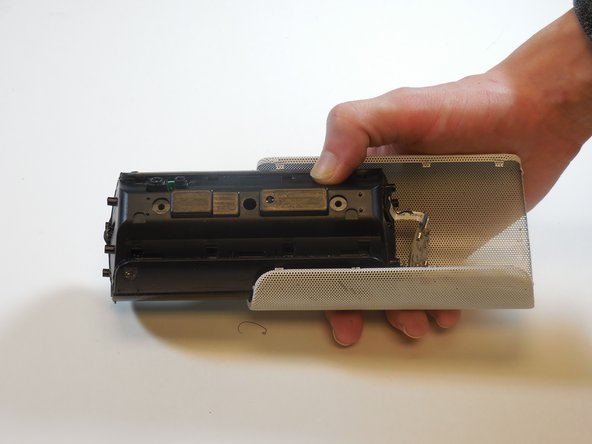
Remove outermost white casing by gently lifting up on one side.
-
Remove two 5mm screws holding the silver back plate in place with a size 2 ph screw driver.
-
Gently lift up and remove the silver casing.
-
-
-
이 단계는 번역되지 않았습니다. 번역을 도와주십시오
-
Pry the four tabs on each side of the speaker cover (8 tabs total).
-
Pry the two tabs on each end to remove the cover (4 tabs total).
-
Slide speaker out of metal speaker cover.
-
-
이 단계는 번역되지 않았습니다. 번역을 도와주십시오
-
Remove 5mm screw in the middle of the back of the device with a size 2 ph screw driver.
-
Unscrew the two 5mm screws on each side using a size 2 ph screwdriver.
-
Open the speaker.
-
-
이 단계는 번역되지 않았습니다. 번역을 도와주십시오
-
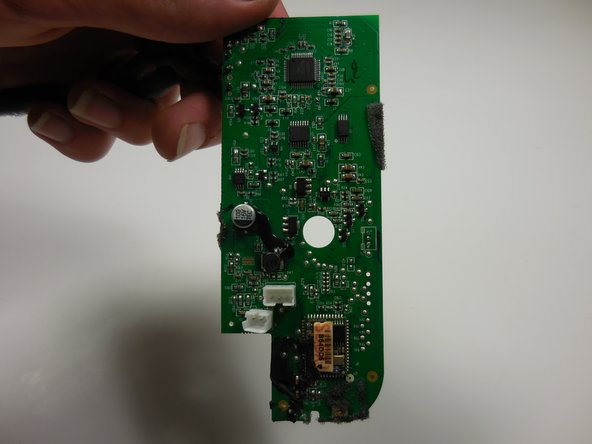
Disconnect all cables that are attached to the motherboard so that it resembles the step picture.
-
-
이 단계는 번역되지 않았습니다. 번역을 도와주십시오
-
Locate the underside of the motherboard, where the square U.FL antenna connector is.
-
-
이 단계는 번역되지 않았습니다. 번역을 도와주십시오
-
Use the soldering iron to desolder the U.FL antenna connector. You might need to use a desoldering braid wire to remove the excess of solder.
-
Clean the PCB pads of any excess of solder with the soldering braid wire before continuing.
-
Place the new U.FL connector on the pads where the desoldered connector was. Make sure the orientation of the connector is the same as before.
-
Solder the new U.FL connector to the PCB. Avoid exessive heat and/or prolongated soldering time during this step.
-


다른 한 분이 해당 안내서를 완성하였습니다.
팀

Colorado Springs, Team 9-5, Panko Spring 2015 Colorado Springs, Team 9-5, Panko Spring 2015 회원
UCCS-PANKO-S15S9G5
3 회원들
안내서 5개 작성하였습니다
댓글 2개
Hi, nice instructions. However, the description and text on the guide are misleading. The damaged part is the U.FL connector for the Bluetooth antenna, but not the antenna itself. I have edited some text on the guide for a better description of what is being repaired.