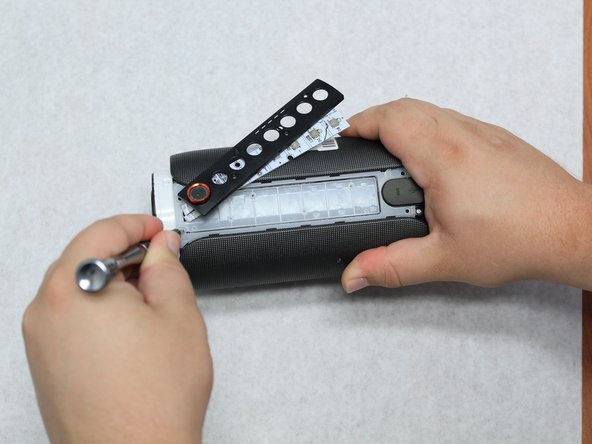
주요 콘텐츠로 건너뛰기

JBL Pulse 2 Button Circuit Board Replacement

필요한 것

  1. JBL Pulse 2 Button Circuit Board Replacement, Button Circuit Board: 1 단계, 이미지 1/2 JBL Pulse 2 Button Circuit Board Replacement, Button Circuit Board: 1 단계, 이미지 2/2
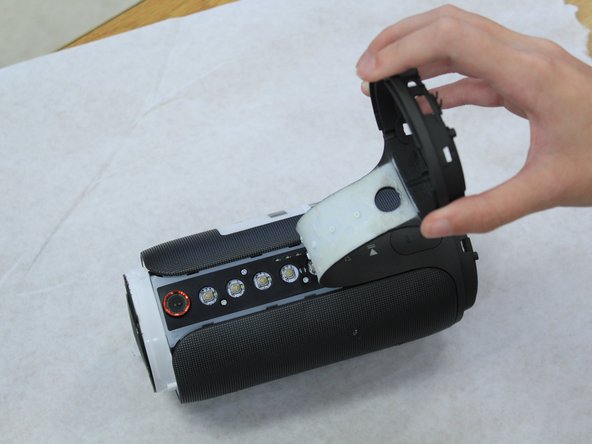
    • Remove the rubber rings from either end of the device.

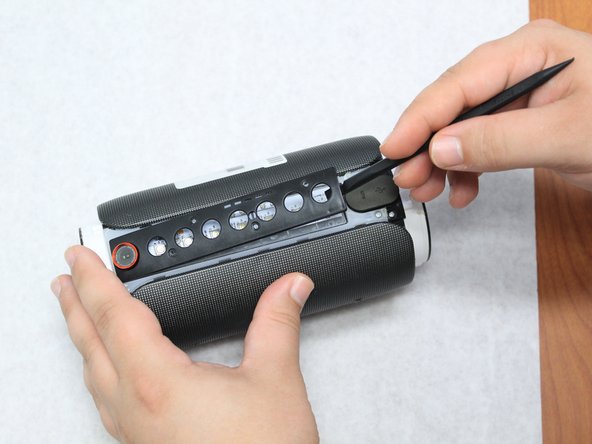
    • If there is difficulty in lifting the rings from the device, use the metal spudger.

  2. JBL Pulse 2 Button Circuit Board Replacement: 2 단계, 이미지 1/1
    • Remove the four 4.8mm Phillips #1 screws from each end of the device with the Phillips head screwdriver.

    • Lift the end pieces off of the device.

  3. JBL Pulse 2 Button Circuit Board Replacement: 3 단계, 이미지 1/1
    • Remove the four 9.5mm Phillips #1 screws from each end of the device.

  4. JBL Pulse 2 Button Circuit Board Replacement: 4 단계, 이미지 1/2 JBL Pulse 2 Button Circuit Board Replacement: 4 단계, 이미지 2/2
    • Peel one end off and slowly draw it across the length of the device until you get to the other side.

  5. JBL Pulse 2 Button Circuit Board Replacement: 5 단계, 이미지 1/3 JBL Pulse 2 Button Circuit Board Replacement: 5 단계, 이미지 2/3 JBL Pulse 2 Button Circuit Board Replacement: 5 단계, 이미지 3/3
    • Remove the four 7.9mm Phillips #1 screws along the black centerpiece of the device between the camera and the auxiliary port.

    • Lift up the casing and circuit board but do not try and remove the ribbon wires.

  6. JBL Pulse 2 Button Circuit Board Replacement: 6 단계, 이미지 1/1
    • Remove the cover from the end that the ribbon wires are attached to. It should peel off easily.

  7. JBL Pulse 2 Button Circuit Board Replacement: 7 단계, 이미지 1/2 JBL Pulse 2 Button Circuit Board Replacement: 7 단계, 이미지 2/2
    • Unlatch the mechanism holding the ribbon wires in place then disconnect them from the motherboard.

    • To access the wires, remove some of the black glue holding them in place with the spudger.

  8. JBL Pulse 2 Button Circuit Board Replacement: 8 단계, 이미지 1/2 JBL Pulse 2 Button Circuit Board Replacement: 8 단계, 이미지 2/2
    • Slowly pull the ribbon wires out from the outside.

    • If there is too much resistance, remove more of the black glue.

결론

To reassemble your device, follow these instructions in reverse order.

다른 3명이 해당 안내서를 완성하였습니다.

Dalton Little

회원 가입일: 08/31/18

254 평판

안내서 1개 작성함

댓글 3개

where can I buy that part

Wilco Peters - 답글

I love you guys

Davi Dodo - 답글

I need to buy parts

hernzum - 답글

댓글 쓰기

조회 통계:

24 시간 전: 0

7일 전: 0

30일 전: 9

전체 시간: 1,086