주요 콘텐츠로 건너뛰기

JBL Pulse 4 LED Light Display Replacement

필요한 것

  1. JBL Pulse 4 LED Light Display Replacement, Casing Replacement: 1 단계, 이미지 1개 중 1개
    • Power off the device before doing any repairs.

    • Hold the power button for 3+ seconds to power down the device.

  2. JBL Pulse 4 LED Light Display Replacement: 2 단계, 이미지 3개 중 1개 JBL Pulse 4 LED Light Display Replacement: 2 단계, 이미지 3개 중 2개 JBL Pulse 4 LED Light Display Replacement: 2 단계, 이미지 3개 중 3개
    • Remove each rubber end cap using a plastic pry tool.

    • Go around each end of the speaker slowly popping up a small section of the rubber cap until there is a gap on all sides.

    • Remove the top by hand.

  3. JBL Pulse 4 LED Light Display Replacement: 3 단계, 이미지 3개 중 1개 JBL Pulse 4 LED Light Display Replacement: 3 단계, 이미지 3개 중 2개 JBL Pulse 4 LED Light Display Replacement: 3 단계, 이미지 3개 중 3개
    • Remove the charging port cover using a plastic pry tool.

    • Remove the two 12.7 mm Phillips #1 screws.

    • Remove the charging port housing from the casing.

  4. JBL Pulse 4 LED Light Display Replacement: 4 단계, 이미지 3개 중 1개 JBL Pulse 4 LED Light Display Replacement: 4 단계, 이미지 3개 중 2개 JBL Pulse 4 LED Light Display Replacement: 4 단계, 이미지 3개 중 3개
    • Disconnect the charging port connector by pulling the connector away from the port.

    • Disconnect the battery level indicator light by pulling the wire away from the lights.

  5. JBL Pulse 4 LED Light Display Replacement: 5 단계, 이미지 2개 중 1개 JBL Pulse 4 LED Light Display Replacement: 5 단계, 이미지 2개 중 2개
    • Remove the six 8 mm Phillips #1 screws from the end of the speaker with the grill that says "JBL."

    • Remove the plastic piece where the 6 screws came out of.

  6. JBL Pulse 4 LED Light Display Replacement: 6 단계, 이미지 1개 중 1개
    • Remove the six 9.5 mm screws using a Phillips #1 screwdriver.

  7. JBL Pulse 4 LED Light Display Replacement: 7 단계, 이미지 3개 중 1개 JBL Pulse 4 LED Light Display Replacement: 7 단계, 이미지 3개 중 2개 JBL Pulse 4 LED Light Display Replacement: 7 단계, 이미지 3개 중 3개
    • Flip the speaker to the other end.

    • Use a pry tool to pry between the casing of the speaker and the internals.

    • Go around the entirety of this end of the speaker slowly prying apart the two pieces.

  8. JBL Pulse 4 LED Light Display Replacement: 8 단계, 이미지 1개 중 1개
    • The casing is now fully detached from the internal components.

    • You can now replace the outer casing of the speaker.

  9. JBL Pulse 4 LED Light Display Replacement, LED Light Display: 9 단계, 이미지 2개 중 1개 JBL Pulse 4 LED Light Display Replacement, LED Light Display: 9 단계, 이미지 2개 중 2개
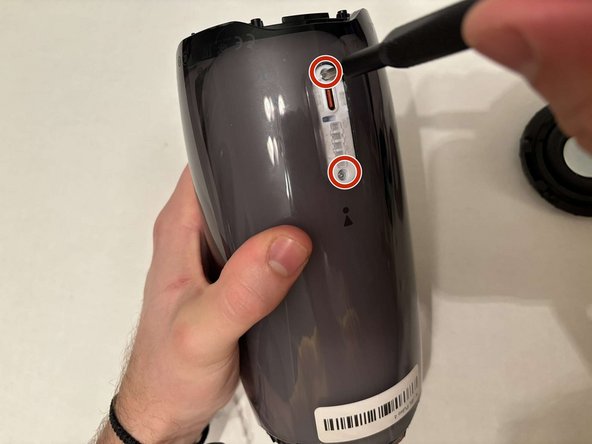
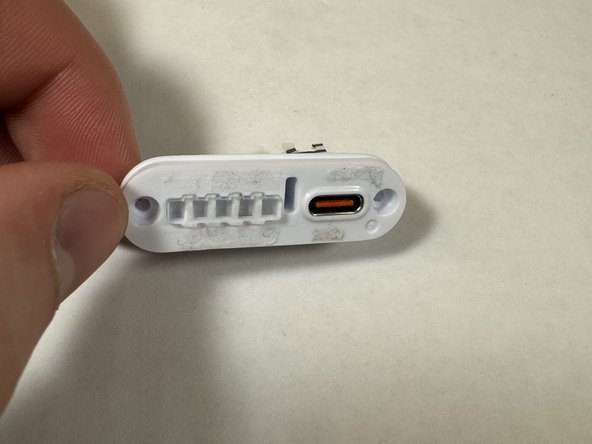
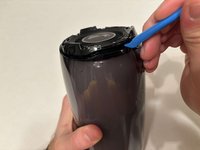
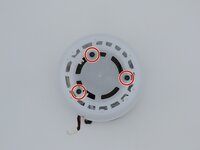
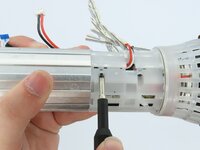
    • Place the speaker on the table with the button board side down.

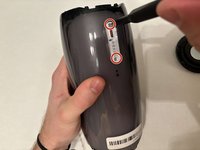
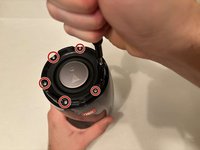
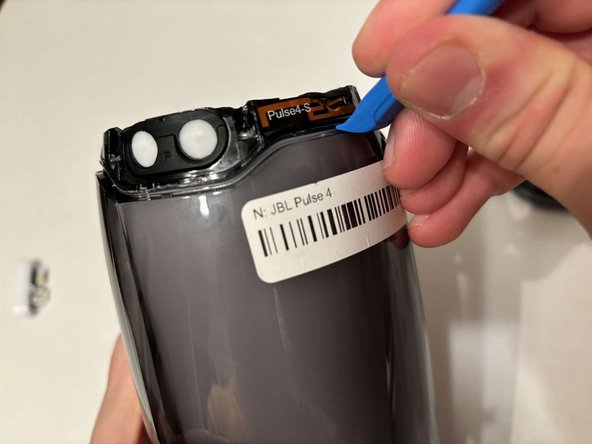
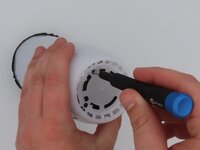
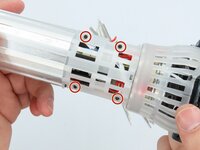
    • Remove the three black 5 mm screws using a Phillips #1 screwdriver.

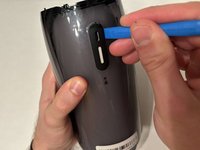
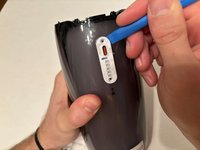
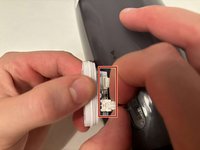
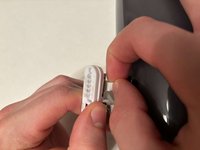
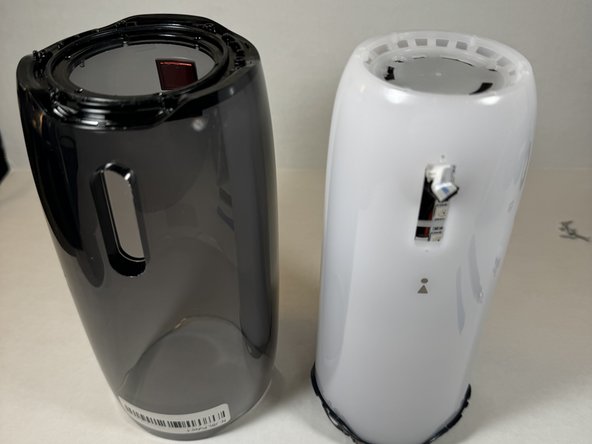
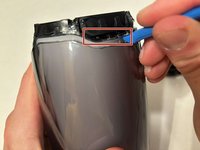
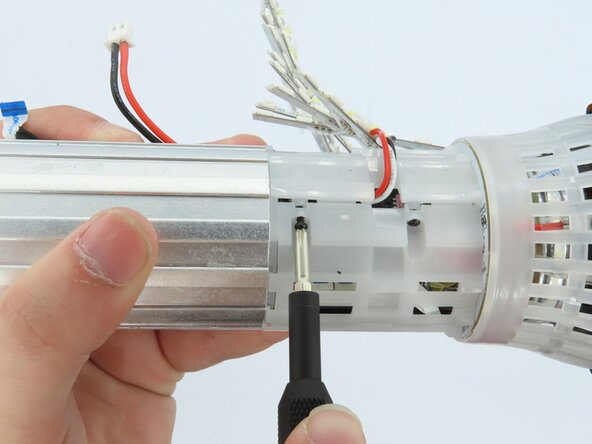
    • Remove the white casing by pulling it away from the button board.

  10. JBL Pulse 4 LED Light Display Replacement: 10 단계, 이미지 1개 중 1개
    • Clip off the two zip-ties using the zip tie cutter.

  11. JBL Pulse 4 LED Light Display Replacement: 11 단계, 이미지 1개 중 1개
    • Peel each LED strip off of the speaker using an iFixit opening pick.

  12. JBL Pulse 4 LED Light Display Replacement: 12 단계, 이미지 2개 중 1개 JBL Pulse 4 LED Light Display Replacement: 12 단계, 이미지 2개 중 2개
    • Remove the four black 5 mm screws using a Phillips #1 screwdriver.

    • Remove the white plastic piece that is held in place by the screws.

  13. JBL Pulse 4 LED Light Display Replacement: 13 단계, 이미지 1개 중 1개
    • Remove the red/white cable from the white connection.

  14. JBL Pulse 4 LED Light Display Replacement: 14 단계, 이미지 1개 중 1개
    • Remove the LED light display from the speaker.

결론

To reassemble your device, follow these instructions in reverse order.

작성자

1다른 기여자 명과 함께

Maria Parks

회원 가입일: 02/25/25

133 평판

안내서 1개를 작성함

0가이드 댓글

댓글 쓰기

조회 통계:

지난 24시간: 1

지난 7일: 7

지난 30일: 21

전체 시간: 222