소개
This guide will provide instructions on how to replace the motherboard.
필요한 것
-
-
Turn the phone off by holding down the power button located on the top of the phone.
-
-
-
Find the small indentation at the bottom right of the phone and pry open the back case of the phone using your fingernail or small plastic opening tool.
-
Gently remove the back case completely from the phone.
-
-
-
-
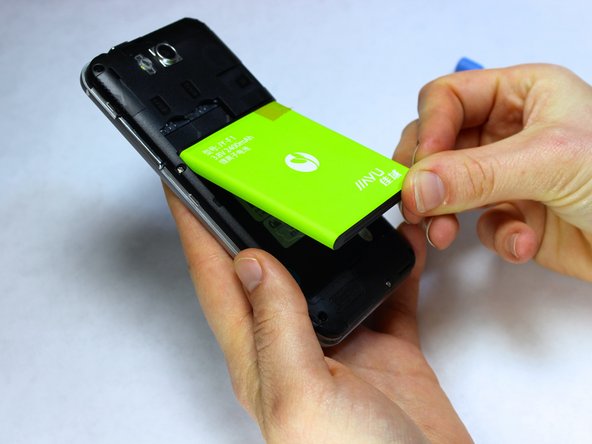
Insert a fingernail or the small plastic opening tool into the recess in the bottom center of the battery and lift upward.
-
Remove the battery from the phone.
-
-
-
With the phone lying face down, remove the nine 3 mm Phillips #00 screws from the midframe.
-
Gently run a plastic opening tool down along the left and right sides of the phone to separate the black midframe assembly from the silver display casing.
-
Carefully remove the midframe assembly from the display casing by pulling up and away from the phone.
-
-
-
Using a precision tweezer, remove the protective stickers from the connectors.
-
Using a precision tweezer or spudger, carefully slide the indicated connectors out from their ports on the motherboard.
-
-
-
Locate the two white clips along the edge of the phone that hold the motherboard in place.
-
Using a finger or plastic opening tool, pull the clips away from the motherboard and hold the clips back.
-
Wedge a plastic credit card or opening pick underneath the motherboard to separate the motherboard away from the display casing.
-
Carefully lift the motherboard upward, making sure any remaining tape connectors are detached.
-


To reassemble your device, follow these instructions in reverse order.
To reassemble your device, follow these instructions in reverse order.
팀

USF Tampa, Team 9-4, Leahy Fall 2014 USF Tampa, Team 9-4, Leahy Fall 2014 회원
USFT-LEAHY-F14S9G4
3 회원들
안내서 10개 작성하였습니다