소개
The Jura brew group is in many Coffee Makers. When it moves slowly, it should be cleaned. Also when a seal is broken (when water leaks out) you have to open it.
필요한 것
-
-
FRONT
-
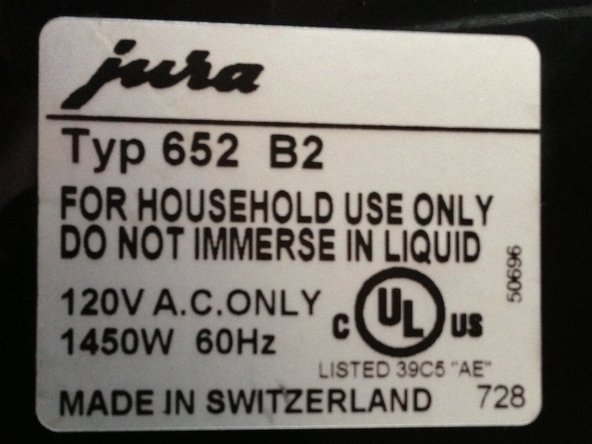
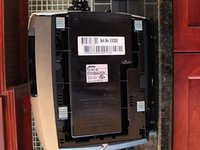
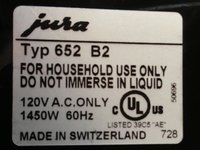
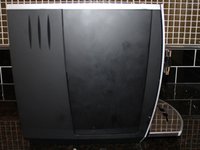
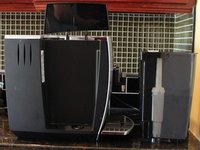
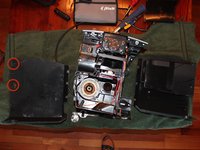
I thought I would start with lots of photos so you can see if you, in fact, have the same model, the J5, or, if you are trying to repair a similar one, what the differences are.
-
As I said in the introduction, I have divided the device into the following six sections: Top, Bottom, Front, Back, Left and Right.
-
-
-
Beginning the Disassembly
-
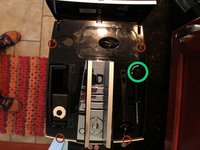
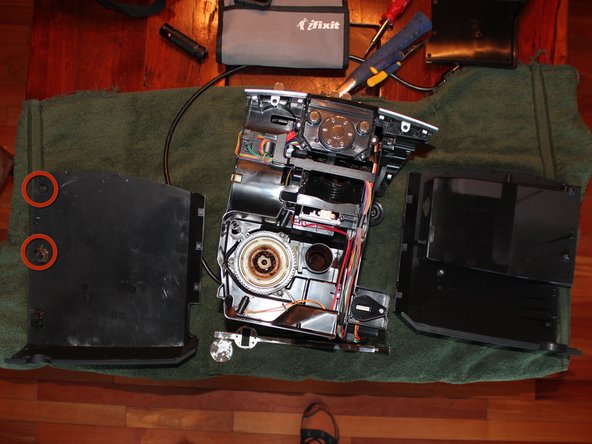
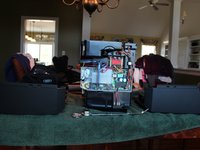
I recommend performing this on top of an old towel, or something similar, to protect the coffee maker as well as the work surface and because some ground coffee tends to fall out of various crevices in the machine.
-
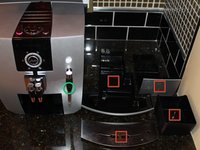
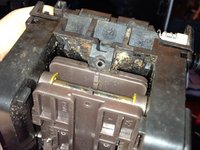
Remove: all four tray pieces (marked with red squares in the first photo), and the frothing attachment(s) (marked with a green circle in the first photo; you may have a second frothing attachment in the top storage area (blue circle, photo 2)).
-
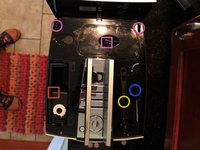
Remove: the water container (marked with a red square), the coffee scoop (yellow circle), and the coffee bean aroma preservation cover (pink square), all the unground beans from the hopper (you can gently dump them out after you have removed everything else by turning the machine over).
-
You can (optionally) remove the top back cover by gently wiggling each of the hinge points (marked with pink circles) up while it is open. Gentle pressure from side to side may release the hinges. Also loosen the captive screw on the bean area and then you can remove that grate by gently squeezing together the two hinge points.
-
[You can click on the photos to see them enlarged. Alternatively, 1. choose the orange cog wheel in the photo and choose 'Full Screen', or, 2. use Ctrl and + (incl =) in your browser to enlarge the whole page. Use Ctrl - to shrink.]
-
-
이 단계에 사용된 도구:iFixit Precision 4 mm Screwdriver Bit$2.99
-
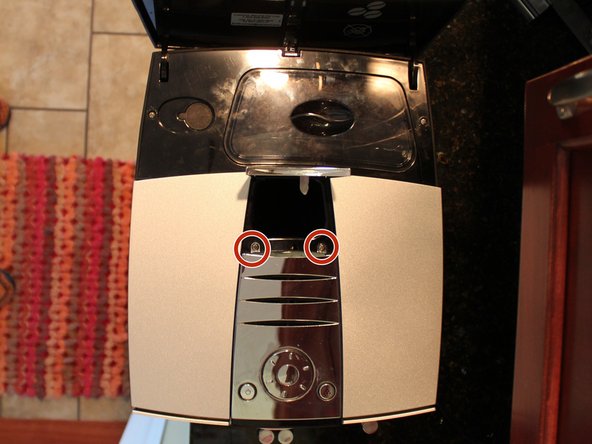
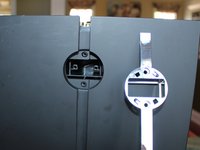
Six screws labeled with the red circles need to be removed before the top can be taken off. One under each of the left and right top hinged covers, two under the top back cover and of the two under the ground coffee top door, the one nearest the water tank (the other one holds the chrome plastic to the top).
-
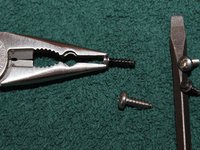
The original black screws were very hard to get out but I had luck with the needle nose pliers in my trusty Leatherman Charge model multi-tool. I tried with several alternative needle nose pliers.
-
There are specific Jura tools available from internet auction sites, tools that accept the slightly oval shaped heads of the recessed 'blind' screws. Just use oval head bit from iFixit.
-
I threw those screws away and replaced them with simple Phillips-head ones - that is why they appear silver in the photo while yours are probably black. I am pretty sure the manufacture does not want us to peek inside :o)
-
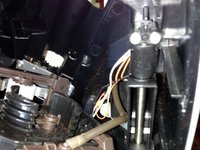
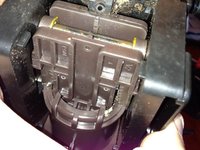
Note: when putting the top back on you need to align the position of the bean grinder adjustment knob with the linkage below. It should line up easily unless you accidentally moved it (marked with a green circle).
-
Taking a close-up photo of the mechanism, in 'macro' mode, is recommended. If you find the photo is too dark, set the flash to 'On', and place a finger over 3/4 of the flash light when you take the photo - since full flash would be far too intense for a close shot.
-
-
-
You can do this step before or after you remove the top.
-
Careful, it is easily broken! (I re-attached mine tastefully with tape, having broken the attachment points. ;o) )
-
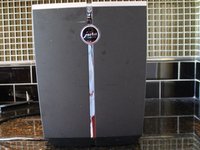
Take a piece of tape, preferably painters tape, and make a small tape T-handle on the rear Jura badge. A small piece of rubber might work or you might be able to get it off with just clean fingers and skin friction.
-
Carefully push in and twist it to the left ~1/10 of a turn. Then, when you feel that it has come loose, pull it gently out to remove it. It is held in place by little lugs and pressure tangs.
-
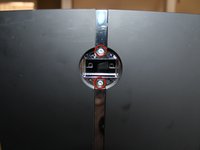
After the rear Jura badge has been removed, behind it you will find two T15 Torx screws marked with red circles in the second picture. They must be removed.
-
You can then gently wiggle free the vertical plastic chrome piece that is on the rear - pull out and set that aside.
-
-
-
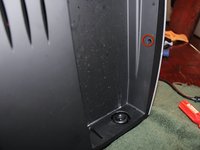
The T15 screw marked in red is the last screw you need to remove before the left and right side covers can be removed
-
Slide the right black (or white) side piece ~5 mm towards the back to remove it. (The right side needs to be removed before the left; you will see an overlap of the sides at the rear centre.)
-
Then slide the left side back to remove it. The left side is slightly trickier to get on and off as you have to work around the water container inlet.
-
In the second picture I marked with red circles two of the many tabs that hold the sides in place. I broke and reattached a few of mine. I had no guide and I really wanted it apart so basically I got it apart the wrong way and then figured out the right way :o)
-
-
-
-
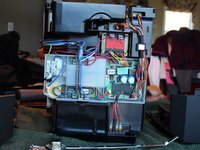
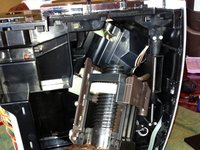
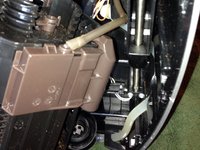
Right side internals
-
The pink circle marks the EM shield for the flux capacitor, which is behind that plastic black piece.
-
;o)
-
-
-
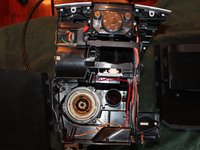
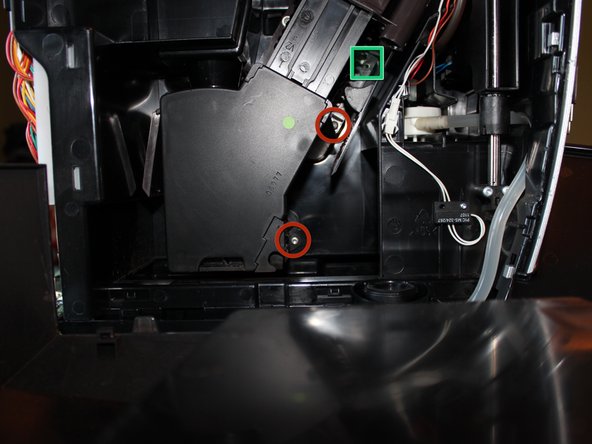
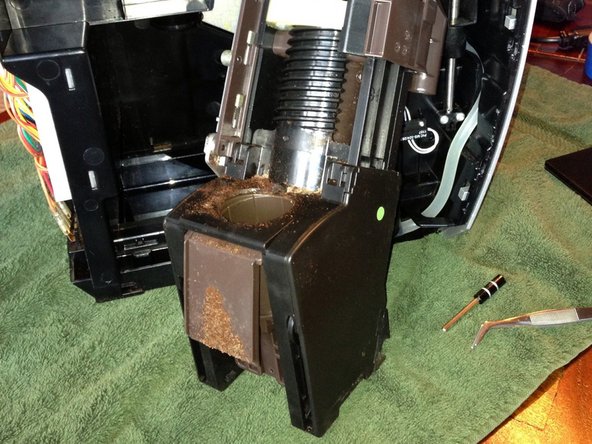
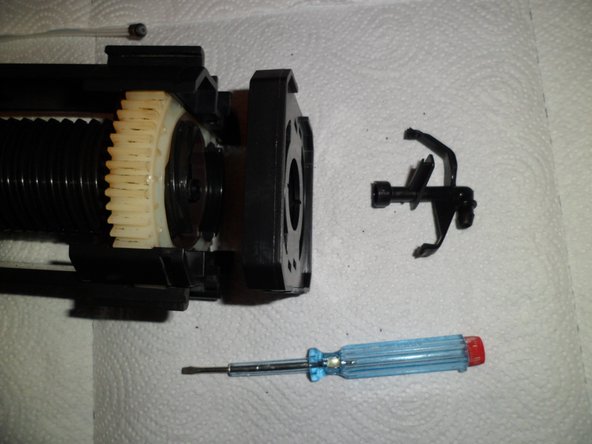
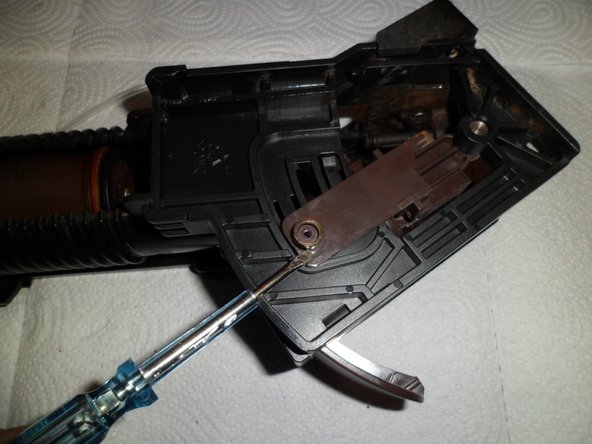
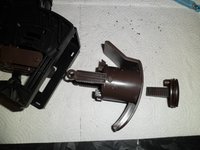
"Tamping Assembly"
-
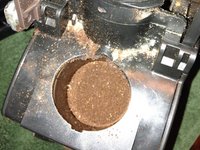
I call the black plastic diagonal assembly with the brown top the "tamping assembly". It receives the ground coffee, forms the puck, holds the puck while the water/steam goes through it, and then drops it in the waste tray (I presume).
-
Note If you choose to remove the tamping assembly you should carefully note where the brown portion is on the larger centre plastic screw. Maybe take a picture, or count exactly how many threads are above the brown portion.
-
When you reassemble, this it needs to be in the exact orientation it was in when you took it apart or it might break the machine. I realised it was a timing mechanism after having taken it apart and misaligned it. Luckily I had pictures to help get it back to the starting position.
-
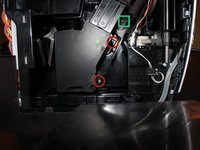
Remove the three T15 screws marked with the red circles. Top two are fine thread and bottom course thread. Note the screw marked with a blue sqaure does not need to be removed to remove the tamping assembly.
-
Also note the unused screw hole marked with a green square. You might need a long handled screw driver or an extension bit.
-
-
-
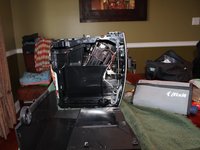
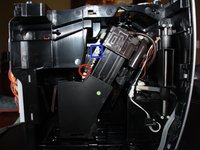
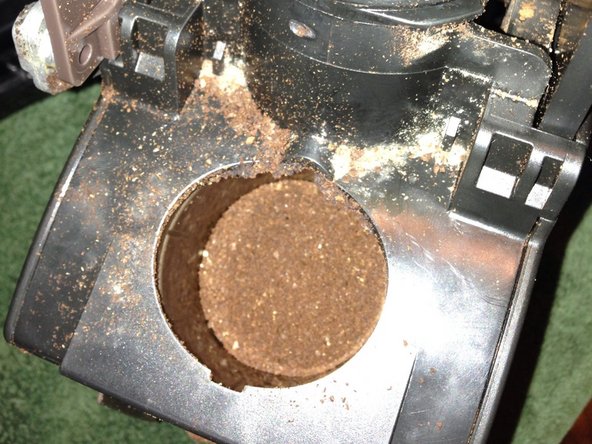
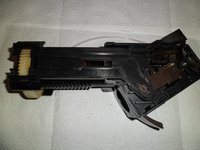
Tamping Assembly Removed - 1
-
The reason for such a large quantity of grounds around the inside of my machine is that I accidentally put too much ground coffee into the ground coffee port. So I took the machine apart to clean those out, and because it was displaying an error during the cleaning cycle.
-
The error was caused by the excess grounds and cleaning it solved the problem.
-
-
-
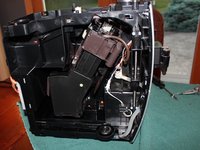
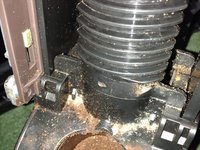
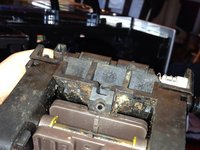
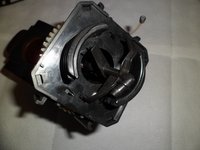
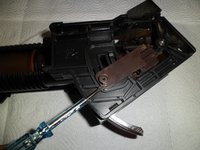
Tamper Assembly Removed - Bottom
-
You can see some growth (mold?!) on the bottom of the tamper in these photo and a little elsewhere.
-
I think this is because if I don't empty out the grounds often enough and have a little mold growth there.
-
I would love to solve this mold growth problem but can't think of an easy solution? (UV light?,) I tried leaving a small amount of a dilute bleach solution in the ground collector but that stank and did not work. White vinegar, perhaps..? So now I just try to empty the grounds and rinse at least once a day.
-
So that is it...!? This is as far as I have disassembled, fixed and cleaned this beloved family member. I will try to read comments and improve it and add to it if I do more. Hopefully you found this useful - thanks for reading it!
-
If you want to disassemble more follow this guide.
-
-
-
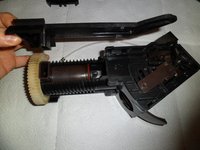
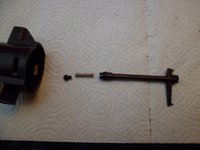
When deinstalled a Jura brew group, it only has ONE screw (in the metal strainer, its a PH2). Everything is easlily clicked together.
-
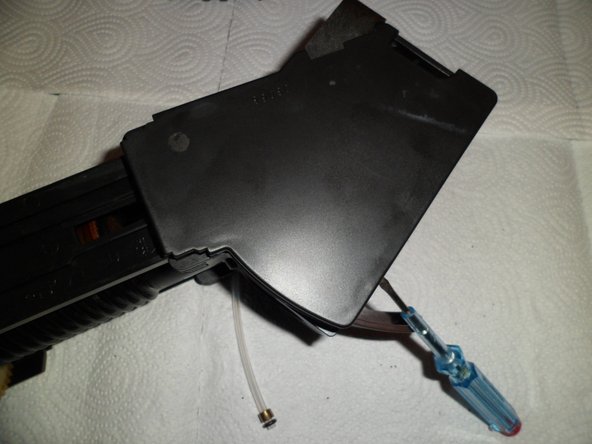
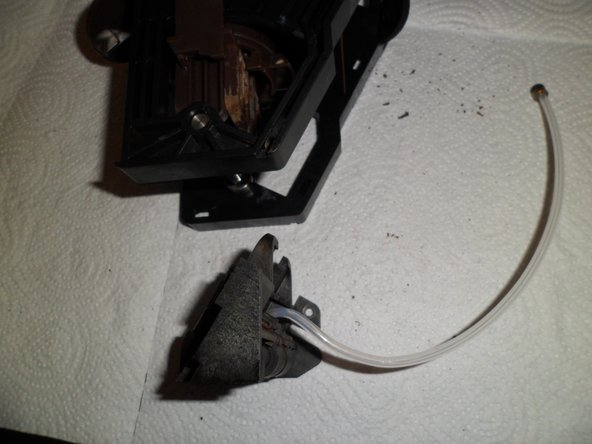
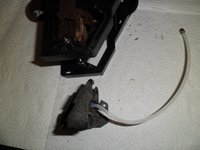
First you pull off the coffee hose on top. Just pull.
-
-
-
Also pull off the hose at the other end.
-
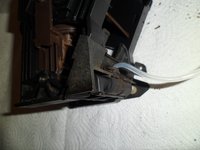
Pull off the shovel. It's clipped at top. It's very flexible.
-
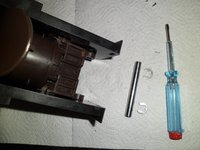
For this guide I have chosen a allready cleaned brew group. When you maintenance this, it will be very greasey and everywhere will coffee crumbs skip away. Take some Paper-towels to work on. For degrease take Toothpick, Toothbrush and Degrease-spray.
-
-
-
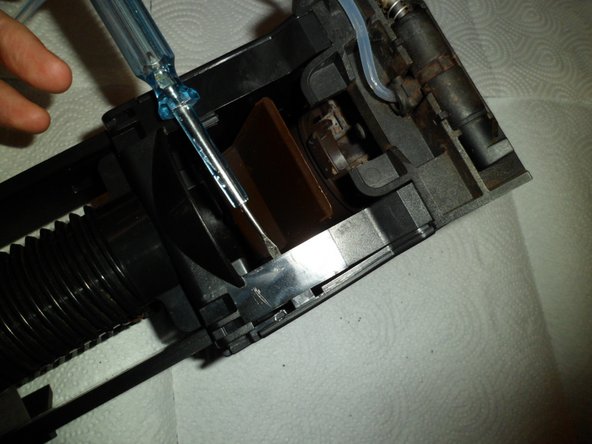
The upper part of the coffee-tube is also clipsed in. Turn it and push the clips. It will snap off. There is no sealing-ring. The sealing-ring for this connection is inside the upper coffee-piston on top of the tube from the Crema-Valve. I show it later.
-
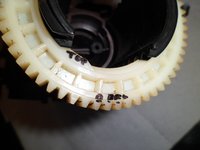
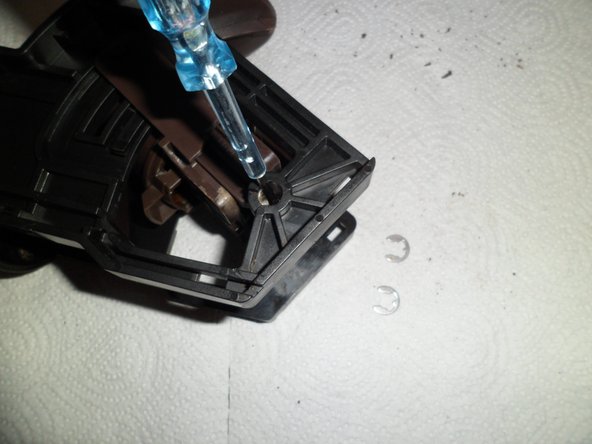
The cover over the white gearwheel has 4 clipse, one at each corner. Use a small screwdriver to leverage it up.
-
-
-
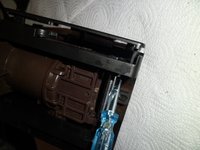
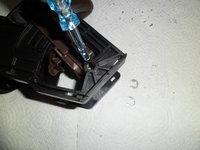
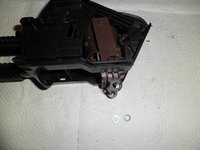
I don't know how this piece is named. It can easy pulled up like shown on the photos.
-
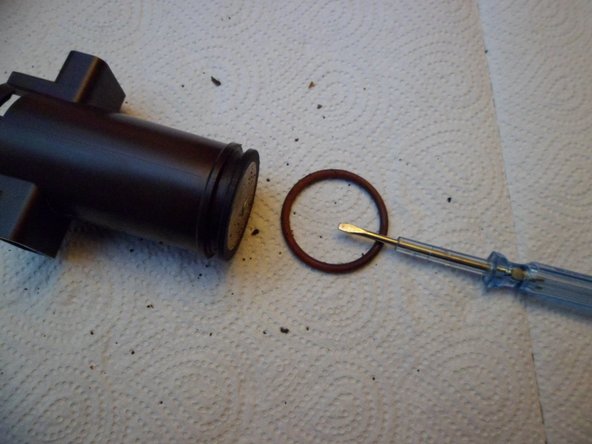
There is a small metal ring. The screwdriver points at it. Lift it up.
-
On the other side the same procedure.
-
In the brew group are totally FOUR metal rings. One is at this part on each side, and one is inside the mechanic on each side.
-
-
-
Now write "TOP" on the white gearwheel. When it's mounted upside down when reassembled it can't rotate properly. Really truth.
-
Turn off the Gearwheel and pull out the upper brew-cylinder (Piston).
-
Now you can change the seal-ring.
-
If a broken seal was the problem and you don't wish to dissect the brew-group to the end you can now start to reassemble the way backwards. :) But think about it: At the lower brew-group-piston is a sceond seal-ring.
-
-
-
Inside the upper Piston is a pipe which can be turned a bit and then pulled out. Carefully. At both ends are black sealings. Please note the orientation of that piece !
-
Inside this Coffee-Pipe at the lower end is the Crema-Valve. This Valve makes the pressure in the coffee-fluid; that makes the good Taste and Crema from the etheric oils of the coffee-beans because the Coffee is squeezed through this valve. Thats the secret why a Jura coffee tastes great. :)
-
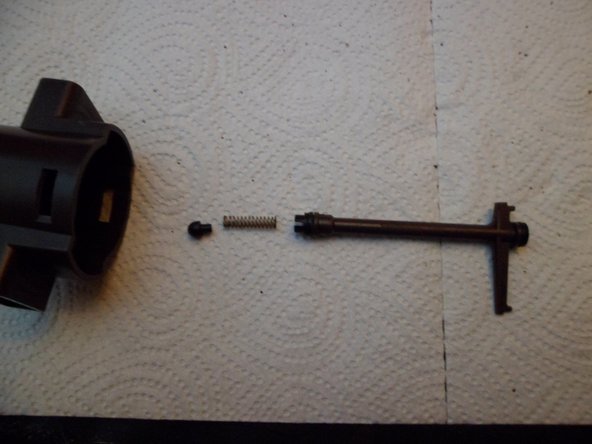
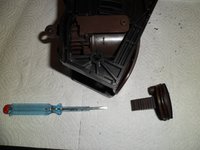
The Crema-Valve Nozzle has a spring and a rubber lid. Both can easy pulled away.
-
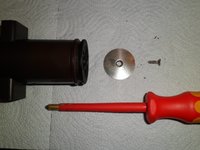
On the other side of the piston is the coffee strainer. It's hold in place by a PH2 screw. When the screw is turned out the metal strainer can pushed off.
-
-
-
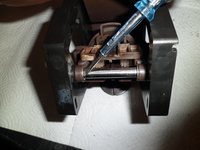
Now remove the axle. Inside are two snaprings. The screwdriver points at one. Use the screwdriver to unlock these snaprings.
-
Now push the axle through the chassis. When the brew-group is filthy and greasey it will move bad - so lay the brew-group on the side and push the axle with the screwdriver.
-
-
-
Turn the lower Piston-Gear a bit like shown on the picture. Now should fall off the two rings which I allready told earlier.
-
Then use the srewdriver to push out the lower Piston from the lower gear mechanic. Please note the POSITION of the Piston because of the orientation of the nozzle where the water flows into the brew-group. If it's mounted wrong at the reassembly the brew-group will break !!!
-
-
-
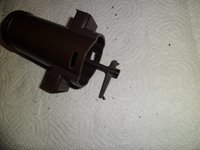
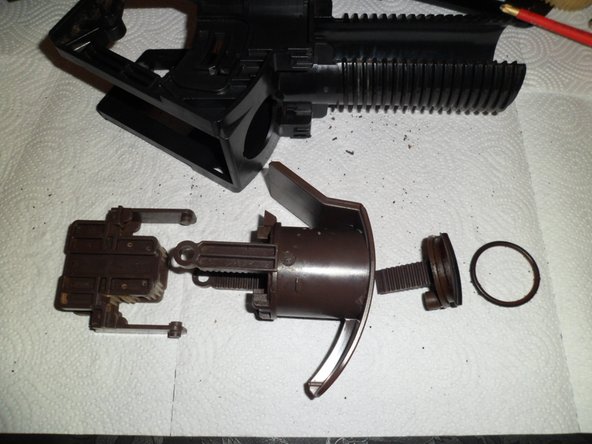
The guideway of the lower piston also can pulled off the brew-group. The first picture shows the orientation from piston and guideway how it is right.
-
The Gear from the guideway mechanics can by turned a little and also pulled off from the brew-group. The second picture also shows the sealing-ring from the lower piston.
-


To reassemble your device, follow these instructions in reverse order.
다른 8명이 해당 안내서를 완성하였습니다.

5가이드 댓글
Thank you for your help
In what series of Jura is this brewgroup found in?
Well, the brewgroups of all Jura machines are similar. They differ in details and size, and the ENA models are a bit more different. If you know one, you know them all.
VauWeh -
Upon reassembly, I go and turn on the unit and it goes through the initialization without issue moving up an down the unit. It then asks rotary button to pushed to rinse machine. Upon doing so, it goes through the process but everything is going to the drain tray. If I then choose an espresso, it goes through but brews to the drain tray.
I have checked the drain stepper motor and is functioning properly. I have tried manually pushing the drain valve during the process and still goes directly to the drain. I have disassembled the brew group again to ensure I put back together properly and in the right way. I have done similarly to the drain valve assembly. I blow through all hoses without issue when valve is open. It makes hot water without an issue out the steam valve. The water is moving and I don't believe there are any blockages or hose or o-ring issues.
Please help if you have an idea. Thanks...
Step 33
If there is a lot of water in the tray under the brewing group during brewing, the seals in the drain valve may also be faulty. There are special instructions. to replace these.