주요 콘텐츠로 건너뛰기

JVC Adixxion GC-XA1BU Battery Cover Replacement

필요한 것

  1. JVC Adixxion GC-XA1BU Battery Cover Replacement, Battery: 1 단계, 이미지 1/1
    • Find the side of the camera that looks like this.

  2. JVC Adixxion GC-XA1BU Battery Cover Replacement: 2 단계, 이미지 1/1
    • Push down on the black switch.

  3. JVC Adixxion GC-XA1BU Battery Cover Replacement: 3 단계, 이미지 1/1
    • While still pushing down on the black switch, slide back the battery cover (see photo for direction).

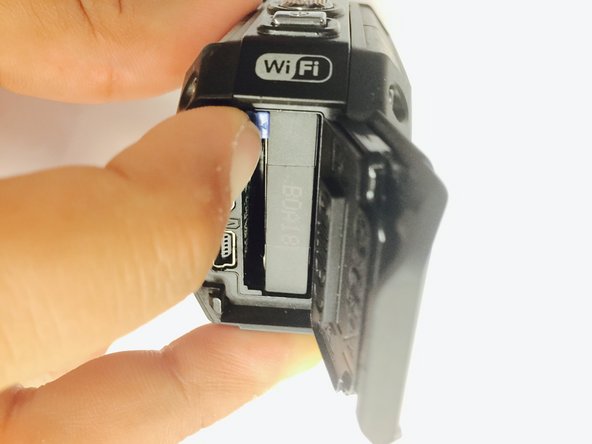
  4. JVC Adixxion GC-XA1BU Battery Cover Replacement: 4 단계, 이미지 1/2 JVC Adixxion GC-XA1BU Battery Cover Replacement: 4 단계, 이미지 2/2
    • Push the cover up to open the battery compartment, and then push the blue battery release switch.

  5. JVC Adixxion GC-XA1BU Battery Cover Replacement: 5 단계, 이미지 1/1
    • You can now take the battery out of the camera.

  6. JVC Adixxion GC-XA1BU Battery Cover Replacement, Battery Cover: 6 단계, 이미지 1/1
    • After removing the battery, take out the two Phillips screws (4mm headsize x 3mm length) screws. You can now remove the battery cover.

결론

To reassemble your device, follow these instructions in reverse order.

다른 한 분이 해당 안내서를 완성하였습니다.

Christina Michelle Johnson

회원 가입일: 01/15/15

1,047 평판

안내서 8개 작성하였습니다

USF Tampa, Team 1-2, Tanski Winter 2015 USF Tampa, Team 1-2, Tanski Winter 2015 회원

USFT-TANSKI-W15S1G2

4 회원들

안내서 8개 작성하였습니다

댓글 0개

댓글 쓰기

조회 통계:

24 시간 전: 0

7일 전: 0

30일 전: 1

전체 시간: 1,252