주요 콘텐츠로 건너뛰기

JVC Adixxion GC-XA1BU Battery Replacement

필요한 것

  1. JVC Adixxion GC-XA1BU Battery Replacement, Battery: 1 단계, 이미지 1/1
    • Find the side of the camera that looks like this.

  2. JVC Adixxion GC-XA1BU Battery Replacement: 2 단계, 이미지 1/1
    • Push down on the black switch.

  3. JVC Adixxion GC-XA1BU Battery Replacement: 3 단계, 이미지 1/1
    • While still pushing down on the black switch, slide back the battery cover (see photo for direction).

  4. JVC Adixxion GC-XA1BU Battery Replacement: 4 단계, 이미지 1/2 JVC Adixxion GC-XA1BU Battery Replacement: 4 단계, 이미지 2/2
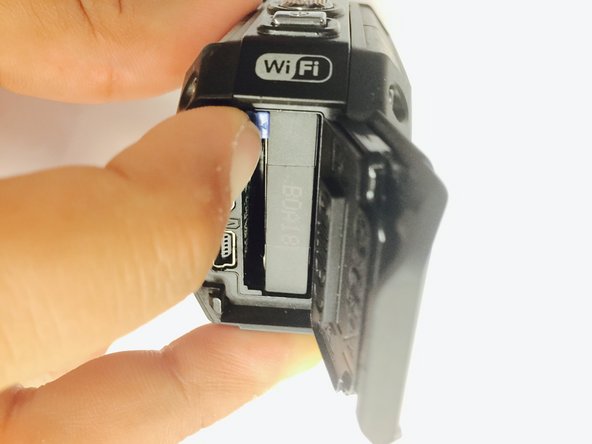
    • Push the cover up to open the battery compartment, and then push the blue battery release switch.

  5. JVC Adixxion GC-XA1BU Battery Replacement: 5 단계, 이미지 1/1
    • You can now take the battery out of the camera.

결론

To reassemble your device, follow these instructions in reverse order.

다른 2명이 해당 안내서를 완성하였습니다.

Christina Michelle Johnson

회원 가입일: 01/15/15

1,047 평판

안내서 8개 작성하였습니다

USF Tampa, Team 1-2, Tanski Winter 2015 USF Tampa, Team 1-2, Tanski Winter 2015 회원

USFT-TANSKI-W15S1G2

4 회원들

안내서 8개 작성하였습니다

댓글 한 개

that was the most unhelpful advise ever given to me :/

katherine McMenaman - 답글

댓글 쓰기

조회 통계:

24 시간 전: 1

7일 전: 2

30일 전: 4

전체 시간: 3,146