주요 콘텐츠로 건너뛰기

이 안내서에는 최근 변경 사항이 더 있습니다. 최신 비검증 버전으로 전환하십시오.

JVC KW-V820BT Front Panel Assembly Replacement

필요한 것

  1. JVC KW-V820BT Front Panel Assembly Replacement, Front Panel Assembly: 1 단계, 이미지 1/3 JVC KW-V820BT Front Panel Assembly Replacement, Front Panel Assembly: 1 단계, 이미지 2/3 JVC KW-V820BT Front Panel Assembly Replacement, Front Panel Assembly: 1 단계, 이미지 3/3
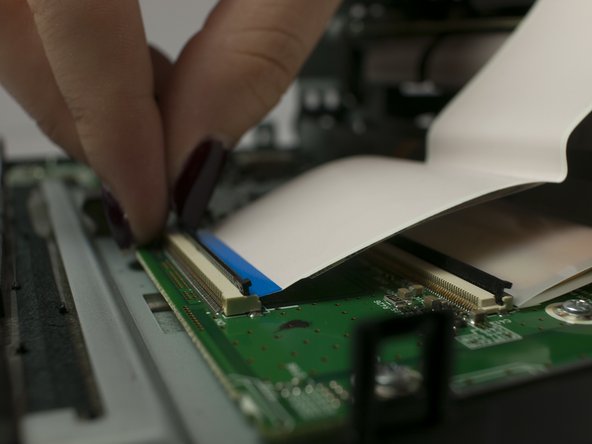
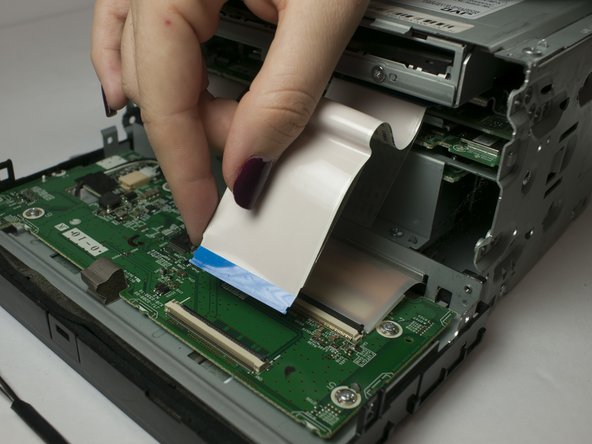
    • Remove the four 1/8-inch black machine screws using a Phillips #00 screwdriver.

  2. JVC KW-V820BT Front Panel Assembly Replacement: 2 단계, 이미지 1/2 JVC KW-V820BT Front Panel Assembly Replacement: 2 단계, 이미지 2/2
    • Remove three steel-finish, pan-head, 1/64 x 3/16" machine screws identified in the photograph, using the Phillips #0 screwdriver.

  3. JVC KW-V820BT Front Panel Assembly Replacement: 3 단계, 이미지 1/3 JVC KW-V820BT Front Panel Assembly Replacement: 3 단계, 이미지 2/3 JVC KW-V820BT Front Panel Assembly Replacement: 3 단계, 이미지 3/3
    • Using your fingers and/or a metal spudger, gently release the plastic locking tabs of the front panel assembly from the steel enclosure while prying the front panel assembly away from the steel enclosure with your fingers.

  4. JVC KW-V820BT Front Panel Assembly Replacement: 4 단계, 이미지 1/1
    • Gently remove the front panel from the steel enclosure.

  5. JVC KW-V820BT Front Panel Assembly Replacement: 5 단계, 이미지 1/3 JVC KW-V820BT Front Panel Assembly Replacement: 5 단계, 이미지 2/3 JVC KW-V820BT Front Panel Assembly Replacement: 5 단계, 이미지 3/3
    • Gently separate the ribbon cable from from ZIF connector on the circuit board using a metal smudger.

    • Be careful not to scratch or damage components or features of the circuit board with the metal spudger

결론

To reassemble your device, follow these instructions in reverse order.

Marshall Andersen

회원 가입일: 10/02/18

665 평판

안내서 6개 작성하였습니다

댓글 0개

댓글 쓰기

조회 통계:

24 시간 전: 1

7일 전: 2

30일 전: 3

전체 시간: 576