이 버전에는 잘못된 편집 사항이 있을 수 있습니다. 최신 확인된 스냅샷으로 전환하십시오.
필요한 것
-
이 단계는 번역되지 않았습니다. 번역을 도와주십시오
-
Press down on the grooved plastic with your thumbs.
-
Push the back cover in the direction indicated by the small arrow on the grooved plastic. The back cover should slide right off.
-
-
이 단계는 번역되지 않았습니다. 번역을 도와주십시오
-
Once you have the back cover off, the camcorder should look like this.
-
Look on the battery for a model number to assure that you acquire the correct replacement part.
-
The camcorder model number is located in the red box. Verify that you have a Jazz HDV178.
-
-
이 단계는 번역되지 않았습니다. 번역을 도와주십시오
-
Take the battery out by pulling up on the bottom of the battery. You should be pulling from the side of the camera where the wrist strap is attached.
-
-
이 단계는 번역되지 않았습니다. 번역을 도와주십시오
-
Remove the camera mount by unscrewing the 4.5 mm screw in the hole.
-
This is the bottom of the camcorder near where the wrist strap connects.
-
-
이 단계는 번역되지 않았습니다. 번역을 도와주십시오
-
Break the glue that attaches the lens cover to the camcorder by sliding the plastic prying tool beneath the circumference of the part.
-
After the glue is broken, remove the lens cover.
-
-
-
이 단계는 번역되지 않았습니다. 번역을 도와주십시오
-
Use a small plastic pry tool to gently pry off the silver strip on the top of the camera.
-
Make sure to run the tool under the outline of the strip as you pry it off so the plastic does not snap.
-
-
이 단계는 번역되지 않았습니다. 번역을 도와주십시오
-
Locate the side of the camcorder beneath the lens and on the opposite side of the wrist strap.
-
Remove the silver strip using the same process as the previous step.
-
Remove the two 4 mm screws that were hidden under the cover.
-
-
이 단계는 번역되지 않았습니다. 번역을 도와주십시오
-
Pry off the rubbery cap, which covers the buttons. Use the same process as the previous two steps.
-
-
이 단계는 번역되지 않았습니다. 번역을 도와주십시오
-
Using a firm hold on both sides of the camcorder, gently pull apart the two halves. Pressure should be evenly distributed across the entire device.
-
-
이 단계는 번역되지 않았습니다. 번역을 도와주십시오
-
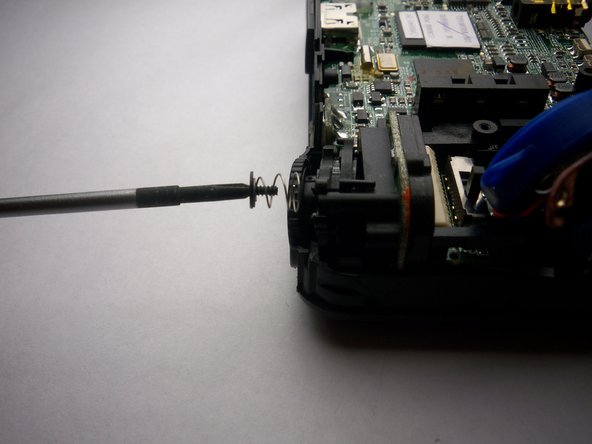
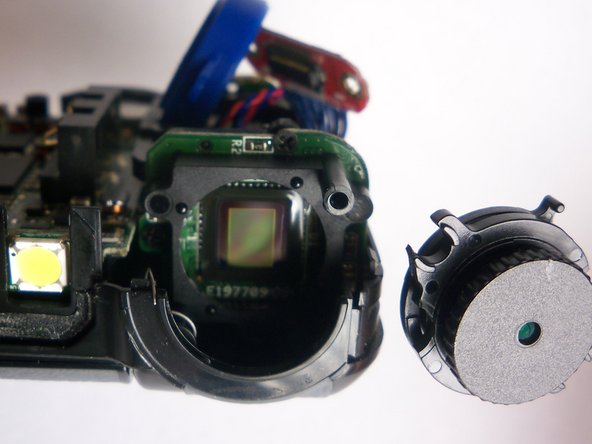
Grab the plastic part covering the lens and gently wiggle it out of place to uncover the lens.
-
-
이 단계는 번역되지 않았습니다. 번역을 도와주십시오
-
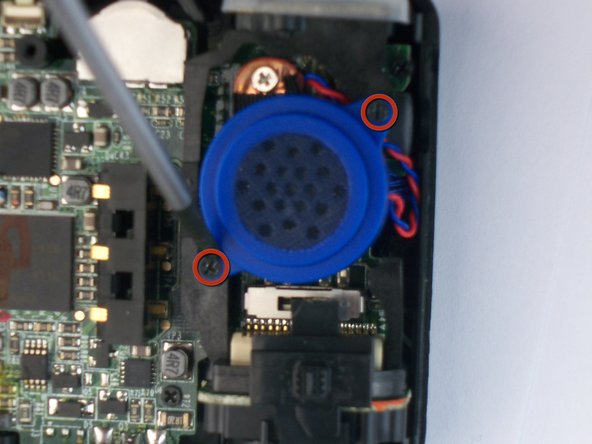
Remove the 4 mm screws holding the speaker onto the motherboard.
-
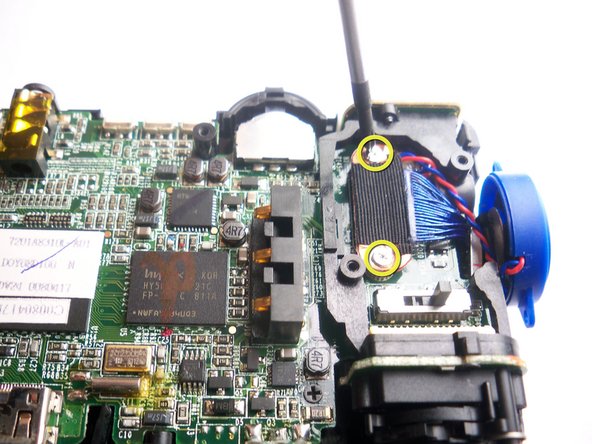
Once the speaker itself is unscrewed, remove the 4 mm silver screws that hold the connection wires to the LCD Display.
-
-
이 단계는 번역되지 않았습니다. 번역을 도와주십시오
-
Remove the four Phillips head screws attaching the motherboard to the housing.
-
-
이 단계는 번역되지 않았습니다. 번역을 도와주십시오
-
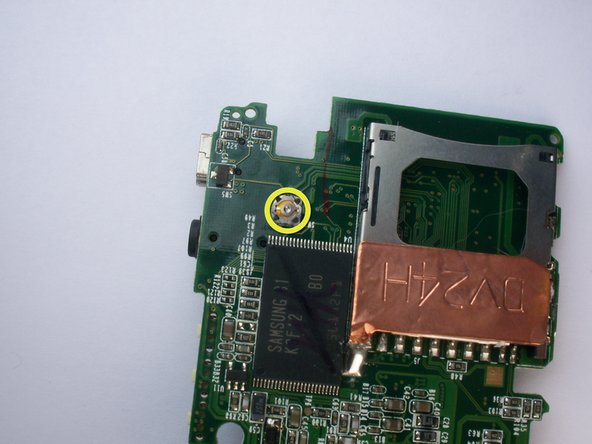
Remove the individual 4mm screw under the top button to release the motherboard from the housing.
-
-
이 단계는 번역되지 않았습니다. 번역을 도와주십시오
-
Once you removed the motherboard, remove the clear rubber button.
-
Use rubbeing alcohol on a Q-tip to clean the surface.
-
Allow to dry and wipe with a clean Q-tip.
-


다른 한 분이 해당 안내서를 완성하였습니다.

팀

Cal Poly, Team 7-34, Regan Winter 2011 Cal Poly, Team 7-34, Regan Winter 2011 회원
CPSU-REGAN-W11S7G34
4 회원들
안내서 7개 작성하였습니다