이 버전에는 잘못된 편집 사항이 있을 수 있습니다. 최신 확인된 스냅샷으로 전환하십시오.
필요한 것
-
이 단계는 번역되지 않았습니다. 번역을 도와주십시오
-
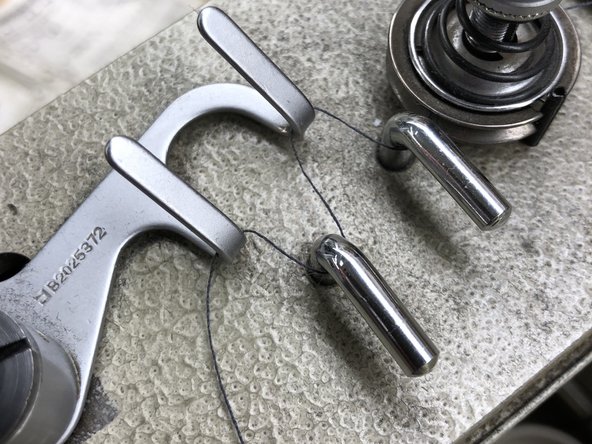
Loop the threading through the two tension posts, making sure you stay in the grooves of the wheels.
-
-
-
이 단계는 번역되지 않았습니다. 번역을 도와주십시오
-
Adjust the thread pull-off lever as well as adjust the position of the nipper bar block to the left or the right.
-
-
이 단계는 번역되지 않았습니다. 번역을 도와주십시오
-
Tighten the thread on the top loop near the nipper releasing knurled thumb nut.
-
-
이 단계는 번역되지 않았습니다. 번역을 도와주십시오
-
Weave threading through the working arm and have it ready to insert through the eye of the needle.
-
-
이 단계는 번역되지 않았습니다. 번역을 도와주십시오
-
Again, keep the thread along the groove of the wheel before slipping it through the eye of the needle.
-
-
이 단계는 번역되지 않았습니다. 번역을 도와주십시오
-
Using the flathead screwdriver, slide the needle up into the slot, with the indented side facing in and tighten until the needle cannot shift.
-
-
이 단계는 번역되지 않았습니다. 번역을 도와주십시오
-
Insert the thread through the eye of the needle, and you are ready for sewing.
-


다른 한 분이 해당 안내서를 완성하였습니다.

팀

Eastern Washington University, Team S27-G8, Munoz Winter 2019 Eastern Washington University, Team S27-G8, Munoz Winter 2019 회원
EWU-MUNOZ-W19S27G8
1 회원
안내서 1개 작성하였습니다