주요 콘텐츠로 건너뛰기

Kaffelogic Nano 7/LINK (A/B/C-N Serial) SSR Replacement

필요한 것

  1. Kaffelogic Nano 7/LINK (A/B/C-N Serial) SSR Replacement, Removing Panel Screws: 1 단계, 이미지 2개 중 1개 Kaffelogic Nano 7/LINK (A/B/C-N Serial) SSR Replacement, Removing Panel Screws: 1 단계, 이미지 2개 중 2개
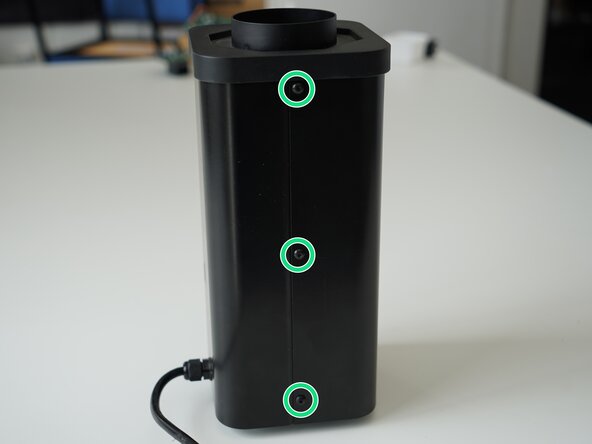
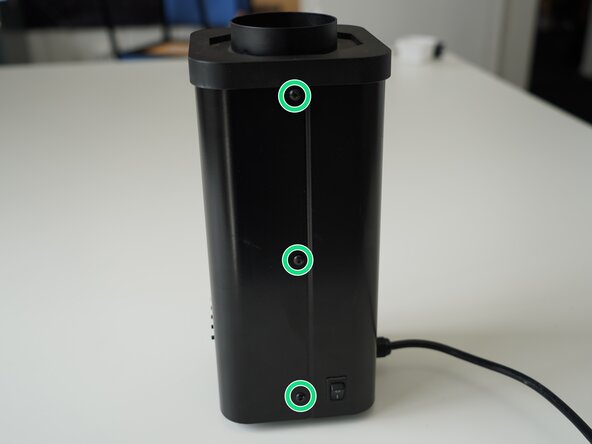
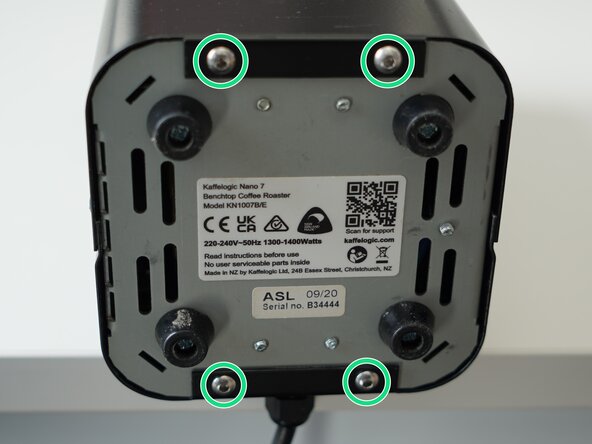
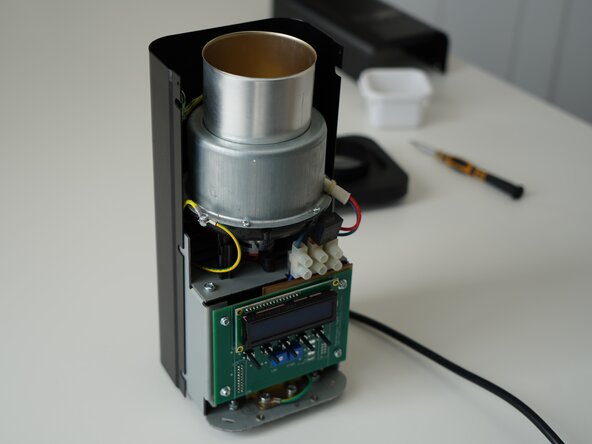
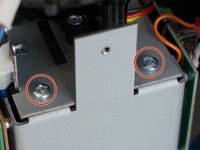
    • Remove the 6x 2.5mm Hex screws on the left and right side of the roaster.

  2. Kaffelogic Nano 7/LINK (A/B/C-N Serial) SSR Replacement, Lift the closure: 2 단계, 이미지 2개 중 1개 Kaffelogic Nano 7/LINK (A/B/C-N Serial) SSR Replacement, Lift the closure: 2 단계, 이미지 2개 중 2개
    • Hold the roaster steady while removing the plastic top/closure.

    • Panels may spring apart slightly once removed.

  3. Kaffelogic Nano 7/LINK (A/B/C-N Serial) SSR Replacement, Remove bottom panel screws: 3 단계, 이미지 3개 중 1개 Kaffelogic Nano 7/LINK (A/B/C-N Serial) SSR Replacement, Remove bottom panel screws: 3 단계, 이미지 3개 중 2개 Kaffelogic Nano 7/LINK (A/B/C-N Serial) SSR Replacement, Remove bottom panel screws: 3 단계, 이미지 3개 중 3개
    • Remove the 4x 2.5mm Hex screws on the bottom of the roaster.

  4. Kaffelogic Nano 7/LINK (A/B/C-N Serial) SSR Replacement, Remove the front panel: 4 단계, 이미지 3개 중 1개 Kaffelogic Nano 7/LINK (A/B/C-N Serial) SSR Replacement, Remove the front panel: 4 단계, 이미지 3개 중 2개 Kaffelogic Nano 7/LINK (A/B/C-N Serial) SSR Replacement, Remove the front panel: 4 단계, 이미지 3개 중 3개
    • Pull away the front panel carefully.

    • Take care not to damage the buttons while maneuvering the front panel.

  5. Kaffelogic Nano 7/LINK (A/B/C-N Serial) SSR Replacement, Remove rear panel: 5 단계, 이미지 3개 중 1개 Kaffelogic Nano 7/LINK (A/B/C-N Serial) SSR Replacement, Remove rear panel: 5 단계, 이미지 3개 중 2개 Kaffelogic Nano 7/LINK (A/B/C-N Serial) SSR Replacement, Remove rear panel: 5 단계, 이미지 3개 중 3개
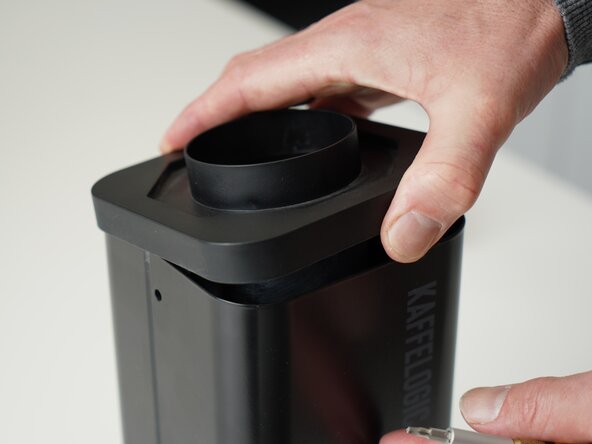
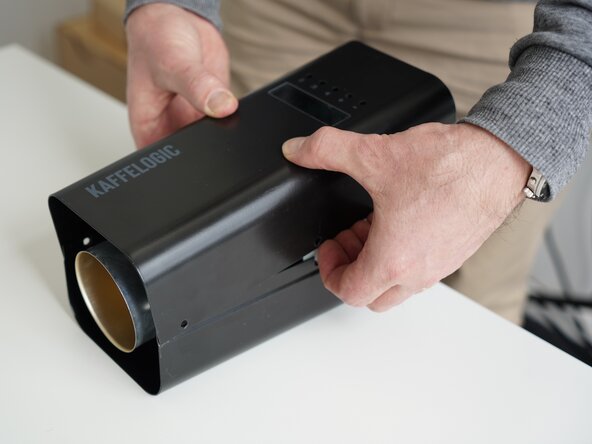
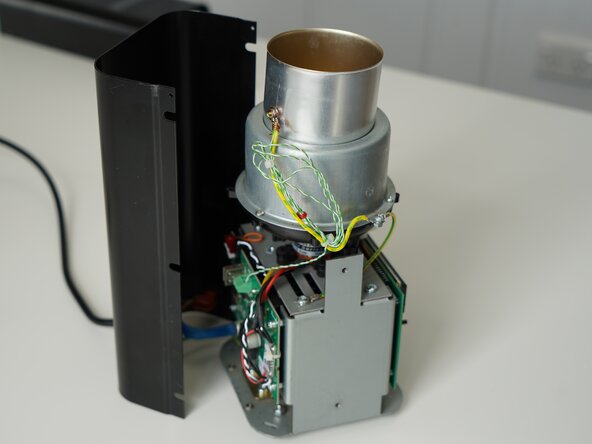
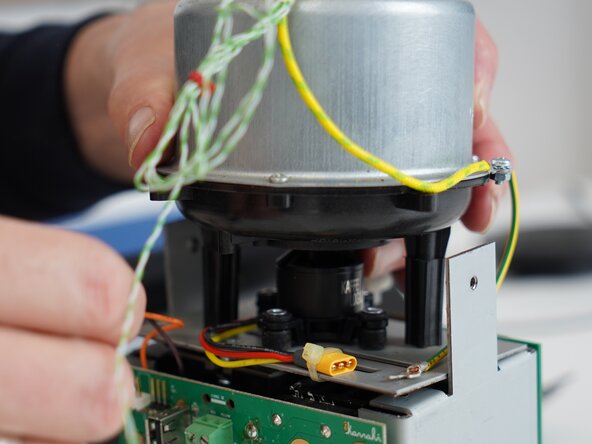
    • Stand the roaster up again and pull away the rear panel from the chassis to expose the remaining components.

    • The mains cable is routed through the panel and it will remain attached, place the panel in a soft bag if you wish to protect the paint throughout the rest of your repairs.

  6. Kaffelogic Nano 7/LINK (A/B/C-N Serial) SSR Replacement, Disconnect gantry cables: 6 단계, 이미지 3개 중 1개 Kaffelogic Nano 7/LINK (A/B/C-N Serial) SSR Replacement, Disconnect gantry cables: 6 단계, 이미지 3개 중 2개 Kaffelogic Nano 7/LINK (A/B/C-N Serial) SSR Replacement, Disconnect gantry cables: 6 단계, 이미지 3개 중 3개
    • Disconnect the SSR signal lead and motor from the PCB-A

  7. Kaffelogic Nano 7/LINK (A/B/C-N Serial) SSR Replacement, Remove gantry screws: 7 단계, 이미지 3개 중 1개 Kaffelogic Nano 7/LINK (A/B/C-N Serial) SSR Replacement, Remove gantry screws: 7 단계, 이미지 3개 중 2개 Kaffelogic Nano 7/LINK (A/B/C-N Serial) SSR Replacement, Remove gantry screws: 7 단계, 이미지 3개 중 3개
    • Remove the 4x PH2 screws securing the gantry plate to the base.

    • Be sure to place the earth spade under the screw head when reassembling.

  8. Kaffelogic Nano 7/LINK (A/B/C-N Serial) SSR Replacement, Lift the stack: 8 단계, 이미지 3개 중 1개 Kaffelogic Nano 7/LINK (A/B/C-N Serial) SSR Replacement, Lift the stack: 8 단계, 이미지 3개 중 2개 Kaffelogic Nano 7/LINK (A/B/C-N Serial) SSR Replacement, Lift the stack: 8 단계, 이미지 3개 중 3개
    • Tip the stack forward to gain access to the SSR.

  9. Kaffelogic Nano 7/LINK (A/B/C-N Serial) SSR Replacement, Remove trigger lead: 9 단계, 이미지 2개 중 1개 Kaffelogic Nano 7/LINK (A/B/C-N Serial) SSR Replacement, Remove trigger lead: 9 단계, 이미지 2개 중 2개
    • Use a PH2 screwdriver to remove the trigger lead.

    • Note that this connection is polarized. Connect red/orange to (+) and black/brown to (-) markers on the SSR.

  10. Kaffelogic Nano 7/LINK (A/B/C-N Serial) SSR Replacement, Remove the mains wiring: 10 단계, 이미지 2개 중 1개 Kaffelogic Nano 7/LINK (A/B/C-N Serial) SSR Replacement, Remove the mains wiring: 10 단계, 이미지 2개 중 2개
    • Use a PH2 screwdriver to remove the two mains spade terminals.

  11. Kaffelogic Nano 7/LINK (A/B/C-N Serial) SSR Replacement, Remove the SSR screws: 11 단계, 이미지 2개 중 1개 Kaffelogic Nano 7/LINK (A/B/C-N Serial) SSR Replacement, Remove the SSR screws: 11 단계, 이미지 2개 중 2개
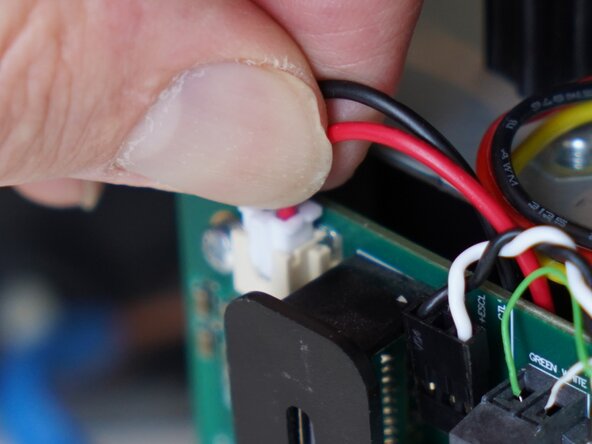
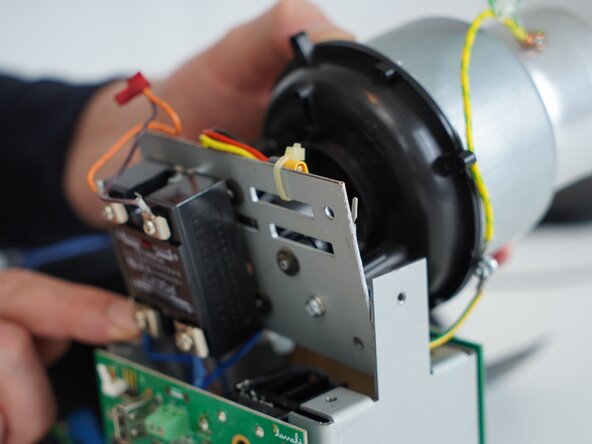
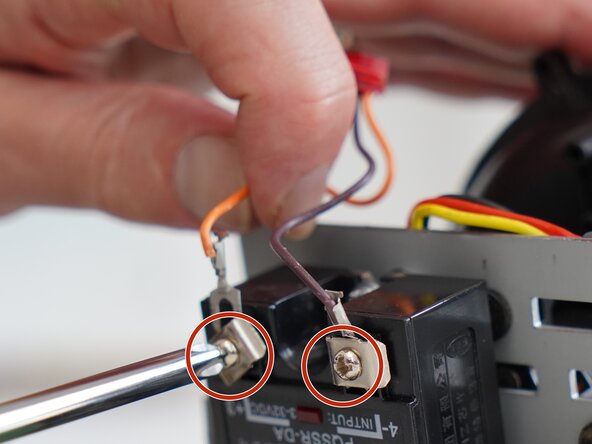
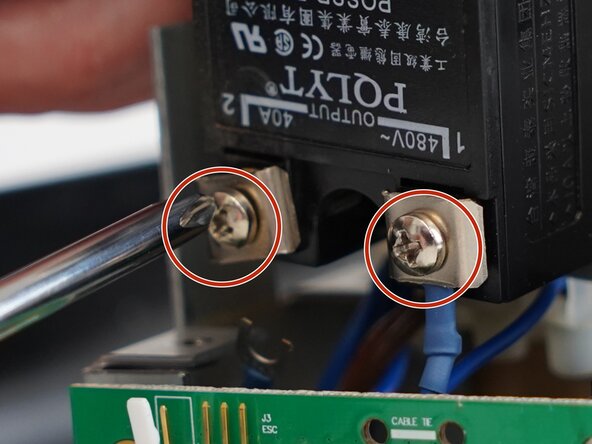
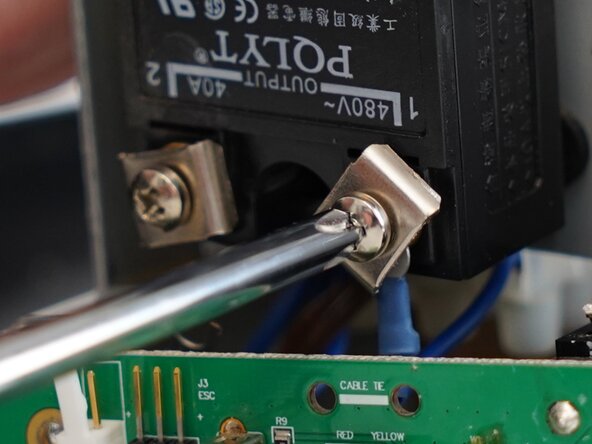
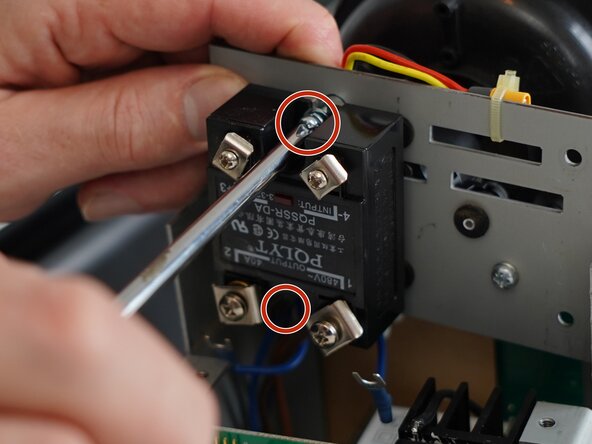
    • Remove the 2x PH2 screws securing the SSR to the bottom of the gantry plate.

  12. Kaffelogic Nano 7/LINK (A/B/C-N Serial) SSR Replacement, SSR removed: 12 단계, 이미지 1개 중 1개
    • SSR can now be pulled out of the roaster and replaced.

결론

To reassemble your device, follow these instructions in reverse order.

작성자

1다른 기여자 명과 함께

Kaffelogic

회원 가입일: 07/23/25

2,098 평판

안내서 18개를 작성함

Kaffelogic Staff Kaffelogic Staff 회원

Community

3 회원들

안내서 18개를 작성함

0가이드 댓글

댓글 쓰기

조회 통계:

지난 24시간: 0

지난 7일: 3

지난 30일: 17

전체 시간: 48