주요 콘텐츠로 건너뛰기

Kangen Leveluk 8 Filter Replacement

필요한 것

  1. Kangen Leveluk 8 Filter Replacement, Do a Filter Check: 1 단계, 이미지 1/3 Kangen Leveluk 8 Filter Replacement, Do a Filter Check: 1 단계, 이미지 2/3 Kangen Leveluk 8 Filter Replacement, Do a Filter Check: 1 단계, 이미지 3/3
    • If you are unsure of the issue with the machine, do a filter check.

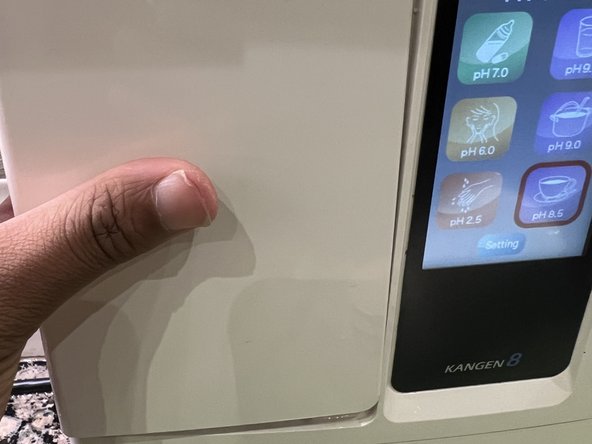
    • Turn on the machine and select "Setting" at the bottom of the menu.

    • Select "Filter Check" located towards the bottom of the Settings list; it is the second-to-last option.

    • If the filter check menu indicates that the filter needs to be replaced, proceed with following steps.

  2. Kangen Leveluk 8 Filter Replacement, Turn off Sink and Water Supply: 2 단계, 이미지 1/3 Kangen Leveluk 8 Filter Replacement, Turn off Sink and Water Supply: 2 단계, 이미지 2/3 Kangen Leveluk 8 Filter Replacement, Turn off Sink and Water Supply: 2 단계, 이미지 3/3
    • Shut off the water supply to the machine.

    • Ensure your sink is not running or the filter compartment will leak water during the process.

    • The location of the water supply to the machine depends on your sink.

    • For an extra precaution power off the machine and unplug it.

    • If the water is on during installation, the filter will leak water.

  3. Kangen Leveluk 8 Filter Replacement, Remove the Lid: 3 단계, 이미지 1/3 Kangen Leveluk 8 Filter Replacement, Remove the Lid: 3 단계, 이미지 2/3 Kangen Leveluk 8 Filter Replacement, Remove the Lid: 3 단계, 이미지 3/3
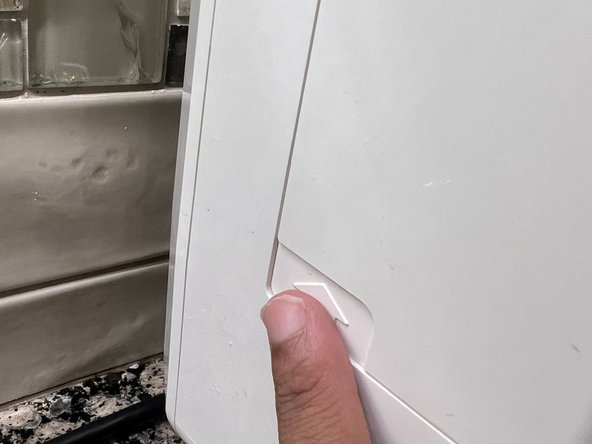
    • Push the white arrow up on the left side of the machine to remove the filter compartment cover.

  4. Kangen Leveluk 8 Filter Replacement, Unlock Filter from Compartment: 4 단계, 이미지 1/3 Kangen Leveluk 8 Filter Replacement, Unlock Filter from Compartment: 4 단계, 이미지 2/3 Kangen Leveluk 8 Filter Replacement, Unlock Filter from Compartment: 4 단계, 이미지 3/3
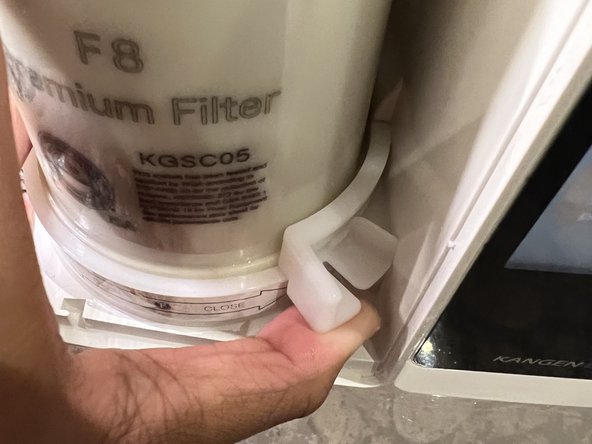
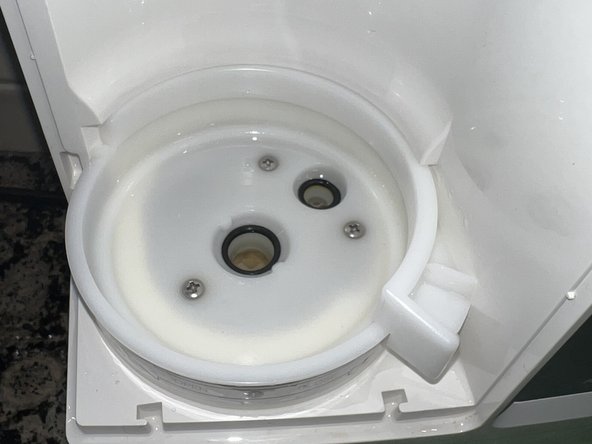
    • Gently push the locking mechanism in a clockwise direction until it comes out of the slot.

    • When the filter is removed the lock will completely come out of the slot. This means the lock will have to be reinserted after installation.

  5. Kangen Leveluk 8 Filter Replacement, Remove the Filter: 5 단계, 이미지 1/3 Kangen Leveluk 8 Filter Replacement, Remove the Filter: 5 단계, 이미지 2/3 Kangen Leveluk 8 Filter Replacement, Remove the Filter: 5 단계, 이미지 3/3
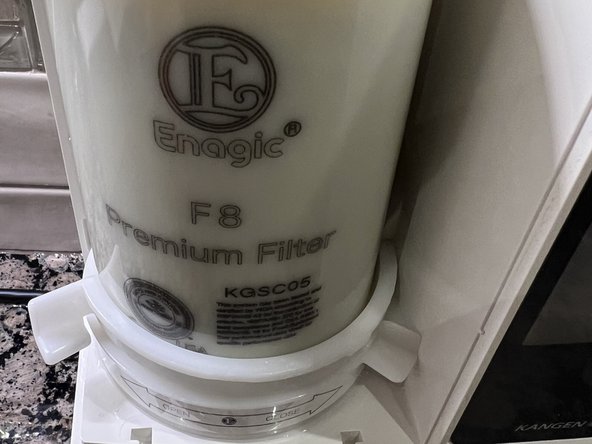
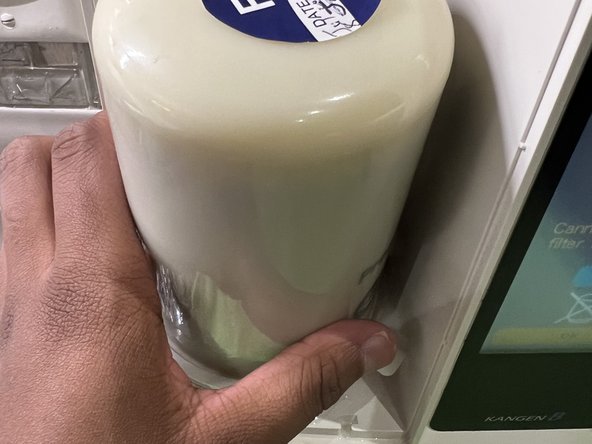
    • Remove the existing filter from the filter compartment.

    • Place a cloth underneath the filter compartment to catch any water that may leak during removal.

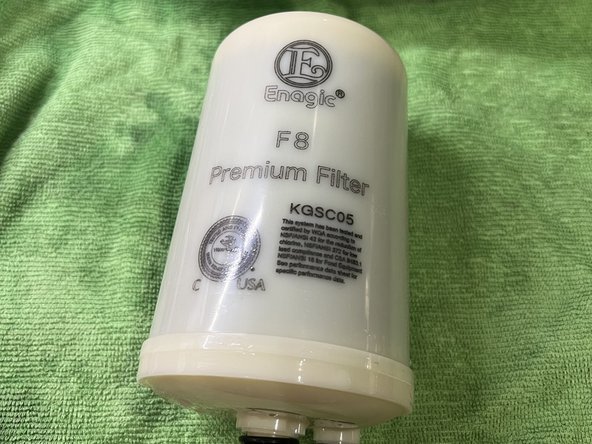
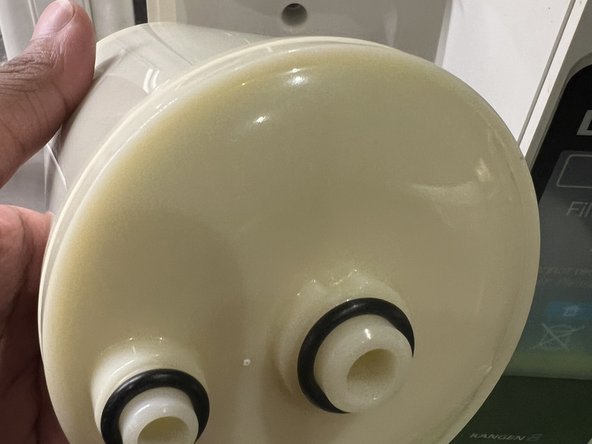
    • Align the new filter with the threads inside the filter compartment. Adjust as necessary.

    • If the machine is plugged in during the installation, it will notify you if the filter is installed in the compartment.

  6. Kangen Leveluk 8 Filter Replacement, Insert the Filter Lock: 6 단계, 이미지 1/3 Kangen Leveluk 8 Filter Replacement, Insert the Filter Lock: 6 단계, 이미지 2/3 Kangen Leveluk 8 Filter Replacement, Insert the Filter Lock: 6 단계, 이미지 3/3
    • Insert the locking mechanism into the machine by pushing it into the slot on the right side of the filter compartment.

    • Push the lock in a counter-clockwise direction until reaches the end of the slot.

    • Ensure that the filter is installed before reinserting the filter lock or the filter will not fit in the compartment.

  7. Kangen Leveluk 8 Filter Replacement, Check for Filter Errors: 7 단계, 이미지 1/1
    • Turn on the machine and check for any error messages.

    • If there are errors and you machine is powered on, the filter error screen will appear immediately after installation.

    • If the machine notifies you of any filter errors after installation, the filter has not been installed correctly or it is not compatible with the machine.

  8. Kangen Leveluk 8 Filter Replacement, Close Filter Compartment, Test Run Machine and Dispose Old Filter: 8 단계, 이미지 1/1
    • Close the filter compartment.

    • Test run the machine with water to ensure it runs properly with the new filter and to see if there are any more errors.

    • Inspect the filter compartment for any leaks.

    • If you notice any leaks when running the machine, immediately turn off the machine, unplug it, and double check filter installation.

    • The old filter can be disposed of in a garbage bin.

결승점

caem366

회원 가입일: 09/25/23

157 평판

안내서 1개 작성함

York University, Team C-44, O'Regan Fall 2023 York University, Team C-44, O'Regan Fall 2023 회원

YORK-O'REGAN-F23SCG44

2 회원들

안내서 1개 작성하였습니다

댓글 0개

댓글 쓰기

조회 통계:

24 시간 전: 3

7일 전: 21

30일 전: 76

전체 시간: 295