주요 콘텐츠로 건너뛰기

Karcher Carpet Cleaner 10066730 2014 Breaker Replacement

필요한 것

  1. Karcher Carpet Cleaner 10066730 2014 Breaker Replacement, Remove the screws securing the front panel: 1 단계, 이미지 1/1
    • Before beginning repairs, disconnect the device from power, disconnect all hoses, drain and depressurize the system, and let the device cool if the heater was recently used.

    • Use a Phillips screwdriver to remove the six screws securing the front panel.

  2. Karcher Carpet Cleaner 10066730 2014 Breaker Replacement, Tilt the front panel down: 2 단계, 이미지 1/2 Karcher Carpet Cleaner 10066730 2014 Breaker Replacement, Tilt the front panel down: 2 단계, 이미지 2/2
    • Grip the front panel at the top and tilt down to reveal the switch electronics.

    • The front panel will stay attached to the device with the flexible tubing.

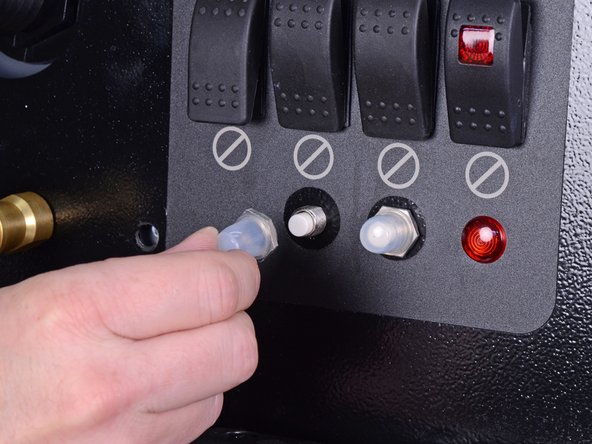
  3. Karcher Carpet Cleaner 10066730 2014 Breaker Replacement, Remove the breaker button cover: 3 단계, 이미지 1/1
    • Use a 16 mm socket to loosen the nut on the breaker button cover.

  4. Karcher Carpet Cleaner 10066730 2014 Breaker Replacement: 4 단계, 이미지 1/2 Karcher Carpet Cleaner 10066730 2014 Breaker Replacement: 4 단계, 이미지 2/2
    • Remove the breaker button cover.

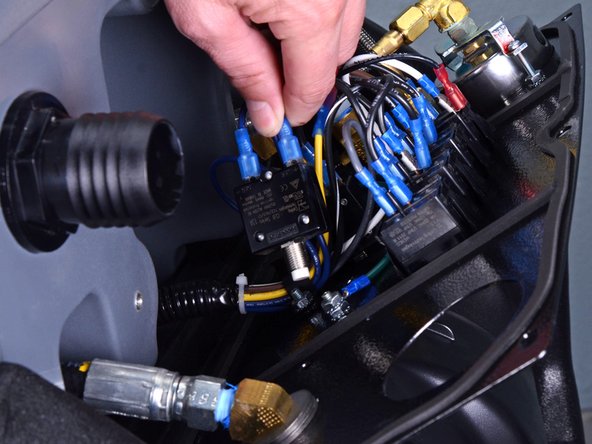
  5. Karcher Carpet Cleaner 10066730 2014 Breaker Replacement, Remove the breaker wires: 5 단계, 이미지 1/2 Karcher Carpet Cleaner 10066730 2014 Breaker Replacement, Remove the breaker wires: 5 단계, 이미지 2/2
    • Separate the breaker from the front panel.

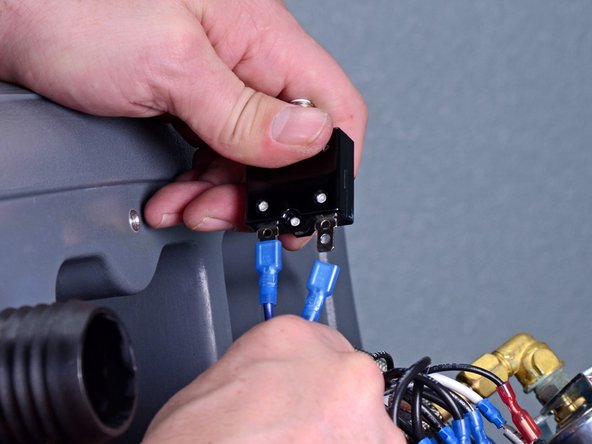
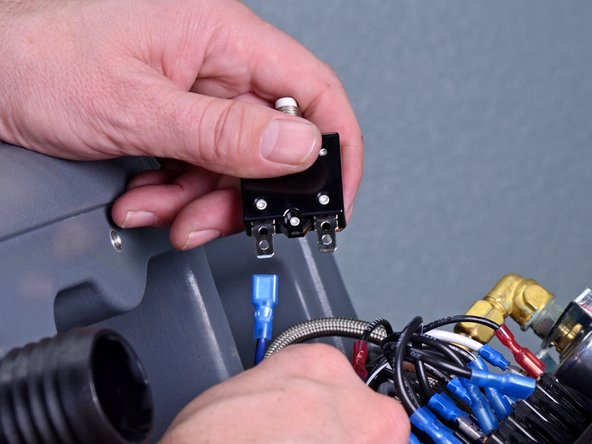
  6. Karcher Carpet Cleaner 10066730 2014 Breaker Replacement, Remove the breaker: 6 단계, 이미지 1/3 Karcher Carpet Cleaner 10066730 2014 Breaker Replacement, Remove the breaker: 6 단계, 이미지 2/3 Karcher Carpet Cleaner 10066730 2014 Breaker Replacement, Remove the breaker: 6 단계, 이미지 3/3
    • Grip the black wire by its blue connector and pull directly away from the breaker to remove it.

    • Grip the dark blue wire by its blue connector and pull directly away from the breaker to remove it.

    • Make a note of which wire goes where to help during reassembly.

    • Only the breaker remains.

결론

To reassemble your device, follow these instructions in reverse order.

다른 한 분이 해당 안내서를 완성하였습니다.

Carsten Frauenheim

회원 가입일: 03/10/20

114,056 평판

안내서 338개 작성하였습니다

iFixit iFixit 회원

Staff

135 회원들

안내서 17,198개 작성하였습니다

댓글 0개

댓글 쓰기

조회 통계:

24 시간 전: 0

7일 전: 6

30일 전: 19

전체 시간: 409