주요 콘텐츠로 건너뛰기

Keurig B70 Platinum Puncture Needle Replacement

필요한 것

  1. Keurig B70 Platinum Puncture Needle Replacement, Brewer Handle: 1 단계, 이미지 1/3 Keurig B70 Platinum Puncture Needle Replacement, Brewer Handle: 1 단계, 이미지 2/3 Keurig B70 Platinum Puncture Needle Replacement, Brewer Handle: 1 단계, 이미지 3/3
    • Turn off and unplug the Keurig before starting.

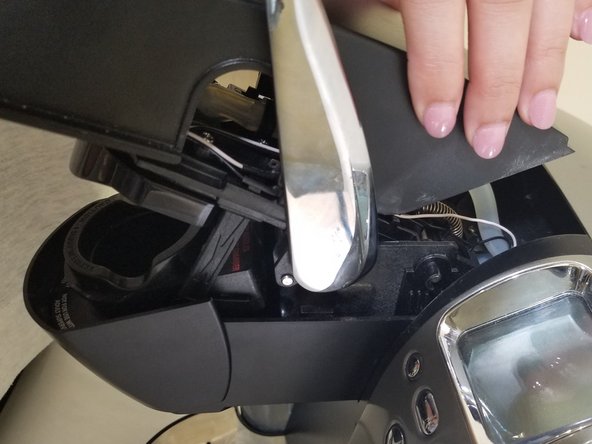
    • Lay the Keurig on its back and open the lid.

    • Using a Phillips #2 screwdriver, remove the two 21.0 mm screws.

    • Be careful when removing the screws. There is a sharp puncture needle!

    • You may need to use tweezers to get the screws out.

  2. Keurig B70 Platinum Puncture Needle Replacement: 2 단계, 이미지 1/2 Keurig B70 Platinum Puncture Needle Replacement: 2 단계, 이미지 2/2
    • Using a T15 Torx screwdriver, remove the two 29.0 mm screws on each ends of the handle.

  3. Keurig B70 Platinum Puncture Needle Replacement: 3 단계, 이미지 1/2 Keurig B70 Platinum Puncture Needle Replacement: 3 단계, 이미지 2/2
    • Lift and pull the black plastic cover away from the Keurig.

  4. Keurig B70 Platinum Puncture Needle Replacement: 4 단계, 이미지 1/1
    • Push the handle back and upward to detach it from the Keurig.

  5. Keurig B70 Platinum Puncture Needle Replacement, Puncture Needle: 5 단계, 이미지 1/2 Keurig B70 Platinum Puncture Needle Replacement, Puncture Needle: 5 단계, 이미지 2/2
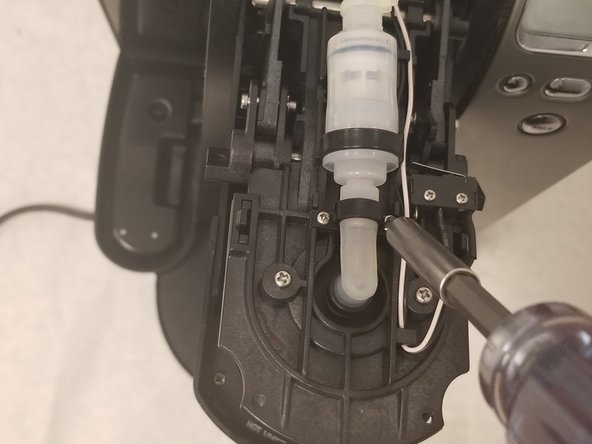
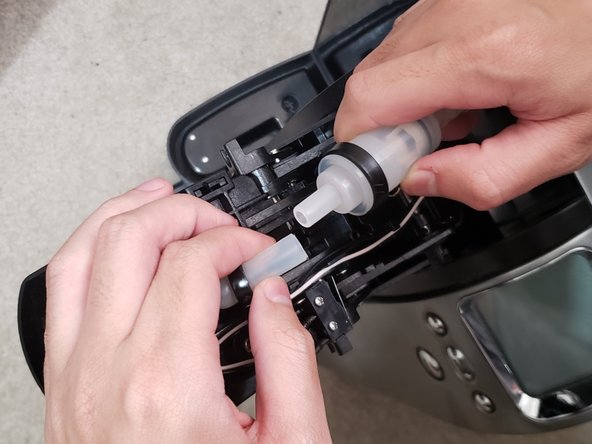
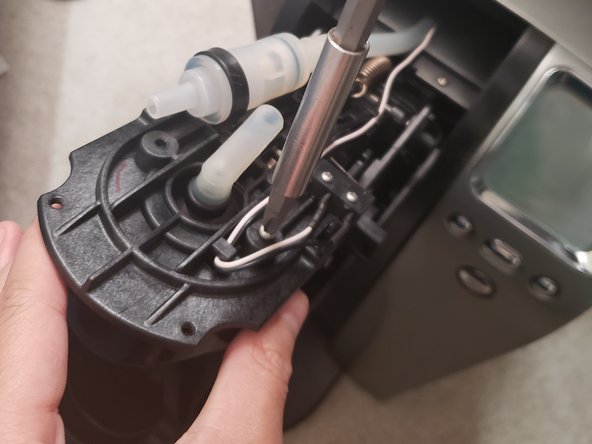
    • Using a Phillips #0 screwdriver, remove the two 7.0 mm screws located on the sides of the tube near the puncture needle.

  6. Keurig B70 Platinum Puncture Needle Replacement: 6 단계, 이미지 1/2 Keurig B70 Platinum Puncture Needle Replacement: 6 단계, 이미지 2/2
    • Using both hands, pull the puncture needle tube and the Keurig tube apart to disconnect the tubes.

    • Don't be afraid to pull hard! The tubes are tightly connected.

  7. Keurig B70 Platinum Puncture Needle Replacement: 7 단계, 이미지 1/2 Keurig B70 Platinum Puncture Needle Replacement: 7 단계, 이미지 2/2
    • Slide the black plastic ring, which holds the puncture needle tube down, off of the tube.

  8. Keurig B70 Platinum Puncture Needle Replacement: 8 단계, 이미지 1/3 Keurig B70 Platinum Puncture Needle Replacement: 8 단계, 이미지 2/3 Keurig B70 Platinum Puncture Needle Replacement: 8 단계, 이미지 3/3
    • Using a Phillips #2 screwdriver, remove the two 9.0 mm screws next to the detached tube.

    • Hold on to the puncture needle when removing the screws to ensure that the puncture needle does not fall and cause injury.

  9. Keurig B70 Platinum Puncture Needle Replacement: 9 단계, 이미지 1/3 Keurig B70 Platinum Puncture Needle Replacement: 9 단계, 이미지 2/3 Keurig B70 Platinum Puncture Needle Replacement: 9 단계, 이미지 3/3
    • Gently pull the puncture needle down and out from the Keurig.

결론

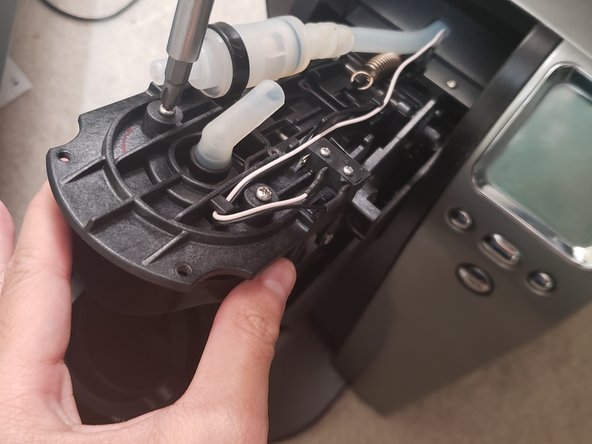
To reassemble your device, follow these instructions in reverse order.

Steven Tran

회원 가입일: 10/14/18

329 평판

안내서 2개 작성하였습니다

UW Tacoma, Team S1-G6, Rose Fall 2018 UW Tacoma, Team S1-G6, Rose Fall 2018 회원

UWT-ROSE-F18S1G6

4 회원들

안내서 5개 작성하였습니다

댓글 0개

댓글 쓰기

조회 통계:

24 시간 전: 0

7일 전: 1

30일 전: 13

전체 시간: 1,101