주요 콘텐츠로 건너뛰기

Kindle Fire Power Button Board Replacement

필요한 것

  1. Kindle Fire Power Button Board Replacement, Back Case: 1 단계, 이미지 1/3 Kindle Fire Power Button Board Replacement, Back Case: 1 단계, 이미지 2/3 Kindle Fire Power Button Board Replacement, Back Case: 1 단계, 이미지 3/3
    • Wedge a plastic opening tool into the lower right corner of the Kindle Fire.

    • Pry the case apart and run the plastic opening tool along the perimeter of the Kindle Fire to release the clips securing the case halves to each other.

    • If you are having extreme difficulty inserting the plastic opening tool, carefully use a metal spudger to undo the first clip, then switch back to the opening tool to avoid scratching your case.

    • It is helpful to pry the bottom of the Kindle Fire away (and out from the side) from the top part. Exerting too much force attempting to split the two without pulling away can cause the tabs on the inside to crack.

  2. Kindle Fire Power Button Board Replacement: 2 단계, 이미지 1/1
    • Once you have freed all the plastic clips, pull the back case off the Kindle Fire.

  3. Kindle Fire Power Button Board Replacement, Battery: 3 단계, 이미지 1/3 Kindle Fire Power Button Board Replacement, Battery: 3 단계, 이미지 2/3 Kindle Fire Power Button Board Replacement, Battery: 3 단계, 이미지 3/3
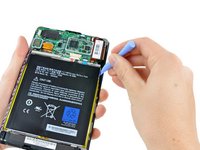
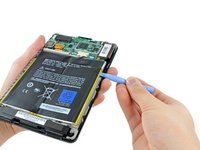
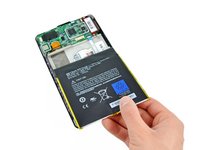
    • Fit the tip of the plastic opening tool between the right battery cell and the Kindle Fire's frame.

    • Lever the battery up and work the plastic opening tool down along its edge to release the glue securing it to the frame.

  4. Kindle Fire Power Button Board Replacement: 4 단계, 이미지 1/1
    • Repeat the process from the previous step to free the left battery cell.

  5. Kindle Fire Power Button Board Replacement: 5 단계, 이미지 1/2 Kindle Fire Power Button Board Replacement: 5 단계, 이미지 2/2
    • Lift the back of the battery up to relieve any tension in the battery connector and simultaneously use a spudger to push the battery connector out of its socket.

    • Pull the battery out of the Kindle Fire.

  6. Kindle Fire Power Button Board Replacement, Motherboard: 6 단계, 이미지 1/3 Kindle Fire Power Button Board Replacement, Motherboard: 6 단계, 이미지 2/3 Kindle Fire Power Button Board Replacement, Motherboard: 6 단계, 이미지 3/3
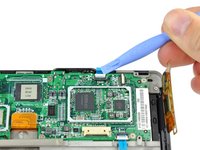
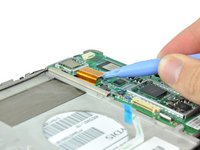
    • Remove the two 2.3 mm Phillips #00 screws from the touchscreen controller.

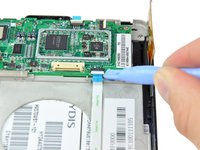
    • Use a plastic opening tool to release the touchscreen controller connector.

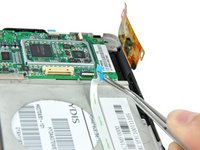
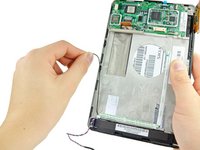
    • Gently remove the touchscreen controller by lifting it up and to the right.

    • Be careful not to rip the ribbon cable in doing so.

  7. Kindle Fire Power Button Board Replacement: 7 단계, 이미지 1/3 Kindle Fire Power Button Board Replacement: 7 단계, 이미지 2/3 Kindle Fire Power Button Board Replacement: 7 단계, 이미지 3/3
    • Use a plastic opening tool to flip open the power button ZIF connector.

    • This connector will not be removed until the motherboard is free.

    • Flip open the ambient light sensor ZIF socket with a plastic opening tool.

    • Use a pair of tweezers to pull the blue tab on the ambient light sensor cable to remove it from its socket.

  8. Kindle Fire Power Button Board Replacement: 8 단계, 이미지 1/3 Kindle Fire Power Button Board Replacement: 8 단계, 이미지 2/3 Kindle Fire Power Button Board Replacement: 8 단계, 이미지 3/3
    • Use a plastic opening tool to lift up and disconnect the display data cable.

    • Lift up on the antenna connector with a plastic opening tool to disconnect it.

    • De-route the antenna cable.

  9. Kindle Fire Power Button Board Replacement: 9 단계, 이미지 1/1
    • Remove the six 2.6 mm Phillips #00 screws securing the motherboard to the frame.

  10. Kindle Fire Power Button Board Replacement: 10 단계, 이미지 1/3 Kindle Fire Power Button Board Replacement: 10 단계, 이미지 2/3 Kindle Fire Power Button Board Replacement: 10 단계, 이미지 3/3
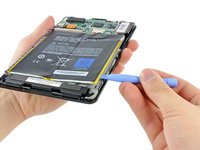
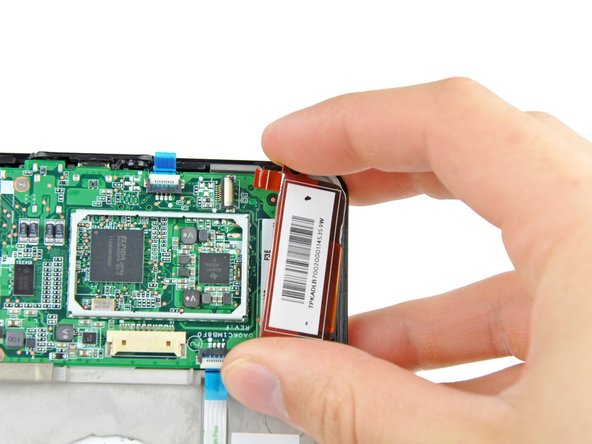
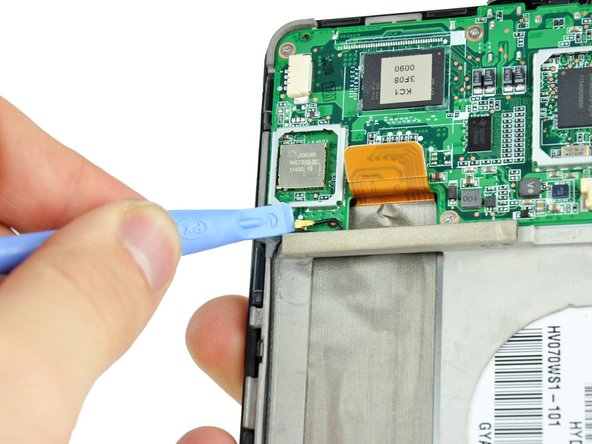
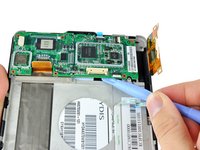
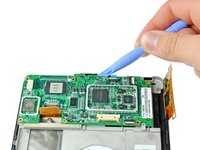
    • Use a plastic opening tool to gently lever up the bottom side of the motherboard to free from the adhesive on its underside.

    • Lever the top side of the motherboard up with a plastic opening tool until it comes free.

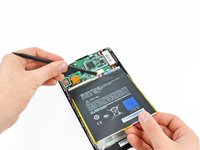
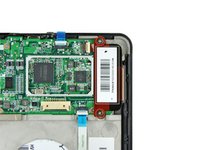
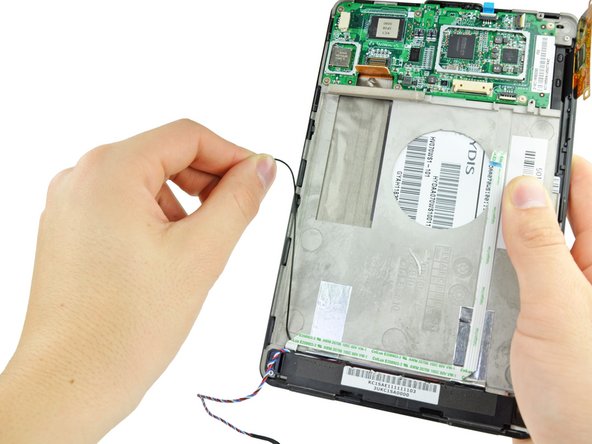
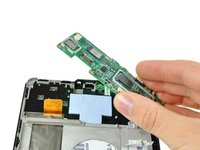
    • Lift the motherboard out of the Kindle Fire, making sure that the power button cable from step 8 comes free from its connector.

  11. Kindle Fire Power Button Board Replacement, Power Button Board: 11 단계, 이미지 1/2 Kindle Fire Power Button Board Replacement, Power Button Board: 11 단계, 이미지 2/2
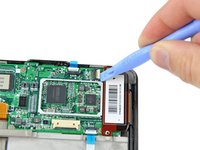
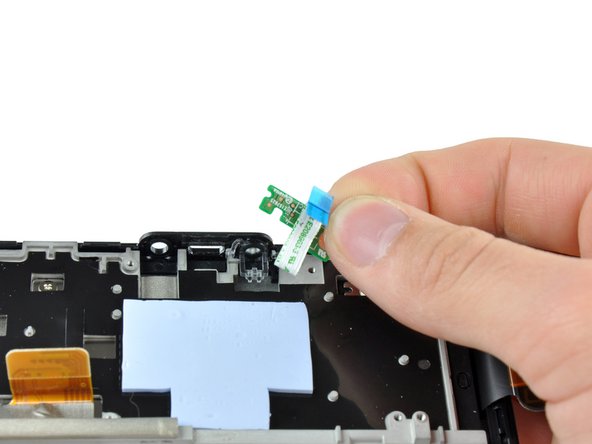
    • Remove the 2.5 mm Phillips #00 scew securing the power button board to the Kindle Fire.

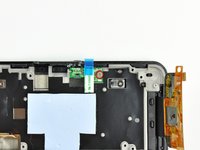
    • Lift the power button board out of the Kindle Fire.

결론

To reassemble your device, follow these instructions in reverse order.

다른 18명이 해당 안내서를 완성하였습니다.

Phillip Takahashi

회원 가입일: 08/22/11

86,632 평판

안내서 87개 작성하였습니다

댓글 한 개

This PCB does not contain the power button, only the power LED. The button is located on the main PCB next to the USB port.

jcross1986 - 답글

댓글 쓰기

조회 통계:

24 시간 전: 2

7일 전: 7

30일 전: 42

전체 시간: 33,101