소개
Screen replacement guide for Kindle Paperwhite 4 (10th Generation)
필요한 것
-
-
With the splungers, split the top case from the rest of the body.
-
The case is glued to the screen, optionally use a hair dryer or heat gun to soften the glue
-
-
-
With a T5 Torx Screwdiver, unscrew the 10 screws holding the frame with the back case
-
After that, with the opening tool, split the back case from the main body
-
-
이 단계에 사용된 도구:Tweezers$4.99
-
With the tweezers, disconnect the wires from the motherboard. Start with the battery and then remove the 3 connections from the screen
-
Unscrew 2 T5 Torx holding the motherboard to the frame
-
Remove the motherboard from the frame
-
(optionally) remove the battery from the frame
-
-
-
-
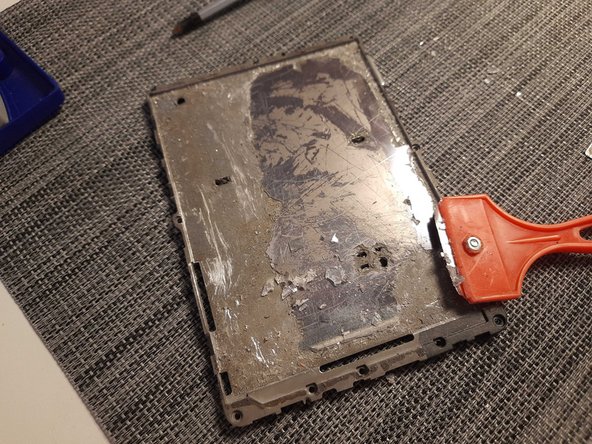
with the help of a heat gun or hairdryer and a razor blade, remove the screen from the frame (this step will take significant time)
-
After all the glass is fully removed from the frame, use alcohol or a dissolver to clean the remaining glue
-
-
-
Attach the new screen to the frame
-
1st, verify it fits well. Once that is done, remove the adhesive tape from the back of the screen and attach the screen to the frame - apply light pressure to fully glue it to the frame.
-
-
-
Put back the motherboard in the frame.
-
Place the motherboard in the plastic spacers provided. After it fits, screw the 2 T5 Torx holding the motherboard to the frame
-
Connect all wires to the motherboard (3 from the screen, 1 battery)
-
-
-
Re-attach the frame with the back case, making sure it clicks and sits right in
-
Screw the 10 T5 Torx screws attaching the frame to the case
-
Finally, put in the front case and hold it tight together for the glue to apply.
-
(optionally) if there are places where the glue was removed, dissassemble again the top frame and add extra in the adhesive side of the top case.
-


다른 한 분이 해당 안내서를 완성하였습니다.

3가이드 댓글
Any suggestions to quicken the screen removal step? I've been trying to remove mine with the iOpener and a hair dryer, and it's taken me about 1h30min to remove 1/6 of the screen, and it's really tough still. Am I not heating it enough?
Edit: Step 4 to clarify
I found a razor blade to be helpful. Metallic objects to pry, trying to get the screen lifted up/split from the glue.
Nevertheless, it was a long process for me as well. About 3-4 hours for the whole screen - it was really glued in
Is it possible for you to do one to replace the charging port? And have the part for the repair?