주요 콘텐츠로 건너뛰기

Kingston HyperX Cloud II Speaker Wire Repair

필요한 것

  1. Kingston HyperX Cloud II Speaker Wire Repair, Kingston HyperX Cloud II Speaker Wire Repair: 1 단계, 이미지 1/1
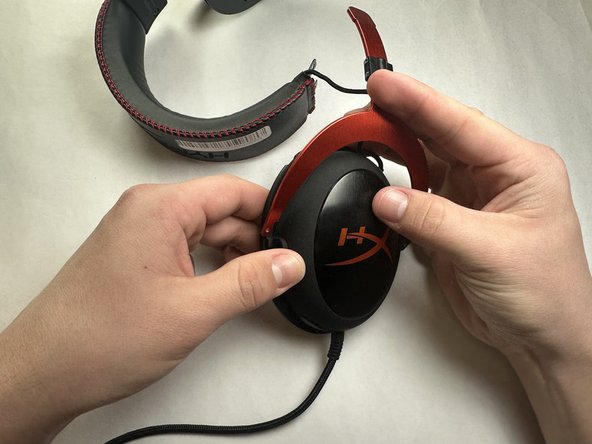
    • Pulling along the edges, take off the ear padding.

  2. Kingston HyperX Cloud II Speaker Wire Repair: 2 단계, 이미지 1/2 Kingston HyperX Cloud II Speaker Wire Repair: 2 단계, 이미지 2/2
    • Use a Phillips #0 screwdriver to remove the two 11 mm screws from the bracket support.

  3. Kingston HyperX Cloud II Speaker Wire Repair: 3 단계, 이미지 1/3 Kingston HyperX Cloud II Speaker Wire Repair: 3 단계, 이미지 2/3 Kingston HyperX Cloud II Speaker Wire Repair: 3 단계, 이미지 3/3
    • Remove the inside bracket support, and then remove the outside bracket support.

    • Expand and remove the microphone speaker from the frame.

  4. Kingston HyperX Cloud II Speaker Wire Repair: 4 단계, 이미지 1/3 Kingston HyperX Cloud II Speaker Wire Repair: 4 단계, 이미지 2/3 Kingston HyperX Cloud II Speaker Wire Repair: 4 단계, 이미지 3/3
    • Use a Phillips #1 screwdriver to remove the two 7.90 mm screws from the red support attached to the microphone speaker.

  5. Kingston HyperX Cloud II Speaker Wire Repair: 5 단계, 이미지 1/3 Kingston HyperX Cloud II Speaker Wire Repair: 5 단계, 이미지 2/3 Kingston HyperX Cloud II Speaker Wire Repair: 5 단계, 이미지 3/3
    • Separate the red frame support from the microphone speaker by putting it to the side.

  6. Kingston HyperX Cloud II Speaker Wire Repair: 6 단계, 이미지 1/2 Kingston HyperX Cloud II Speaker Wire Repair: 6 단계, 이미지 2/2
    • Remove the four 11 mm screws on the speaker frame with a Phillips #2 screwdriver.

  7. Kingston HyperX Cloud II Speaker Wire Repair: 7 단계, 이미지 1/3 Kingston HyperX Cloud II Speaker Wire Repair: 7 단계, 이미지 2/3 Kingston HyperX Cloud II Speaker Wire Repair: 7 단계, 이미지 3/3
    • Remove the headphone speaker frame.

    • Solder the detached blue wire onto the driver.

    • Be cautious not to solder the wrong wire.

  8. Kingston HyperX Cloud II Speaker Wire Repair: 8 단계, 이미지 1/1
    • Solder the green wire onto the driver.

    • Be cautious not to solder the wrong wire.

결론

To reassemble your device, follow these instructions in reverse order.

Daniel Olaoluwa Ajagbonna

회원 가입일: 03/27/23

325 평판

안내서 2개 작성하였습니다

IUPUI, Team 1-4, Harley Spring 2023 IUPUI, Team 1-4, Harley Spring 2023 회원

IUPUI-HARLEY-S23S1G4

3 회원들

안내서 3개 작성하였습니다

댓글 0개

댓글 쓰기

조회 통계:

24 시간 전: 1

7일 전: 19

30일 전: 87

전체 시간: 1,603