주요 콘텐츠로 건너뛰기

Kodak Easyshare C183 Lens Assembly Replacement

필요한 것

  1. Kodak Easyshare C183 Lens Assembly Replacement, Lens: 1 단계, 이미지 1/3 Kodak Easyshare C183 Lens Assembly Replacement, Lens: 1 단계, 이미지 2/3 Kodak Easyshare C183 Lens Assembly Replacement, Lens: 1 단계, 이미지 3/3
    • Remove the batteries, memory card and wrist strap, if so equipped.

    • Remove the three Phillips screws on the bottom.

    • Remove the two Phillips screws on the right hand side.

  2. Kodak Easyshare C183 Lens Assembly Replacement: 2 단계, 이미지 1/3 Kodak Easyshare C183 Lens Assembly Replacement: 2 단계, 이미지 2/3 Kodak Easyshare C183 Lens Assembly Replacement: 2 단계, 이미지 3/3
    • Remove the two screws on the left hand side.

    • Nicely enough, all the screws are the same size. No need to keep them separated.

    • Start splitting the case from the battery holder. You can use an opening tool or just your fingernails.

  3. Kodak Easyshare C183 Lens Assembly Replacement: 3 단계, 이미지 1/3 Kodak Easyshare C183 Lens Assembly Replacement: 3 단계, 이미지 2/3 Kodak Easyshare C183 Lens Assembly Replacement: 3 단계, 이미지 3/3
    • The camera's front half will come off first.

    • Remove the one screw on the top left of the camera. It this holds the back case on to the midframe.

    • Remove the back case.

  4. Kodak Easyshare C183 Lens Assembly Replacement: 4 단계, 이미지 1/3 Kodak Easyshare C183 Lens Assembly Replacement: 4 단계, 이미지 2/3 Kodak Easyshare C183 Lens Assembly Replacement: 4 단계, 이미지 3/3
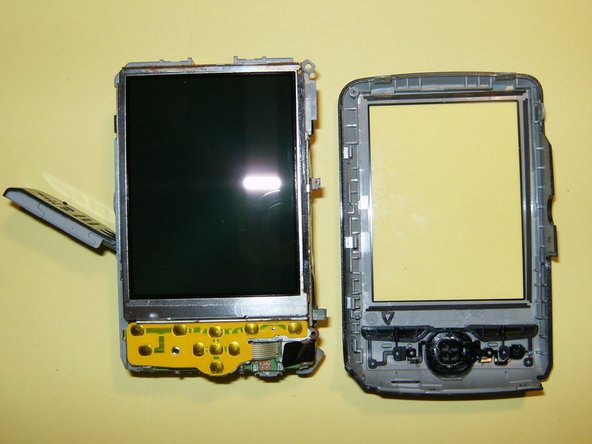
    • Gently move the LCD out of the holder. DO NOT TRY TO REMOVE THE LCD. Just fold it over.

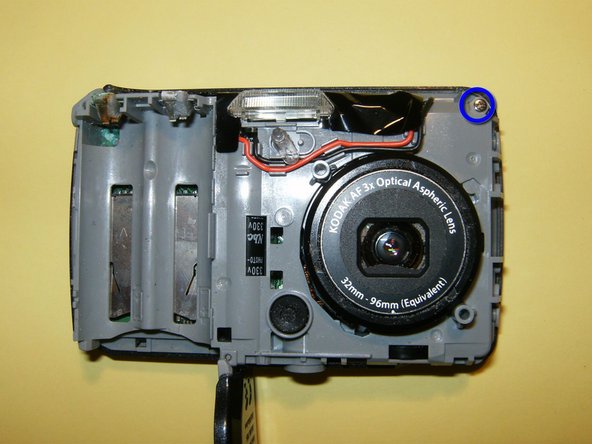
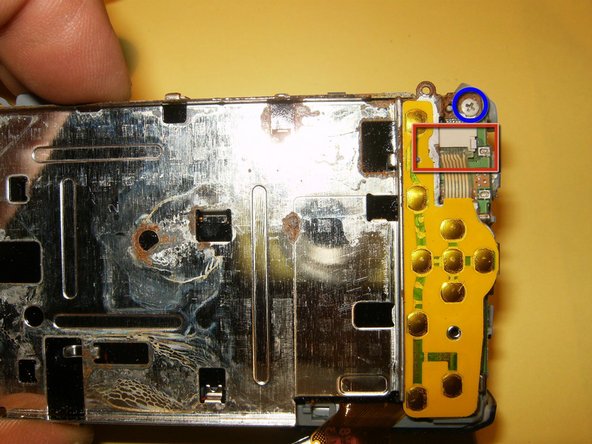
    • Remove the one screw on the top corner of the holder.

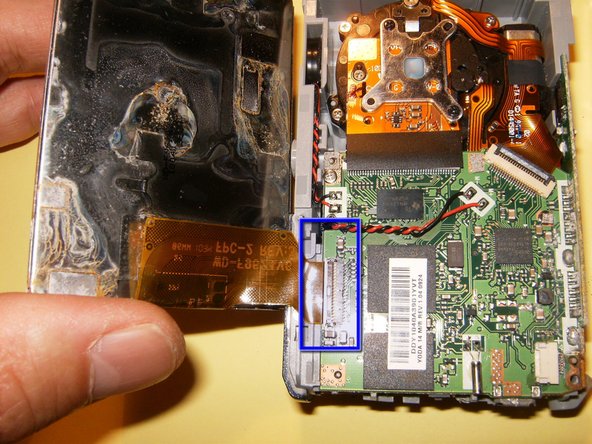
    • Remove the ribbon cable from its connector. It is just pushed in. there are not clips to move. Gently pull it straight down.

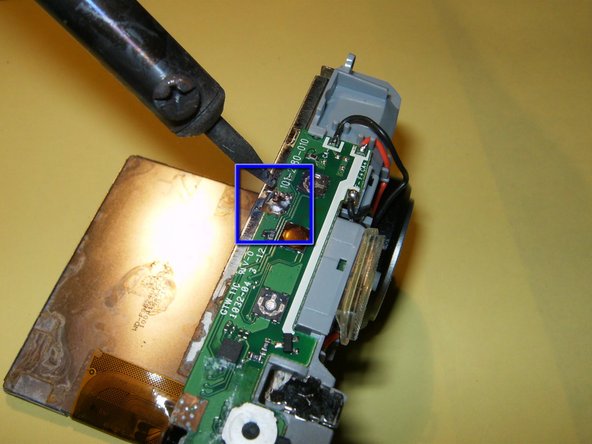
    • Remove the solder that connects the LCD holder to the top logic board.

  5. Kodak Easyshare C183 Lens Assembly Replacement: 5 단계, 이미지 1/3 Kodak Easyshare C183 Lens Assembly Replacement: 5 단계, 이미지 2/3 Kodak Easyshare C183 Lens Assembly Replacement: 5 단계, 이미지 3/3
    • The LCD holding board and the switches are removed as one unit.

    • Open the clip on the LCD ribbon cable connector. Use your fingernails to gently pull it toward the top of the camera.

    • Remove the LCD.

  6. Kodak Easyshare C183 Lens Assembly Replacement: 6 단계, 이미지 1/3 Kodak Easyshare C183 Lens Assembly Replacement: 6 단계, 이미지 2/3 Kodak Easyshare C183 Lens Assembly Replacement: 6 단계, 이미지 3/3
    • Open the connectors for the CCD and the lens. Both use a clip that hold the cable is places. Move those gently into the opposite direction of the cables. this will free the cable.

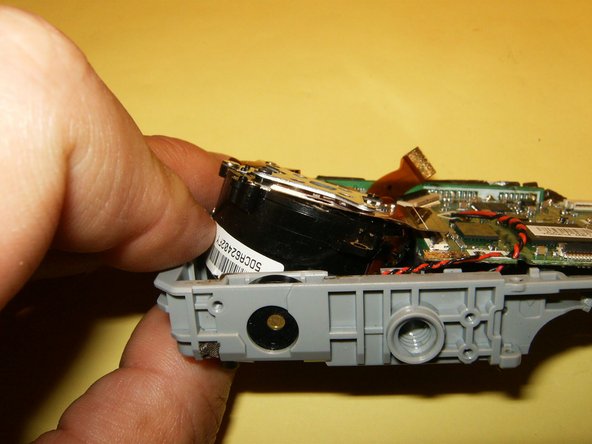
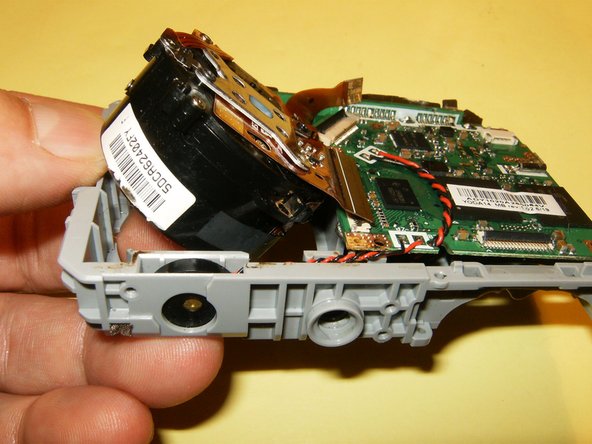
    • Remove the two screws that hold the lens in place.

    • With the screws and the cables removed, use your fingers and push the lens upward and angled out of the midframe.

  7. Kodak Easyshare C183 Lens Assembly Replacement: 7 단계, 이미지 1/1
    • This is what your final result should look like. the lens is now free from the midframe and a new lens can be easily installed.

결론

To reassemble your device, follow these instructions in reverse order.

다른 한 분이 해당 안내서를 완성하였습니다.

oldturkey03

회원 가입일: 09/29/10

781,658 평판

안내서 119개 작성하였습니다

Global Fixers Global Fixers 회원

Community

32 회원들

안내서 531개 작성하였습니다

댓글 2개

ممنون از اطلاعات تان

hamid kaker - 답글

خواهش میکنم. امیدوارم کمک کرده باشد.

oldturkey03 -

댓글 쓰기

조회 통계:

24 시간 전: 2

7일 전: 4

30일 전: 9

전체 시간: 1,841