주요 콘텐츠로 건너뛰기

Kolcraft Cloud Plus Seat Replacement

필요한 것

  1. Kolcraft Cloud Plus Seat Replacement, Seat: 1 단계, 이미지 1/3 Kolcraft Cloud Plus Seat Replacement, Seat: 1 단계, 이미지 2/3 Kolcraft Cloud Plus Seat Replacement, Seat: 1 단계, 이미지 3/3
    • Unsnap the six buttons holding the storage basket under the seat.

  2. Kolcraft Cloud Plus Seat Replacement: 2 단계, 이미지 1/1
    • Unsnap the “Child Tray” by pulling outwards on the plastic connectors on either side of the stroller. As you pull, lift upwards to completely remove the tray from its connection to the stroller’s frame.

  3. Kolcraft Cloud Plus Seat Replacement: 3 단계, 이미지 1/1
    • Remove the "Parent Tray" by pulling outwards on the plastic connectors on either side of the stroller. Lift straight up to remove completely.

  4. Kolcraft Cloud Plus Seat Replacement: 4 단계, 이미지 1/3 Kolcraft Cloud Plus Seat Replacement: 4 단계, 이미지 2/3 Kolcraft Cloud Plus Seat Replacement: 4 단계, 이미지 3/3
    • Unscrew the three, 14mm Phillips #2 screws on the outer frame of the stroller and repeat for the opposite side.

    • Remove the plastic washers that come off with the screws.

    • You may have to fold the stroller, then flip it over to access the screws on its underside.

  5. Kolcraft Cloud Plus Seat Replacement: 5 단계, 이미지 1/1
    • Unscrew the two, 14mm Phillips #2 screws on either side of the outside frame near the foot rest.

    • Remove the plastic washers.

  6. Kolcraft Cloud Plus Seat Replacement: 6 단계, 이미지 1/1
    • Unscrew the two, 14mm Phillips #2 on the underside of the seat and repeat for the opposite side of the stroller.

    • Remove the plastic washers.

  7. Kolcraft Cloud Plus Seat Replacement: 7 단계, 이미지 1/2 Kolcraft Cloud Plus Seat Replacement: 7 단계, 이미지 2/2
    • Unscrew 14mm Phillips #2 screw on the underside of the stroller and repeat this process for the opposite side.

    • Remove the plastic washers.

    • These plastic washers are circular to better fit around the frame. Remember that these locations require the circular washers.

  8. Kolcraft Cloud Plus Seat Replacement: 8 단계, 이미지 1/1
    • Pull the cover down the metal frame to reveal a 14mm Phillips #2 screw on either side of the inside frame.

  9. Kolcraft Cloud Plus Seat Replacement: 9 단계, 이미지 1/1
    • Unscrew the 14mm Phillips #2 screws located under the cover on either side of the inside frame.

    • Remove the plastic washers.

  10. Kolcraft Cloud Plus Seat Replacement: 10 단계, 이미지 1/3 Kolcraft Cloud Plus Seat Replacement: 10 단계, 이미지 2/3 Kolcraft Cloud Plus Seat Replacement: 10 단계, 이미지 3/3
    • Using the spudger, pop out the small, white ball that's on the underside of the plastic part of the frame. Repeat this process for the opposite side.

    • Brace the spudger against the frame—it will provide the extra force needed to pop the white balls through their holes.

  11. Kolcraft Cloud Plus Seat Replacement: 11 단계, 이미지 1/2 Kolcraft Cloud Plus Seat Replacement: 11 단계, 이미지 2/2
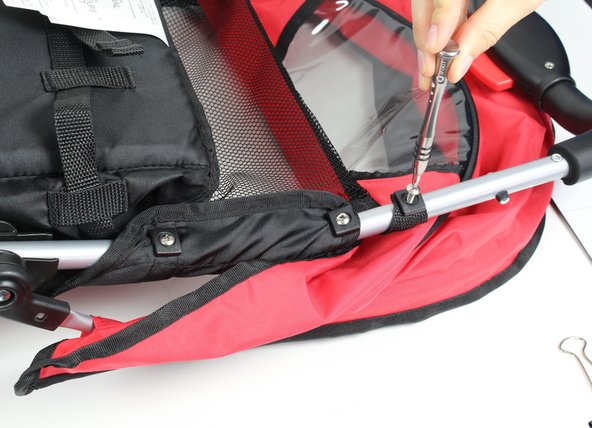
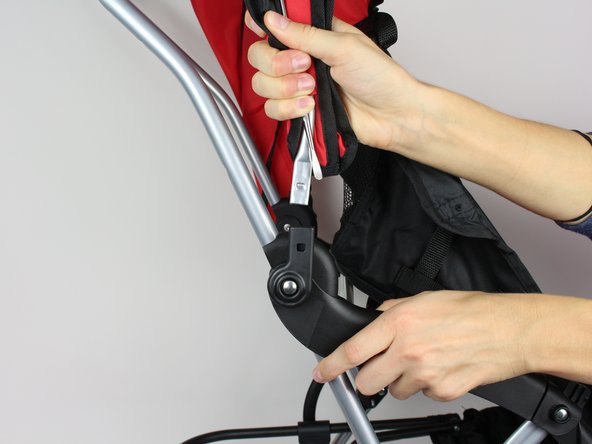
    • Place the metal spudger between the plastic connector and the metal frame of the sun shade.

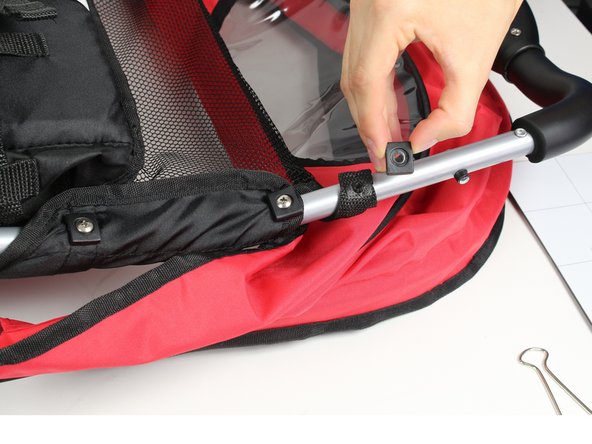
    • Use the spudger to pry outwards on the plastic while simultaneously pulling straight up on the metal frame of the sun shade.

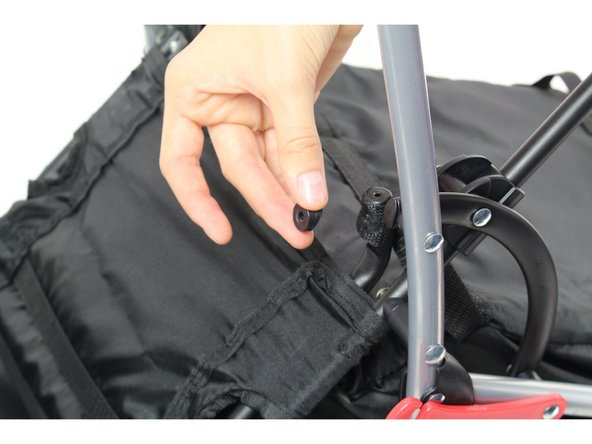
    • Repeat this process for the opposite side to completely remove the seat.

    • Use one hand to brace the frame of the stroller by firmly pushing down on the plastic part of the frame.

결론

To reassemble your device, follow these instructions in reverse order.

Christopher Peterson

회원 가입일: 10/01/15

330 평판

안내서 3개 작성하였습니다

Cal Poly, Team 11-1, Forte Fall 2015 Cal Poly, Team 11-1, Forte Fall 2015 회원

CPSU-FORTE-F15S11G1

4 회원들

안내서 3개 작성하였습니다

댓글 0개

댓글 쓰기

조회 통계:

24 시간 전: 0

7일 전: 4

30일 전: 12

전체 시간: 1,683