주요 콘텐츠로 건너뛰기

Kurio 10S Battery Replacement

필요한 것

  1. Kurio 10S Battery Replacement, Back Cover: 1 단계, 이미지 1/1
    • Turn the device over and place it with the screen down on a flat surface that is clean so the screen does not get scratched.

  2. Kurio 10S Battery Replacement: 2 단계, 이미지 1/2 Kurio 10S Battery Replacement: 2 단계, 이미지 2/2
    • Locate the four screws, two on each side.

    • Using the philips head screwdriver, carefully remove each screw and keep them together in a safe location.

  3. Kurio 10S Battery Replacement: 3 단계, 이미지 1/1
    • Once all screws are removed, use a spudger to get under a corner and unclip the hooks.

    • Once the spudger is under the cover, slide it all the way around the device, pushing lightly into the device making sure it stays under the cover until all the clips are removed.

    • The back cover is difficult to remove, so do not be afraid of using some force once all of the clips have been removed.

  4. Kurio 10S Battery Replacement: 4 단계, 이미지 1/1
    • The back cover should then be able to easily be removed from the device and you should see the battery and other internal components.

  5. Kurio 10S Battery Replacement, Battery: 5 단계, 이미지 1/1
    • Remove the electrical tape surrounding the battery.

    • Take care when working near the wires under the electrical tape and around the battery, as they may be fragile.

  6. Kurio 10S Battery Replacement: 6 단계, 이미지 1/1
    • Once the electrical tape is removed there should be a metal bar across the battery.

    • Using a philip's head screwdriver, remove the screws on both ends and take off the metal bar.

  7. Kurio 10S Battery Replacement: 7 단계, 이미지 1/2 Kurio 10S Battery Replacement: 7 단계, 이미지 2/2
    • Locate the red and black wire connections where the battery is connected to the motherboard.

    • Now remove the red and black wires by soldering the ends of the wires off where they connect to the motherboard.

    • Caution: Soldering irons run hot. When removing solder from the board, the iron heats up the components, so be careful when using one.

결론

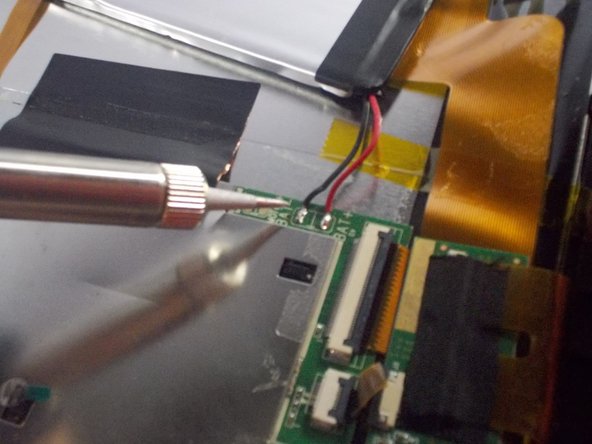
To reassemble your device, follow these instructions in reverse order.

다른 2명이 해당 안내서를 완성하였습니다.

Timothy Kramer

회원 가입일: 03/27/15

325 평판

안내서 2개 작성하였습니다

UMass Dartmouth, Team 1-6, Shastany Spring 2015 UMass Dartmouth, Team 1-6, Shastany Spring 2015 회원

UMASSD-SHASTANY-S15S1G6

4 회원들

안내서 8개 작성하였습니다

댓글 0개

댓글 쓰기

조회 통계:

24 시간 전: 0

7일 전: 12

30일 전: 17

전체 시간: 1,292