주요 콘텐츠로 건너뛰기

Kyocera Hydro Vibe Trim Replacement

필요한 것

  1. Kyocera Hydro Vibe Trim Replacement, Battery: 1 단계, 이미지 1/1
    • Make sure that the device is turned off before beginning.

    • Look for a small indentation on the bottom of the phone.

    • Insert the plastic opening tool into the indentation and lift off the back casing.

  2. Kyocera Hydro Vibe Trim Replacement: 2 단계, 이미지 1/3 Kyocera Hydro Vibe Trim Replacement: 2 단계, 이미지 2/3 Kyocera Hydro Vibe Trim Replacement: 2 단계, 이미지 3/3
    • The large white component is the battery. Look for a small indentation under the arrow that says "LIFT."

    • Place the plastic opening tool in the indentation and lift the battery out of the socket.

  3. Kyocera Hydro Vibe Trim Replacement, Trim: 3 단계, 이미지 1/1
    • Locate the screws holding the trim which are the four side screws on each corner.

    • Remove each screw with a Phillips screw driver #J00. The screws are 5mm Phillips.

  4. Kyocera Hydro Vibe Trim Replacement: 4 단계, 이미지 1/2 Kyocera Hydro Vibe Trim Replacement: 4 단계, 이미지 2/2
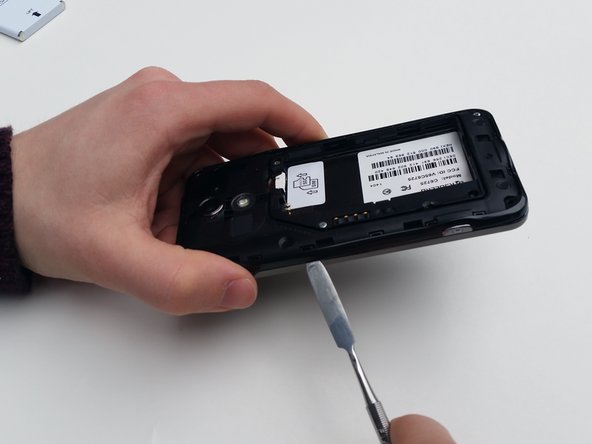
    • Locate the clasps holding the trim in place.

    • You will need to insert the metal spudger through the bottom of the trim and slowly push upwards to release the clasps.

  5. Kyocera Hydro Vibe Trim Replacement: 5 단계, 이미지 1/1
    • The trim is flimsy.

    • This is what the trim will look like once removed.

결론

To reassemble your device, follow these instructions in reverse order.

Phillip Newman

회원 가입일: 01/31/16

142 평판

안내서 1개 작성함

댓글 0개

댓글 쓰기

조회 통계:

24 시간 전: 0

7일 전: 0

30일 전: 3

전체 시간: 687