소개
NOTE: I made this duplicate guide because the other guide, which was made in a different language, did not allow me to move it under LEGO.
필요한 것
-
-
This guide is for NXT bricks that have blank or flickering or dim LCD screens or dead areas.
-
Your brick should power up as normal - making the opening 'chime' and the usual button-press noises, but have issues with the screen - if you are getting nothing at all (check the batteries!) or a very quiet steady clicking noise it is probably a firmware problem so try and update or fix that first.
-
-
-
Undo four small cross heads under the batteries and remove the pale grey front cover.
-
Undo two small cross heads either side of the screen.
-
-
-
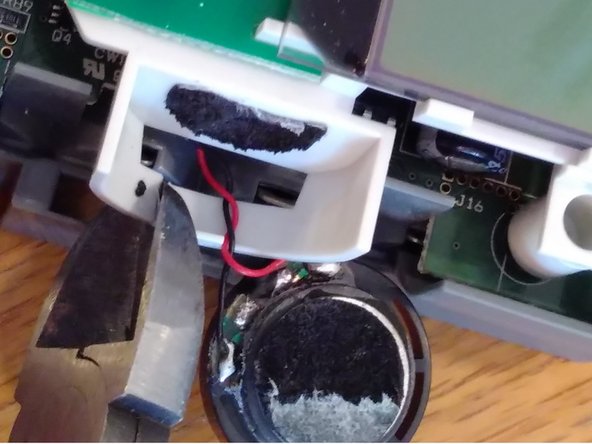
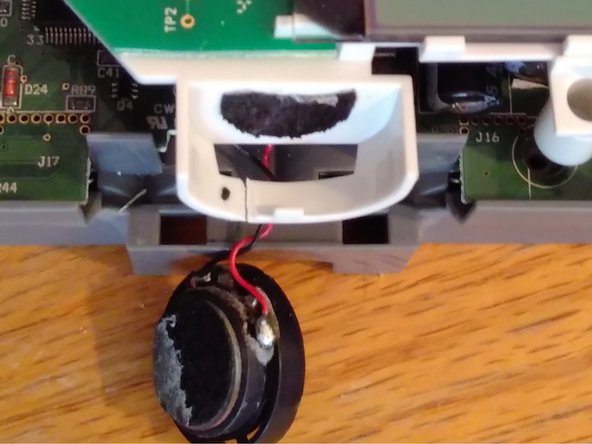
Very gently pry the speaker away from the white plastic case. It is held with a sticky foam pad.
-
Move the speaker and its wires aside and cut a small channel in the plastic to allow the cables to pass through. TAKE CARE NOT TO CUT THE CABLES.
-
-
-
-
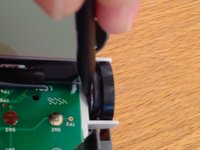
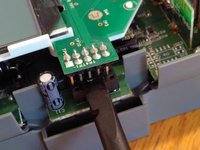
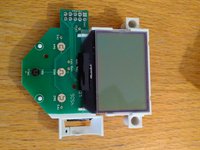
Unplug the 10 pin connector and lift out the screen/pcb assembly.
-
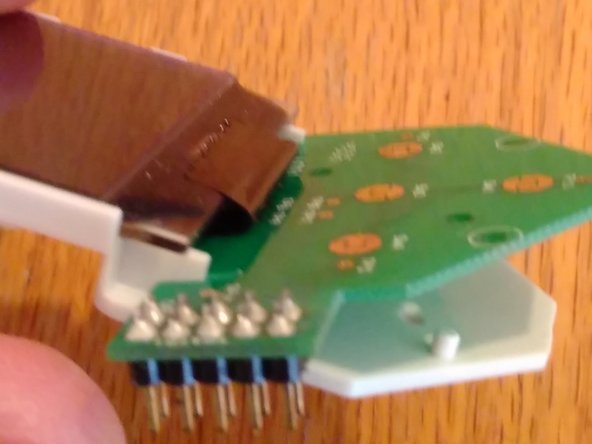
lift the pcb from the bottom and slide it out and away so the ribbon cable is opened out and fully visible.
-
-
-
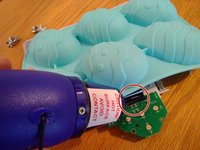
I protected the LCD screen itself with a silicon baking mould (not sure if that was necessary!) Heat the part of the ribbon cable that attaches to the pcb. I gave it 10 secs with a small heat gun.
-
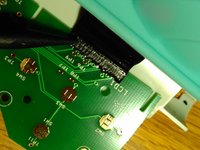
Apply pressure to the area - You want to avoid puncturing the shiny protective cover-tape but to compress and hopefully re-connect the tiny terminals underneath. There are about ten of them, so i used the sharp end of a spudger and rubbed back and forth parallel to the ribbon
-
-
-
Re-fold the ribbon cable under the screen and replace the PCB just enough to be able to re-insert the 10 pin connector. put some batteries in and test the screen.
-
Repeat step 5 if necessary with more heat or pressure.
-
-
-
Remember to thread the speaker cable back through the channel you cut and carefully re-stick it to the white plastic housing. Be careful not to put pressure on the face of the speaker - delicate)
-


To reassemble your device, follow these instructions in reverse order.
다른 한 분이 해당 안내서를 완성하였습니다.
