소개
Replacing the motor in my LG cordless vacuum was surprisingly straightforward. After thoroughly checking for obstructions and blockages, I determined the motor was likely the culprit. Interestingly, the motor assembly includes the control circuit board attached to its underside. The replacement part comes as a complete unit—motor, control board, and wiring harness—so there’s very little else to replace.
The symptoms I noticed were a faint whirring sound and a total loss of suction. However, before assuming the motor is to blame, I strongly recommend watching a few troubleshooting videos on YouTube. Many of them highlight common blockage points that can cause similar symptoms, and resolving those could save you the cost of a new motor.
Another potential issue to rule out is a flat or faulty battery. The simplest way to test this is by swapping in a spare battery. If you’re comfortable using a multimeter, you can also check the battery’s voltage—it should read around 25 volts DC.
As of this writing, LG sells the replacement motor for $179.00.
-
-
The first step is find the vacuum model number (not the motor part number yet). Remove the battery from the handle and look in the recess. My Model was an A9PRO.
-
-
-
The first and most crucial step is to remove the battery from the vacuum before beginning any repairs. The battery carries approximately 25 volts DC, which is more than enough to deliver a painful electric shock if you accidentally touch the live terminals. Always disconnect the power source to ensure your safety.
-
-
-
Unscrew the top filter lid by hand and remove the filter to reveal the motor casing screws.
-
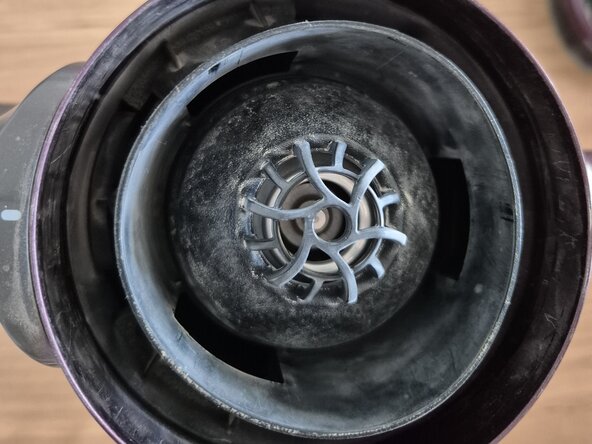
Unscrew the silver cone located inside the waste container. Watch some youtube videas first as there a special way this is done otherwise it might break using one of the vacuum nozzles.
-
The cone appears to be quite brittle, and from what I’ve seen, you're meant to use one of the vacuum’s nozzle attachments to safely remove it. I managed to unscrew it by hand, but be cautious—it feels fragile and could easily crack under pressure.
-
Important: Surprisingly, the silver cone plays a structural role—it actually presses the motor base into position. When you remove the screws in the next step, you're unscrewing them from the motor base plate, which is held firmly in place by the cone.
-
Keep this in mind during reassembly: If you don’t reinstall the cone first, the screws won’t align properly with the motor base plate. The cone is essential for holding the motor base in position, so make sure it’s seated correctly before driving the screws back in.
-
-
-
-
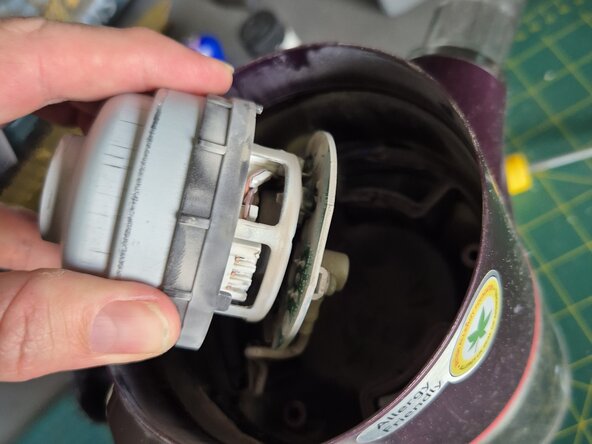
Carefully remove the plastic motor cover, which secures the motor in place. You'll need to unscrew 3 or 4 fasteners—take note of their positions for reassembly. Once the screws are out, the motor should come free and drop down gently.
-
Be aware that it's still connected to wiring that leads to the control switches and battery power supply, so avoid pulling or straining the cables.
-
Dont remove wiring yet. Dust off the wiring. There should be a black and a white wires. The black goes to GND (ground). Make a note where exactly the wires go and take photos including the small delicate control harness (it will go in a different place on the new motor)
-
As shown in the picture. You can obtain the part number of the motor assembly from the side rof the motor casing. Mine was Part Number EAU63543703.
-
Finding the right part number. If you google the motor part number As shown in the picture. You can obtain the part number of the motor assembly from the side rof the motor casing. Mine was Part Number EAU63543703 you should get a hit on the LG spare parts website.
-
However, you will most likely find the part number you have is superseded by a different LG part number. This is when you need to look up the replacement part number that the LG website recommends and check that it is compatcble with your LG vacuum model number (the number that was in the battery compartment). Mine was A9PRO.
-
The replacement part number for mine was: EAU64483704 LG CORDZERO A9 STICK VACUUM MOTOR. Look under product details on the LG webpage for you model number to verify.
-
-
-
As mentioned earlier, the original part number is no longer available and has been replaced by a newer motor model. I discovered that the updated motor features a different casing design, which doesn’t fit as snugly into the vacuum motor enclosure as the previous version.
-
The picture shows the underside of the new motor where the circuit board is located. The circuit board comes with a new wiring harness attached.
-
Note: the different location of the small square plug automtive style plug. On the original motor the receptacle for this plug was on the side of the circuit board. On the new board it plugs straight into the underside.
-
The good news is that you can undo the black and white wire and automotive style receplatcle plug off the new motor and discard them. The old wiring is configured exactly the same and plugs straght into the new motor.
-
Wiring Connection - Make sure the black wire goes to the terminal marked GND (ground). The white is the power wire. The automative plug goes to the new location as shown in the picture. Dont get your black and white mixed up - take photos as you go.
-
While the new motor can still be installed, the fit is less precise, and the cover screws on the black plastic housing may not align as cleanly as before.
-
Routing the harness. Be careful when routing the wiring, you dont want to crush the wires under the cover. The black plastic cover has a recess for the wires to head in the battery area - make sure you feed them through properly.
-
-
-
Before attaching the black plastic motor cover, ensure the silver cone is properly reinstalled into the waste container. If it's not in place, the cover screws will have nothing to anchor into, making secure installation impossible.
-
There are three screws and they need to be screwed in pretty tightly or the top filter cover wont go back on properly.
-
Place filter back in and then screw filter lid vack on by hand.
-
-
-
Reassemble all the vacuum components, insert the battery, and power it on for a test run. With any luck, you'll get the same great results I did—and enjoy the satisfaction of saving money by tackling the repair yourself.
-


To reassemble your device, follow these instructions in reverse order.