주요 콘텐츠로 건너뛰기

LG CG180 Display Replacement

필요한 것

  1. LG CG180 Display Replacement, Battery: 1 단계, 이미지 1/1
    • Power down the cell phone by pressing and holding down the red "end call" button.

  2. LG CG180 Display Replacement: 2 단계, 이미지 1/1
    • Turn the phone screen-down so you are looking at the back cover.

  3. LG CG180 Display Replacement: 3 단계, 이미지 1/2 LG CG180 Display Replacement: 3 단계, 이미지 2/2
    • Slide the back cover down using your finger to remove the cover from the phone.

  4. LG CG180 Display Replacement: 4 단계, 이미지 1/1
    • Place your finger at the top of the battery in small gap.

  5. LG CG180 Display Replacement: 5 단계, 이미지 1/1
    • Press downward while pulling outward to remove the battery.

  6. LG CG180 Display Replacement, Hardshell Case: 6 단계, 이미지 1/1
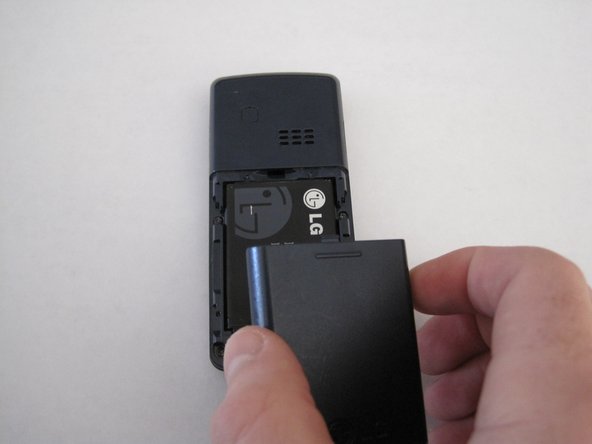
    • Remove all four screws on the back of the phone using a Phillips #00 screwdriver.

  7. LG CG180 Display Replacement: 7 단계, 이미지 1/1
    • Insert a plastic opening tool in the seam.

  8. LG CG180 Display Replacement: 8 단계, 이미지 1/2 LG CG180 Display Replacement: 8 단계, 이미지 2/2
    • Run the tool along the seam to release all the tabs.

  9. LG CG180 Display Replacement: 9 단계, 이미지 1/2 LG CG180 Display Replacement: 9 단계, 이미지 2/2
    • Pull the phone back cover off once all the tabs are released.

  10. LG CG180 Display Replacement: 10 단계, 이미지 1/1
    • Push the contents of the phone away from the hardshell case by applying pressure to the keypad with both thumbs.

  11. LG CG180 Display Replacement: 11 단계, 이미지 1/1
    • The hardshell case is separated from the rest of the phone.

  12. LG CG180 Display Replacement, Keypad: 12 단계, 이미지 1/2 LG CG180 Display Replacement, Keypad: 12 단계, 이미지 2/2
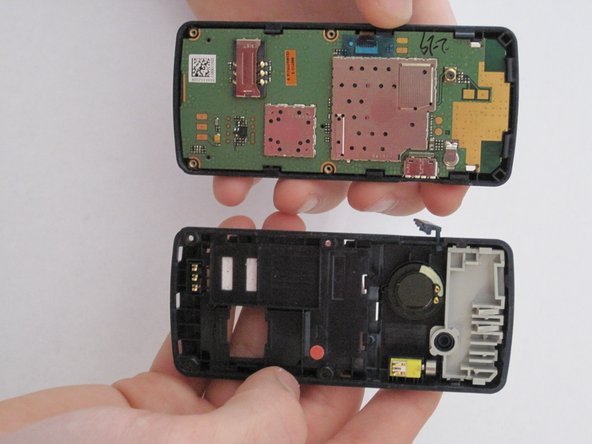
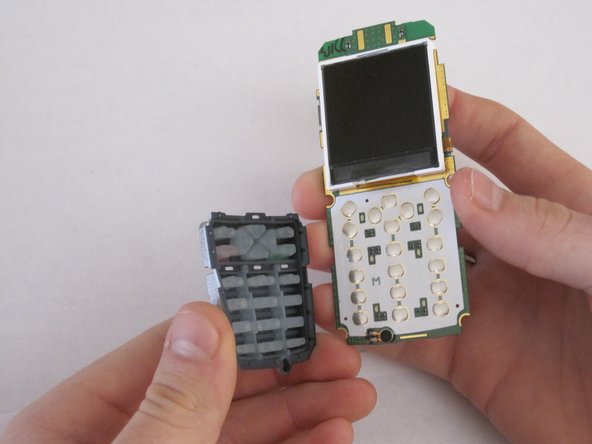
    • Separate keypad from circuit board by turning it upside down and allowing it to fall off.

  13. LG CG180 Display Replacement, Display: 13 단계, 이미지 1/1
    • Place the circuit board with the display facing downward.

  14. LG CG180 Display Replacement: 14 단계, 이미지 1/1
    • Use thumb to release both white clips at the top of the circuit board.

    • Be careful with the display because it is still attached by electrical tape.

  15. LG CG180 Display Replacement: 15 단계, 이미지 1/2 LG CG180 Display Replacement: 15 단계, 이미지 2/2
    • Once both clips are released, turn over the circuit board so that the display is facing upward.

    • Carefully lift the display from the left side and open to the right.

  16. LG CG180 Display Replacement: 16 단계, 이미지 1/1
    • Carefully remove the electrical tape from the display.

  17. LG CG180 Display Replacement: 17 단계, 이미지 1/1
    • The display is disconnected from the circuit board.

결론

To reassemble your device, follow these instructions in reverse order.

Alex Jacobs

회원 가입일: 01/21/10

5 평판

안내서 4개 작성하였습니다

Cal Poly, Team 14-42, Regan Winter 2010 Cal Poly, Team 14-42, Regan Winter 2010 회원

CPSU-REGAN-W10S14G42

4 회원들

안내서 10개 작성하였습니다

댓글 0개

댓글 쓰기

조회 통계:

24 시간 전: 0

7일 전: 1

30일 전: 1

전체 시간: 1,739