주요 콘텐츠로 건너뛰기

이 안내서에는 최근 변경 사항이 더 있습니다. 최신 비검증 버전으로 전환하십시오.

LG Cosmos 2 LCD Display Replacement

필요한 것

  1. LG Cosmos 2 LCD Display Replacement, Battery: 1 단계, 이미지 1/3 LG Cosmos 2 LCD Display Replacement, Battery: 1 단계, 이미지 2/3 LG Cosmos 2 LCD Display Replacement, Battery: 1 단계, 이미지 3/3
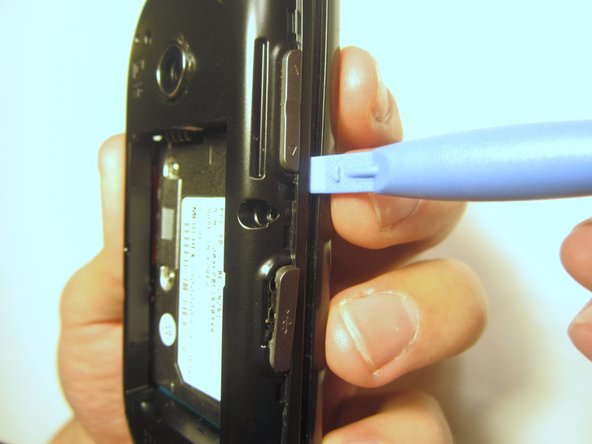
    • Insert the plastic opener into the slot at the top of the device.

    • Apply gentle pressure with the plastic tool to pop the back case off.

  2. LG Cosmos 2 LCD Display Replacement: 2 단계, 이미지 1/3 LG Cosmos 2 LCD Display Replacement: 2 단계, 이미지 2/3 LG Cosmos 2 LCD Display Replacement: 2 단계, 이미지 3/3
    • Use the plastic opener to lift, and remove, the device battery.

  3. LG Cosmos 2 LCD Display Replacement, Rear Case: 3 단계, 이미지 1/1
    • Use a screwdriver and corresponding bit to remove the six 2mm screws that are located along the edge of the rear case. Set the screws aside.

  4. LG Cosmos 2 LCD Display Replacement: 4 단계, 이미지 1/3 LG Cosmos 2 LCD Display Replacement: 4 단계, 이미지 2/3 LG Cosmos 2 LCD Display Replacement: 4 단계, 이미지 3/3
    • Use the plastic opener to pry the rear case loose.

    • This can be difficult. You will need to pry around the entire edge of the rear case, not just in one place.

  5. LG Cosmos 2 LCD Display Replacement, Motherboard: 5 단계, 이미지 1/1
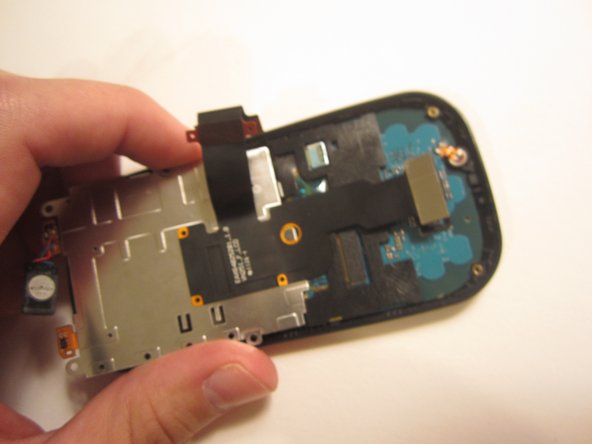
    • Use a screwdriver and corresponding bit to remove the two 3mm screws that attach the motherboard to the front case. Set the screws aside

  6. LG Cosmos 2 LCD Display Replacement: 6 단계, 이미지 1/1
    • Rotate the phone 180 degrees and use the plastic opener to lift the metal piece that covers the ribbon cable.

  7. LG Cosmos 2 LCD Display Replacement: 7 단계, 이미지 1/2 LG Cosmos 2 LCD Display Replacement: 7 단계, 이미지 2/2
    • Use the plastic opener to disconnect the ribbon cable.

  8. LG Cosmos 2 LCD Display Replacement: 8 단계, 이미지 1/2 LG Cosmos 2 LCD Display Replacement: 8 단계, 이미지 2/2
    • Use tweezers to disconnect the two cables that attach the motherboard to the case.

    • Note: Pull on the cables gently to prevent damage for future use.

  9. LG Cosmos 2 LCD Display Replacement: 9 단계, 이미지 1/1
    • Remove the motherboard from the front case.

  10. LG Cosmos 2 LCD Display Replacement, Option Buttons: 10 단계, 이미지 1/1
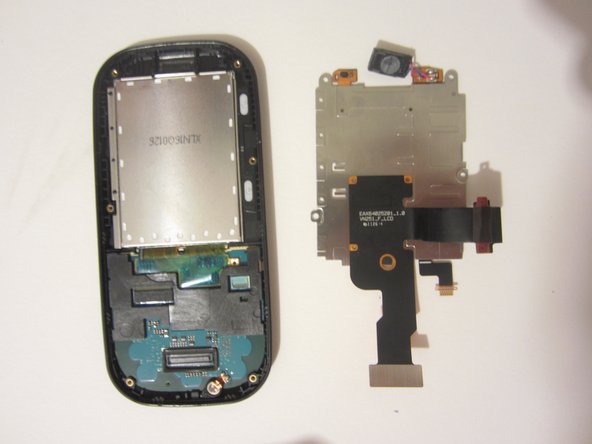
    • Use a screwdriver and corresponding bit to remove the four 1mm screws. Set the screws aside.

  11. LG Cosmos 2 LCD Display Replacement: 11 단계, 이미지 1/2 LG Cosmos 2 LCD Display Replacement: 11 단계, 이미지 2/2
    • Pull the ribbon cable through the slit in the keyboard case to separate it from the sliding mechanism.

  12. LG Cosmos 2 LCD Display Replacement: 12 단계, 이미지 1/1
    • Use a screwdriver and corresponding bit to remove the four 3mm screws. Set the screws aside.

    • Note: Two of the screws may be hidden underneath a black rubber film. Pull off this film if necessary.

  13. LG Cosmos 2 LCD Display Replacement: 13 단계, 이미지 1/2 LG Cosmos 2 LCD Display Replacement: 13 단계, 이미지 2/2
    • Use the plastic opener to pry open the front of the phone.

    • Slip the ribbon cable through the slit to fully separate the two pieces.

  14. LG Cosmos 2 LCD Display Replacement: 14 단계, 이미지 1/1
    • Use a screwdriver and corresponding bit to remove the two 1mm screws. Set the screws aside.

  15. LG Cosmos 2 LCD Display Replacement: 15 단계, 이미지 1/1
    • Detach the ribbon cable with the plastic opener.

  16. LG Cosmos 2 LCD Display Replacement: 16 단계, 이미지 1/3 LG Cosmos 2 LCD Display Replacement: 16 단계, 이미지 2/3 LG Cosmos 2 LCD Display Replacement: 16 단계, 이미지 3/3
    • Use the spudger to pry the metal piece loose.

    • Remove the metal piece along with the two ribbon cables.

  17. LG Cosmos 2 LCD Display Replacement: 17 단계, 이미지 1/1
    • Flip the front of the phone over and the old option buttons will fall out.

    • Insert new option buttons.

  18. LG Cosmos 2 LCD Display Replacement, LCD Display: 18 단계, 이미지 1/2 LG Cosmos 2 LCD Display Replacement, LCD Display: 18 단계, 이미지 2/2
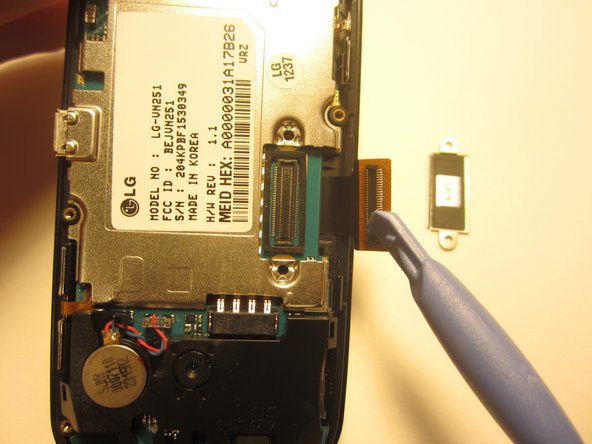
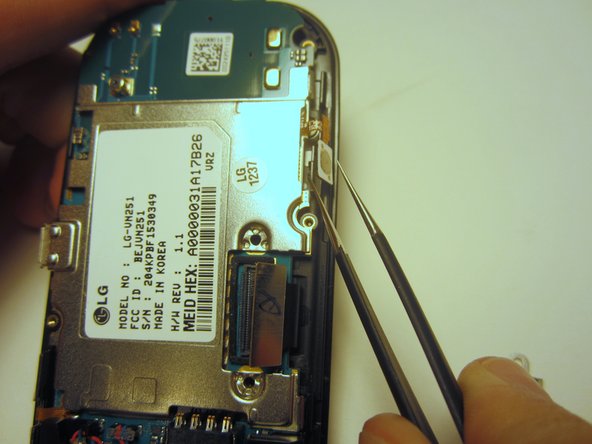
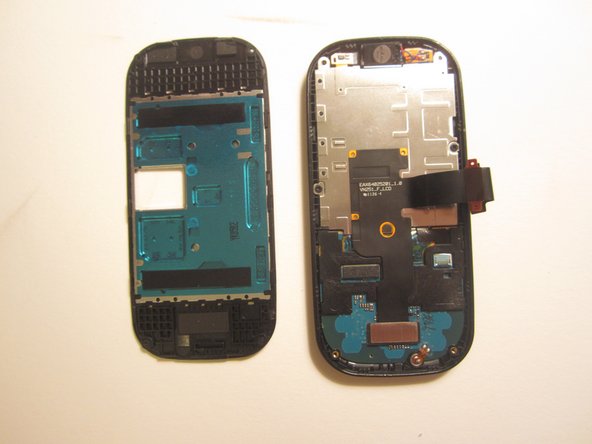
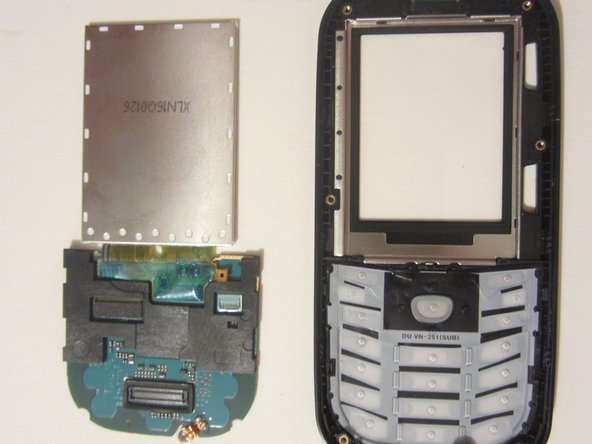
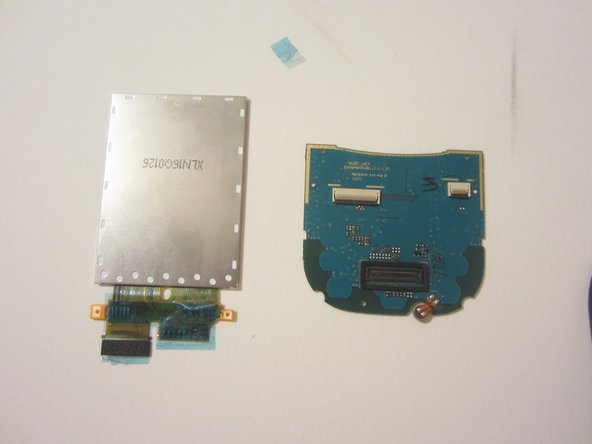
    • Use a tool to pry open the LCD display. Remove the display and the circuit board that it's connected to.

  19. LG Cosmos 2 LCD Display Replacement: 19 단계, 이미지 1/1
    • Remove the plastic piece from the circuit board by unlocking the switch on the plastic piece with a pair of tweezers.

  20. LG Cosmos 2 LCD Display Replacement: 20 단계, 이미지 1/1
    • Using a pair of tweezers, remove the tape.

  21. LG Cosmos 2 LCD Display Replacement: 21 단계, 이미지 1/1
    • Using either your finger or the plastic opener, disconnect the cable.

  22. LG Cosmos 2 LCD Display Replacement: 22 단계, 이미지 1/2 LG Cosmos 2 LCD Display Replacement: 22 단계, 이미지 2/2
    • Pull the LCD display away from the circuit board.

    • You shouldn't feel any resistance. If you notice resistance, make sure you have completed the previous step.

결론

To reassemble your device, follow these instructions in reverse order.

다른 한 분이 해당 안내서를 완성하였습니다.

Nick White

회원 가입일: 10/18/13

851 평판

안내서 8개 작성하였습니다

Clemson, Team 13-1, Benson Fall 2013 Clemson, Team 13-1, Benson Fall 2013 회원

CLEM-BENSON-F13S13G1

3 회원들

안내서 16개 작성하였습니다

댓글 0개

댓글 쓰기

조회 통계:

24 시간 전: 0

7일 전: 2

30일 전: 3

전체 시간: 2,447