주요 콘텐츠로 건너뛰기

LG Encore GT550 Audio Jack Replacement

필요한 것

  1. LG Encore GT550 Audio Jack Replacement, Audio Jack: 1 단계, 이미지 1/2 LG Encore GT550 Audio Jack Replacement, Audio Jack: 1 단계, 이미지 2/2
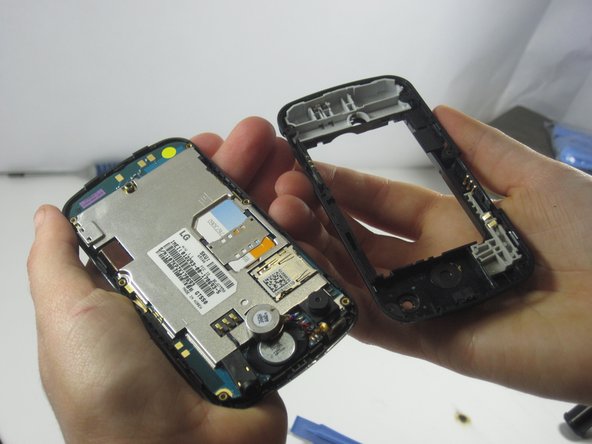
    • Turn the device over so the backside is facing up.

    • Use your fingers or an opening tool to remove the back cover in order to expose the battery.

  2. LG Encore GT550 Audio Jack Replacement: 2 단계, 이미지 1/2 LG Encore GT550 Audio Jack Replacement: 2 단계, 이미지 2/2
    • Use your fingers or a spudger to remove the battery. Lift it from the side opposite of the camera.

  3. LG Encore GT550 Audio Jack Replacement: 3 단계, 이미지 1/1
    • Use a Phillips #0 screwdriver to remove six screws around the perimeter of the phone.

  4. LG Encore GT550 Audio Jack Replacement: 4 단계, 이미지 1/2 LG Encore GT550 Audio Jack Replacement: 4 단계, 이미지 2/2
    • Place the opening tool in the seam of the device and pry around the perimeter to separate the top case from the bottom case.

  5. LG Encore GT550 Audio Jack Replacement: 5 단계, 이미지 1/2 LG Encore GT550 Audio Jack Replacement: 5 단계, 이미지 2/2
    • Place the opening tool on the top on the device between the phone casing and motherboard.

    • Separate the screen and the motherboard.

  6. LG Encore GT550 Audio Jack Replacement: 6 단계, 이미지 1/1
    • Push the audio jack out and replace it.

결론

To reassemble your device, follow these instructions in reverse order.

다른 한 분이 해당 안내서를 완성하였습니다.

Lindsey Harding

회원 가입일: 11/04/13

501 평판

안내서 5개 작성하였습니다

UMass Dartmouth, Team 1-4, Shastany Fall 2013 UMass Dartmouth, Team 1-4, Shastany Fall 2013 회원

UMASSD-SHASTANY-F13S1G4

2 회원들

안내서 10개 작성하였습니다

댓글 0개

댓글 쓰기

조회 통계:

24 시간 전: 0

7일 전: 1

30일 전: 1

전체 시간: 212