이 버전에는 잘못된 편집 사항이 있을 수 있습니다. 최신 확인된 스냅샷으로 전환하십시오.
필요한 것
-
이 단계는 번역되지 않았습니다. 번역을 도와주십시오
-
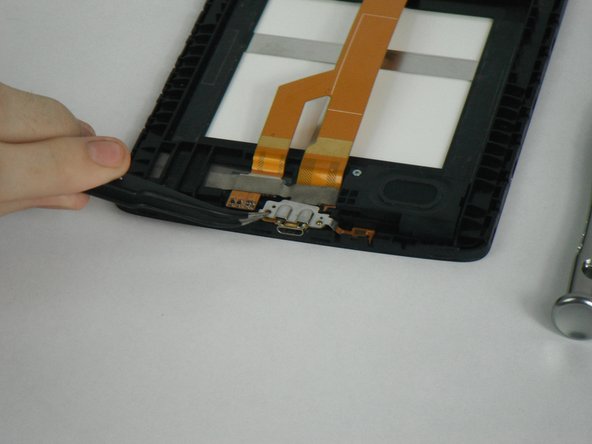
The screen assembly is secured to the plastic backing with clips.Insert the plastic opening tool between the screen and plastic.
-
Carefully work your way around the device making sure not to go too deep damaging any eternal components, freeing it from the connecting clips.
-
Lift the tablet from the plastic frame. You may need to loosen some more clips if it is difficult to remove.
-
-
이 단계는 번역되지 않았습니다. 번역을 도와주십시오
-
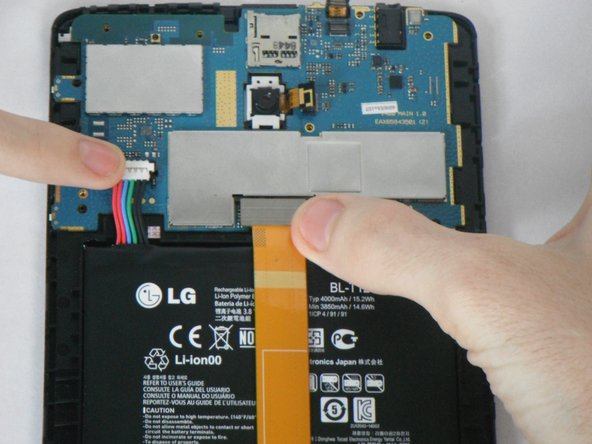
Remove the red marked connectors by gently prying up. Be sure not to rip the ribbon cables as they are very fragile.
-
Remove the three connectors marked in orange by gently prying them upwards. The cables are very fragile so be careful not to rip them.
-
-
-
이 단계는 번역되지 않았습니다. 번역을 도와주십시오
-
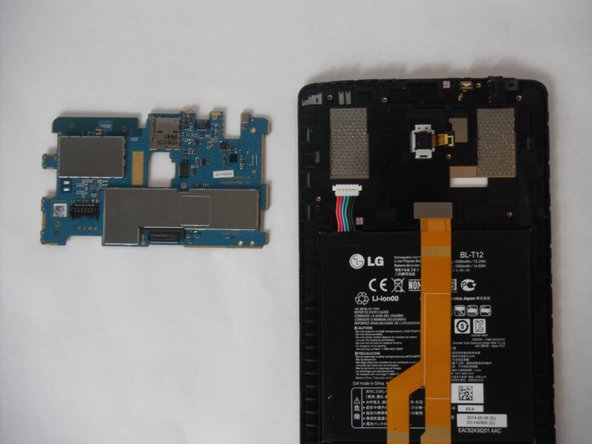
Remove the 7 screws marked in red that are securing the logic board to the case.
-
Be sure that all the connectors marked in orange are removed before pulling out the mother board.
-
Very carefully remove the logic board after the screws have been removed
-
-
이 단계는 번역되지 않았습니다. 번역을 도와주십시오
-
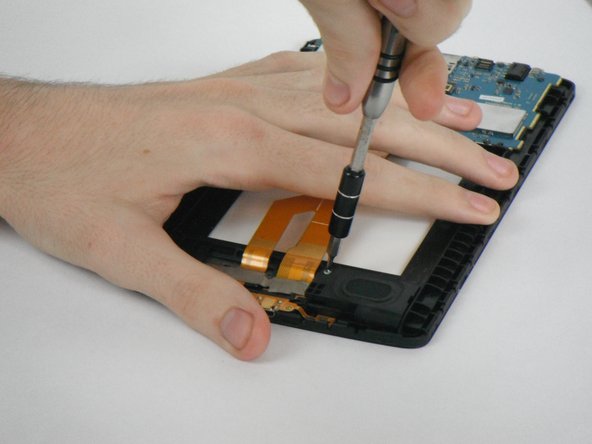
Remove the two screw marked in red.
-
Using the tweezers , gently pull out the metal bracket that holds the charging port in place.
-
Carefully pull out the ribbon connector in orange.
-
Remove the one screw that holds the speaker in place.
-
Slowly pull out the speaker.
-
-
이 단계는 번역되지 않았습니다. 번역을 도와주십시오
-
Insert your new mother board with the 7 screws
-
Reconnect all the connectors marked in red back to the mother board.
-


다른 3명이 해당 안내서를 완성하였습니다.

팀
