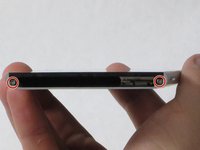
소개
In this guide, you will be removing the screen from the phone, so that you may replace a cracked or malfunctioning screen. This will involve prying the screen out of the phone, unscrewing the motherboard, and disconnecting the screen tether from the motherboard.
필요한 것
-
-
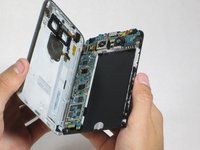
While holding the battery release button, pull the bottom end of the phone out of the body.
-
-
-
-
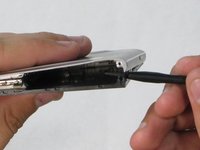
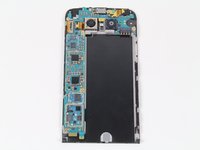
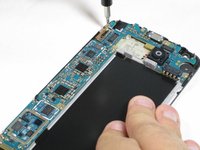
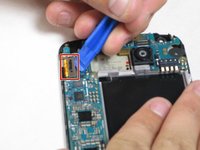
Once the screen has been separated from the back of the phone, now you can remove the motherboard.
-
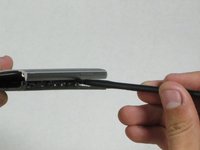
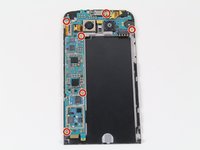
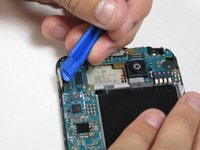
Using the #00 Philips head, remove the six 2.7mm Phillips screws.
-
-
이 단계에 사용된 도구:Tweezers$4.99
-
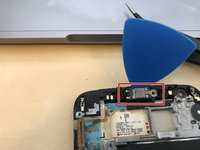
Make sure to transfer the earpiece from the old screen to the new screen or else you wouldn't be able to hear anyone when you make phone calls!
-
The component is fragile so don't try to force it to come out with a pair of tweezers. A pick should be able to wedge it out.
-
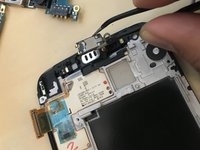
Be careful with the adhesive that's connected to it. It's easy to pull out.
-


To reassemble your device, follow these instructions in reverse order.
To reassemble your device, follow these instructions in reverse order.
다른 91명이 해당 안내서를 완성하였습니다.
팀

Cal Poly, Team 18-2, Forte Fall 2016 Cal Poly, Team 18-2, Forte Fall 2016 회원
CPSU-FORTE-F16S18G2
4 회원들
안내서 15개를 작성함
댓글 14개
I just did a screen replacement following this guide. The #000 phillips fit a lot better than the #00, but otherwise this guide was great. It took about 15 minutes to do from start to finish and I'd say it was one of the more easy replacements I've had to do, since there were minimal components that had to be transferred over from the old to the new screen.
Thanks!
this is great - success - thank you. A little confusing between step 4 and 5 as I think you reverse angles on the photos - in step 4 the motherboard is right under where you have the opening tool and in step 5 you have the spudger on the other side.
one of the 2 screws from the bottom pinged across the room when I did this and I'm pretty sure I don't have any hope of finding it perhaps until I move house. Any ideas on where I can find another? UK based. replacebase doesn't have them. It works fine without, just would like it screwed together properly...
Followed these steps no problem. Only heads up: Make sure that the replacement screen you buy comes a speaker, or make sure you move your old one over. This step isn't shown in the above, and was required for me.
I think the guide could be a bit more completed. Its vague and doesn't seem like a full repair guide.