이 버전에는 잘못된 편집 사항이 있을 수 있습니다. 최신 확인된 스냅샷으로 전환하십시오.
필요한 것
-
이 단계는 번역되지 않았습니다. 번역을 도와주십시오
-
Remove the back cover by firmly pressing the triangle and push upwards.
-
Lift the bottom section to remove the cover.
-
-
-
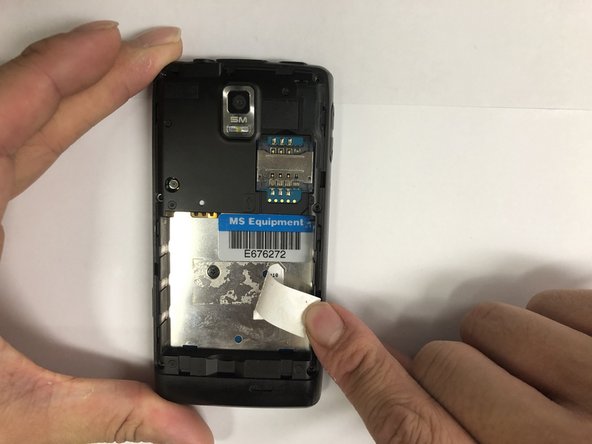
이 단계는 번역되지 않았습니다. 번역을 도와주십시오
-
Peel off the sticker with the metal spudger.
-
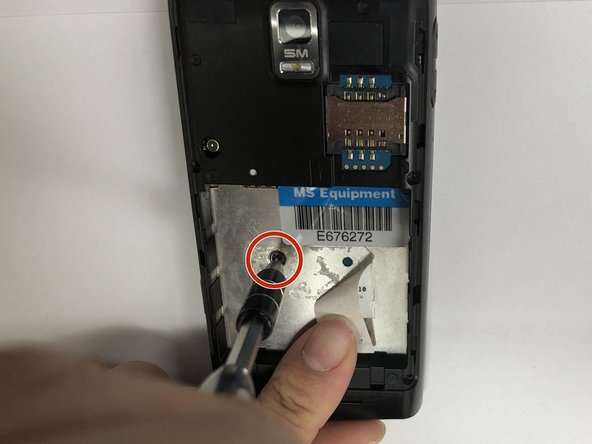
Remove one 1mm PH000 screw.
-
-
이 단계는 번역되지 않았습니다. 번역을 도와주십시오
-
Pry open all four sides of the back-frame gently, using the metal spudger.
-
-
이 단계는 번역되지 않았습니다. 번역을 도와주십시오
-
Pry off the connector using the iFixit opening tool to remove the communication board.
-
-
이 단계는 번역되지 않았습니다. 번역을 도와주십시오
-
Pry off the connectors using the iFixit opening tool.
-
Disconnect the antenna using the iFixit opening tool.
-


다른 한 분이 해당 안내서를 완성하였습니다.
팀

IUPUI, Team S1-G6, Hovde Fall 2018 IUPUI, Team S1-G6, Hovde Fall 2018 회원
IUPUI-HOVDE-F18S1G6
3 회원들
안내서 6개 작성하였습니다