주요 콘텐츠로 건너뛰기

LG Lucid 4G LCD Replacement

필요한 것

  1. LG Lucid 4G LCD Replacement, Battery: 1 단계, 이미지 1/3 LG Lucid 4G LCD Replacement, Battery: 1 단계, 이미지 2/3 LG Lucid 4G LCD Replacement, Battery: 1 단계, 이미지 3/3
    • Turn off the phone by pressing the power button, then press "Power Off", then press "OK" when notified that your phone will shut down.

  2. LG Lucid 4G LCD Replacement: 2 단계, 이미지 1/2 LG Lucid 4G LCD Replacement: 2 단계, 이미지 2/2
    • Flip the phone so that its back plate is facing upward.

    • Use your fingernail or prying tool to lift the back plate of the phone open by using the notch at the bottom.

  3. LG Lucid 4G LCD Replacement: 3 단계, 이미지 1/2 LG Lucid 4G LCD Replacement: 3 단계, 이미지 2/2
    • Using the notch located near the bottom center, remove the battery with a prying tool or your fingernail.

  4. LG Lucid 4G LCD Replacement, LCD Assembly: 4 단계, 이미지 1/2 LG Lucid 4G LCD Replacement, LCD Assembly: 4 단계, 이미지 2/2
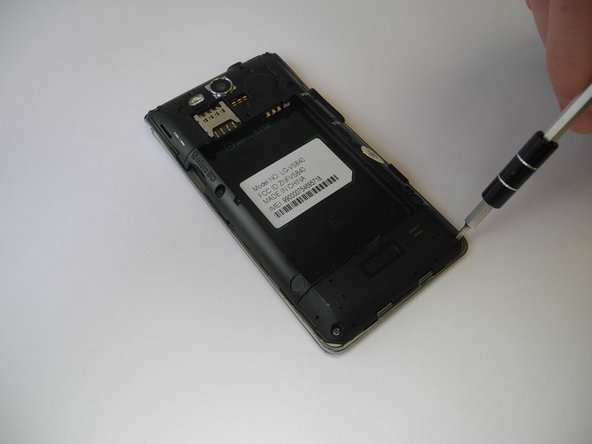
    • Begin by removing the seven Phillip's head screws on the back of the phone.

  5. LG Lucid 4G LCD Replacement: 5 단계, 이미지 1/2 LG Lucid 4G LCD Replacement: 5 단계, 이미지 2/2
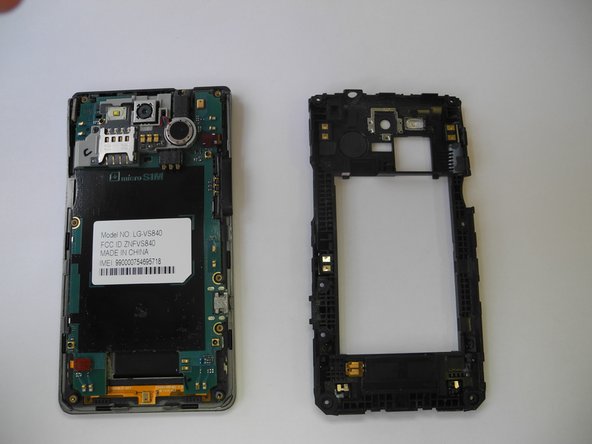
    • Use the small notches along the sides of the phone to help you pry the back plate off and help stop the pry tool from slipping.

    • Use the plastic pry tool and begin working your way around the sides of the phone.

    • Some force may be required during this step.

  6. LG Lucid 4G LCD Replacement: 6 단계, 이미지 1/1
    • Remove the single Phillip's head screw holding the sim card assembly in place.

  7. LG Lucid 4G LCD Replacement: 7 단계, 이미지 1/2 LG Lucid 4G LCD Replacement: 7 단계, 이미지 2/2
    • Gently lift the corner of the sim card assembly as shown.

    • The SIM card assembly is still attached to the motherboard via a ribbon cable.

    • Release the press-fit ribbon cable connector by lifting it with a spudger or prying tool.

  8. LG Lucid 4G LCD Replacement: 8 단계, 이미지 1/2 LG Lucid 4G LCD Replacement: 8 단계, 이미지 2/2
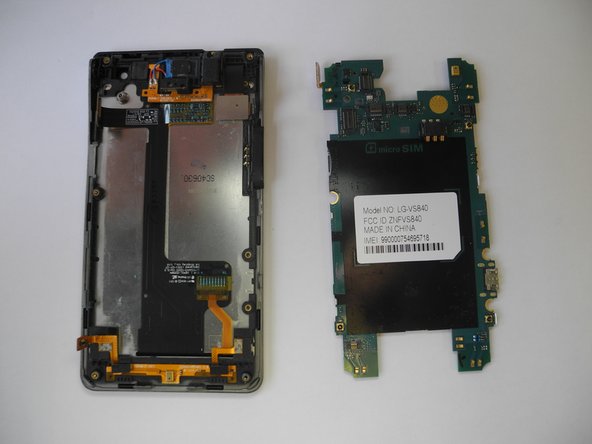
    • Release the five flex connectors on the motherboard.

    • The camera may fall off during this step. That is okay! Set it aside for reassembly.

    • Once all five flex connectors are released, simply lift the motherboard to separate it from the rest of the phone.

  9. LG Lucid 4G LCD Replacement: 9 단계, 이미지 1/1
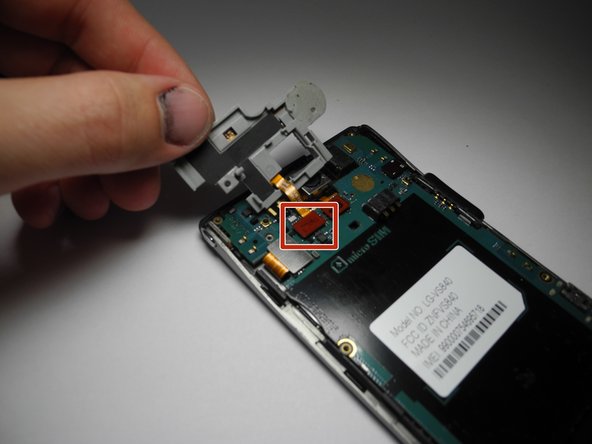
    • If the camera did not fall off during step five, you must remove it now by gently lifting it. It is attached by a small amount of adhesive and should detach easily.

    • Gently lift the headphone jack assembly to reveal the touch screen digitizer flex cable.

    • Release the touch screen digitizer flex cable connector.

  10. LG Lucid 4G LCD Replacement: 10 단계, 이미지 1/2 LG Lucid 4G LCD Replacement: 10 단계, 이미지 2/2
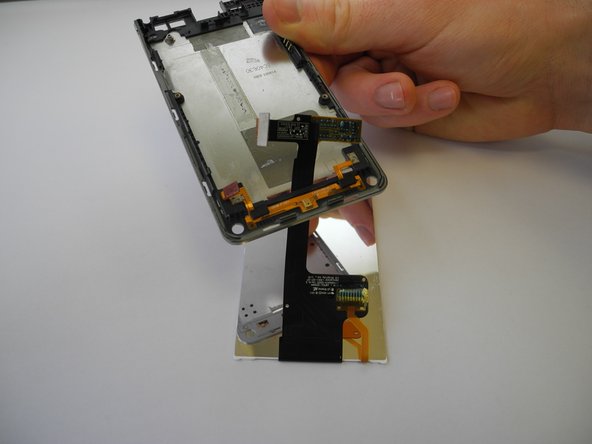
    • Use a plastic pry tool to begin removing the touch screen assembly.

    • Slide the pry tool along the gap between the touch screen digitizer and the LCD mount to release the connectors.

    • Once the touch screen assembly has been separated, carefully slide the ribbon through the slot in its housing.

    • Caution: Be gentle when separating the two sections along the top of the phone. The ribbon detached in step 6 is attached to the touch screen digitizer and must be carefully fed through the LCD housing to avoid tearing it.

  11. LG Lucid 4G LCD Replacement: 11 단계, 이미지 1/2 LG Lucid 4G LCD Replacement: 11 단계, 이미지 2/2
    • The final step is to remove the LCD screen from its housing. Begin by gently peeling the ribbon from the back of the housing.

    • Once the ribbon is fully detached, carefully feed it through the bottom of the display housing.

    • Once this is done the LCD screen assembly will have been separated from the phone.

결론

To reassemble your device, follow these instructions in reverse order.

다른 한 분이 해당 안내서를 완성하였습니다.

Adam Boeck

회원 가입일: 02/07/17

133 평판

안내서 1개 작성함

Ohio State, Team 1-1, Wilder Spring 2017 Ohio State, Team 1-1, Wilder Spring 2017 회원

OSU-WILDER-S17S1G1

4 회원들

안내서 8개 작성하였습니다

댓글 0개

댓글 쓰기

조회 통계:

24 시간 전: 0

7일 전: 1

30일 전: 2

전체 시간: 320