주요 콘텐츠로 건너뛰기

LG Optimus Exceed 2 Volume Button Replacement

보관된 가이드
해당 안내서는 단지 역사적인 목적으로 보관됩니다. 최신 버전 안내서를 사용하여 수리 하십시오.

필요한 것

  1. LG Optimus Exceed 2 Volume Button Replacement, Battery: 1 단계, 이미지 1/2 LG Optimus Exceed 2 Volume Button Replacement, Battery: 1 단계, 이미지 2/2
    • Flip the device over and remove the back covering.

  2. LG Optimus Exceed 2 Volume Button Replacement: 2 단계, 이미지 1/1
    • Push on the top of the battery downward and pull the battery off of the device.

  3. LG Optimus Exceed 2 Volume Button Replacement, Rear Camera: 3 단계, 이미지 1/3 LG Optimus Exceed 2 Volume Button Replacement, Rear Camera: 3 단계, 이미지 2/3 LG Optimus Exceed 2 Volume Button Replacement, Rear Camera: 3 단계, 이미지 3/3
    • Remove the eleven 4mm screws using a Philips head screw driver.

  4. LG Optimus Exceed 2 Volume Button Replacement: 4 단계, 이미지 1/3 LG Optimus Exceed 2 Volume Button Replacement: 4 단계, 이미지 2/3 LG Optimus Exceed 2 Volume Button Replacement: 4 단계, 이미지 3/3
    • Insert the plastic opening tool into the side of the device and pry off silver covering. Push up against the back covering when the tool is inserted to detach from the phone.

    • Make sure to detach all sides of silver covering before lifting it off the phone.

  5. LG Optimus Exceed 2 Volume Button Replacement: 5 단계, 이미지 1/2 LG Optimus Exceed 2 Volume Button Replacement: 5 단계, 이미지 2/2
    • Using the prying tool detach the connector on the device.

    • Insert the plastic opening tool underneath the connector and push tool down to lift the connector from the device.

  6. LG Optimus Exceed 2 Volume Button Replacement: 6 단계, 이미지 1/2 LG Optimus Exceed 2 Volume Button Replacement: 6 단계, 이미지 2/2
    이 단계에 사용된 도구:
    Tweezers
    $4.99
    구매
    • Using tweezers lift the camera off of the device.

    • To do so grasp the camera gently with the tweezers and pull the camera up out of the device.

  7. LG Optimus Exceed 2 Volume Button Replacement, Motherboard: 7 단계, 이미지 1/2 LG Optimus Exceed 2 Volume Button Replacement, Motherboard: 7 단계, 이미지 2/2
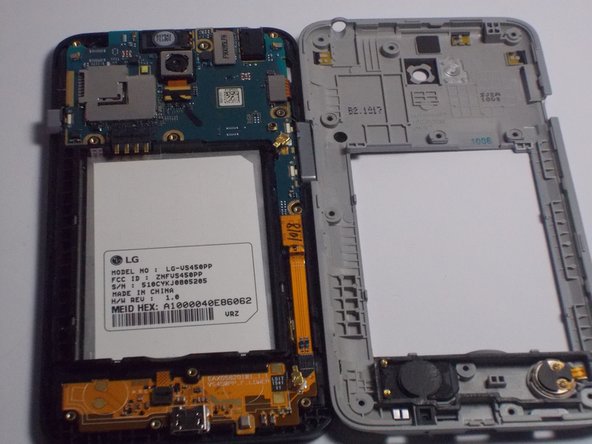
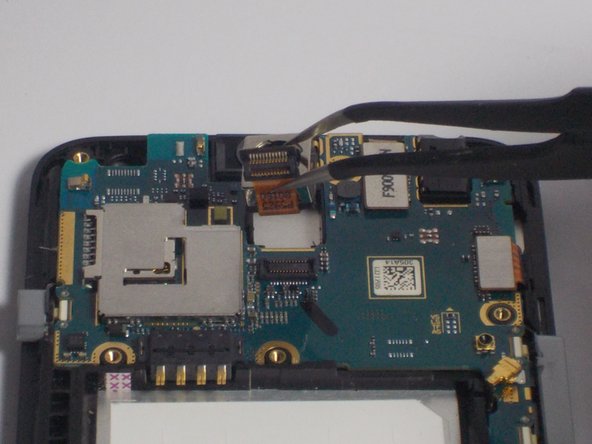
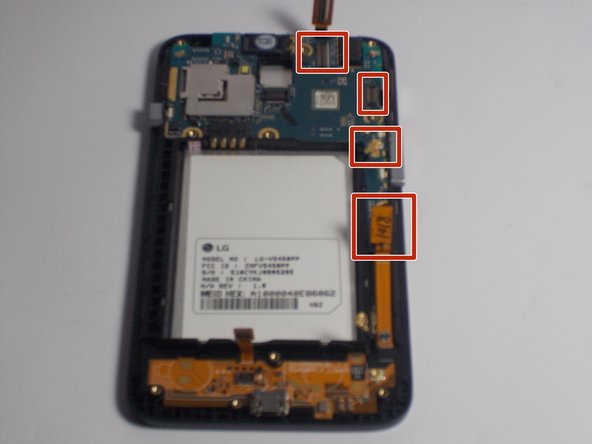
    • Disconnect the remaining ribbon plugs and connectors. (Only remove the highlighted cables for the removal of the logic board.)

  8. LG Optimus Exceed 2 Volume Button Replacement: 8 단계, 이미지 1/2 LG Optimus Exceed 2 Volume Button Replacement: 8 단계, 이미지 2/2
    • Push the blue lifting tool up underneath the logic board and pull it upwards removing it from the device.

  9. LG Optimus Exceed 2 Volume Button Replacement, Volume Button: 9 단계, 이미지 1/1
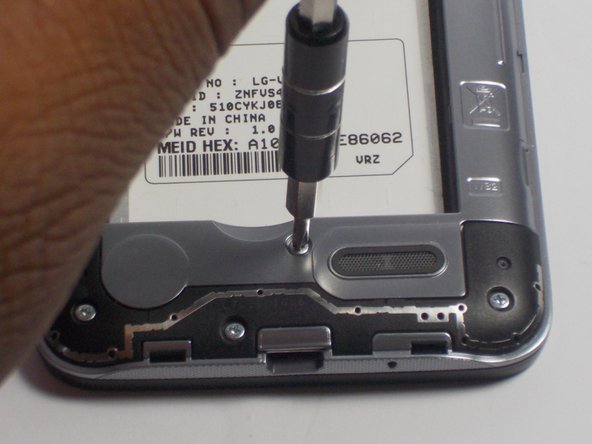
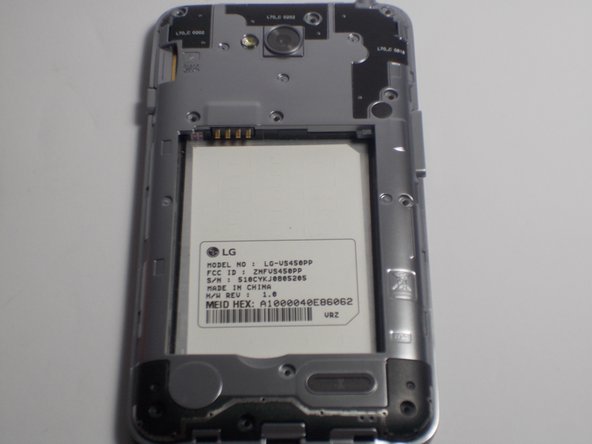
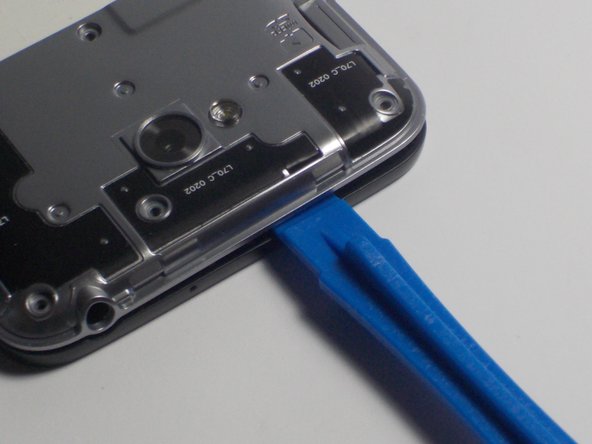
    • Begin this guide by completing the LG Optimus Exceed 2 Screen Replacement to step 2.

  10. LG Optimus Exceed 2 Volume Button Replacement: 10 단계, 이미지 1/2 LG Optimus Exceed 2 Volume Button Replacement: 10 단계, 이미지 2/2
    • With the device facing up lift with your fingers or the blue lifting tool to remove the volume buttons from the device.

결론

To reassemble your device, follow these instructions in reverse order.

Carl Dorvilus

회원 가입일: 03/10/16

708 평판

안내서 6개 작성하였습니다

UMass Dartmouth, Team 4-4, Catania Spring 2016 UMass Dartmouth, Team 4-4, Catania Spring 2016 회원

UMASSD-CATANIA-S16S4G4

3 회원들

안내서 6개 작성하였습니다

댓글 0개

댓글 쓰기

조회 통계:

24 시간 전: 0

7일 전: 0

30일 전: 6

전체 시간: 77