주요 콘텐츠로 건너뛰기

LG Optimus L90 Touch Screen Replacement

보관된 가이드
해당 안내서는 단지 역사적인 목적으로 보관됩니다. 최신 버전 안내서를 사용하여 수리 하십시오.

필요한 것

  1. LG Optimus L90 Touch Screen Replacement, Battery: 1 단계, 이미지 1/3 LG Optimus L90 Touch Screen Replacement, Battery: 1 단계, 이미지 2/3 LG Optimus L90 Touch Screen Replacement, Battery: 1 단계, 이미지 3/3
    • Carefully slide an opening pick between the the rear cover and the body of the phone.

    • Using the pick, separate the cover from the back of the phone.

    • Remove the rear cover.

  2. LG Optimus L90 Touch Screen Replacement: 2 단계, 이미지 1/2 LG Optimus L90 Touch Screen Replacement: 2 단계, 이미지 2/2
    • Insert a plastic opening tool int o the small recess at the bottom of the battery.

    • Use the plastic opening tool to lift up the bottom of the battery.

    • Remove the battery from the phone.

  3. LG Optimus L90 Touch Screen Replacement, Motherboard: 3 단계, 이미지 1/2 LG Optimus L90 Touch Screen Replacement, Motherboard: 3 단계, 이미지 2/2
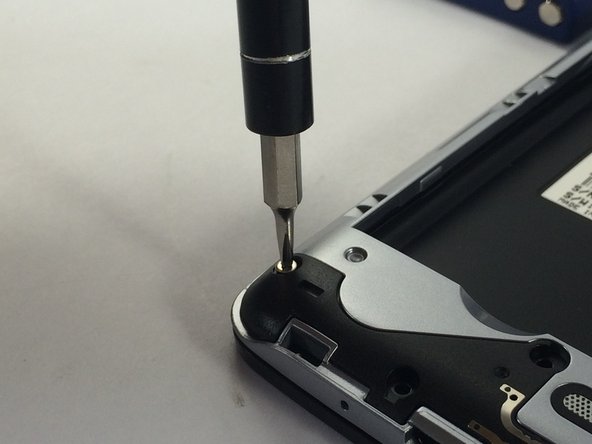
    • Remove the eleven JIS #000 screws securing the midframe to the phone.

  4. LG Optimus L90 Touch Screen Replacement: 4 단계, 이미지 1/3 LG Optimus L90 Touch Screen Replacement: 4 단계, 이미지 2/3 LG Optimus L90 Touch Screen Replacement: 4 단계, 이미지 3/3
    • Using an opening pick, carefully separate the midframe from the motherboard.

  5. LG Optimus L90 Touch Screen Replacement: 5 단계, 이미지 1/3 LG Optimus L90 Touch Screen Replacement: 5 단계, 이미지 2/3 LG Optimus L90 Touch Screen Replacement: 5 단계, 이미지 3/3
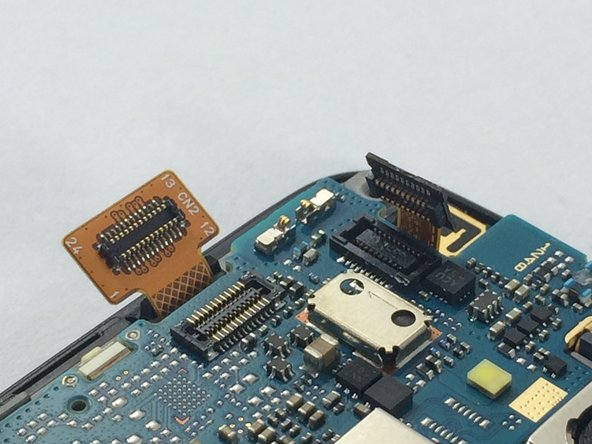
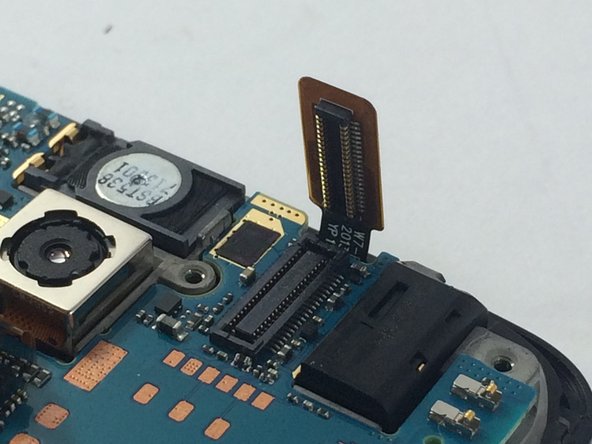
    • Disconnect the flex cables (gold tags with prongs) from the motherboard.

  6. LG Optimus L90 Touch Screen Replacement: 6 단계, 이미지 1/2 LG Optimus L90 Touch Screen Replacement: 6 단계, 이미지 2/2
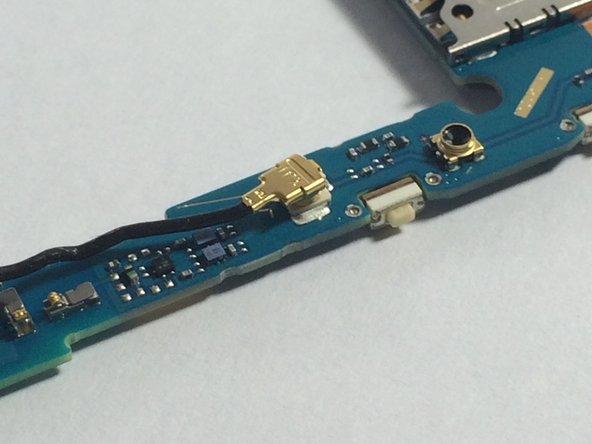
    • Disconnect the thin black cable in the bottom-right corner of the phone.

  7. LG Optimus L90 Touch Screen Replacement: 7 단계, 이미지 1/3 LG Optimus L90 Touch Screen Replacement: 7 단계, 이미지 2/3 LG Optimus L90 Touch Screen Replacement: 7 단계, 이미지 3/3
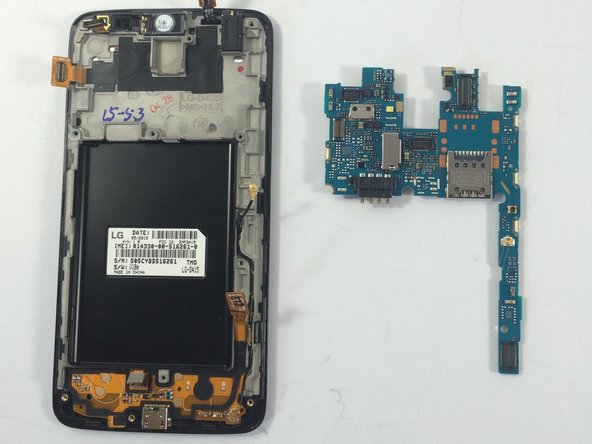
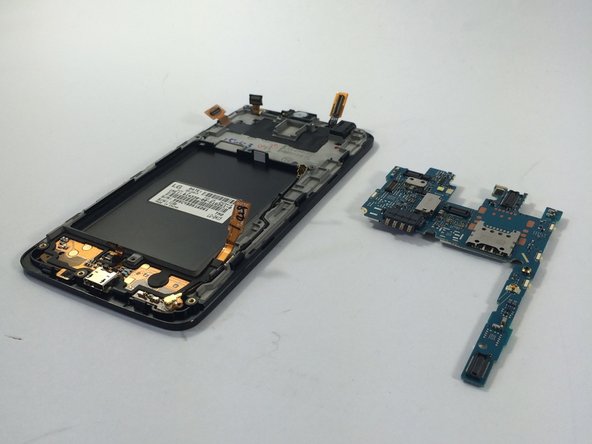
    • Gently pry the motherboard away from the phone.

  8. LG Optimus L90 Touch Screen Replacement, Touch Screen: 8 단계, 이미지 1/2 LG Optimus L90 Touch Screen Replacement, Touch Screen: 8 단계, 이미지 2/2
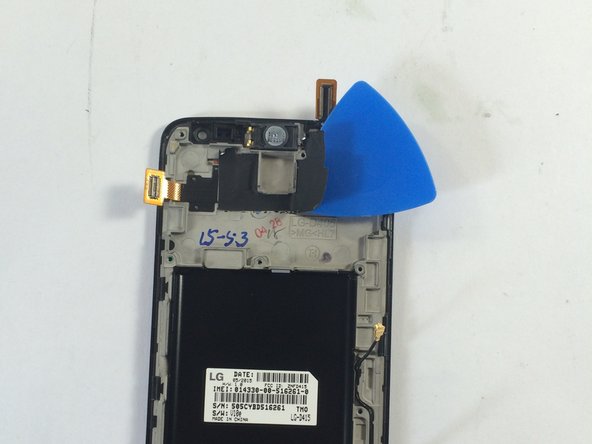
    • Once the motherboard is carefully removed, use your prying tool to remove the black tape that is located around the back camera. Place the tape off to the side when finished as you will need this later.

  9. LG Optimus L90 Touch Screen Replacement: 9 단계, 이미지 1/1
    • Once the tape is removed, use your heat gun to heat up the screen of the phone for 1-2 minutes. This will soften the adhesive that binds the screen to the phone.

  10. LG Optimus L90 Touch Screen Replacement: 10 단계, 이미지 1/1
    • Once the screen is up to a decent temperature, use your prying tool to separate the screen from the body of the phone. Once the damaged screen is removed the new one is ready to be inserted.

결론

To reassemble your device, follow these instructions in reverse order.

다른 4명이 해당 안내서를 완성하였습니다.

Alex Arruda

회원 가입일: 03/04/16

511 평판

안내서 5개 작성하였습니다

UMass Dartmouth, Team 3-5, Bhusal Spring 2016 UMass Dartmouth, Team 3-5, Bhusal Spring 2016 회원

UMASSD-BHUSAL-S16S3G5

2 회원들

안내서 7개 작성하였습니다

댓글 0개

댓글 쓰기

조회 통계:

24 시간 전: 0

7일 전: 0

30일 전: 1

전체 시간: 2,232