주요 콘텐츠로 건너뛰기

LG Risio Motherboard Replacement

필요한 것

  1. LG Risio Motherboard Replacement, Back Panel: 1 단계, 이미지 1/2 LG Risio Motherboard Replacement, Back Panel: 1 단계, 이미지 2/2
    • Use a plastic opening tool to seperate the back panel from the device.

    • Remove the back panel.

  2. LG Risio Motherboard Replacement, Battery: 2 단계, 이미지 1/1
    • Place your thumb along the bottom of the battery and pry upwards to remove.

  3. LG Risio Motherboard Replacement, Midframe: 3 단계, 이미지 1/1
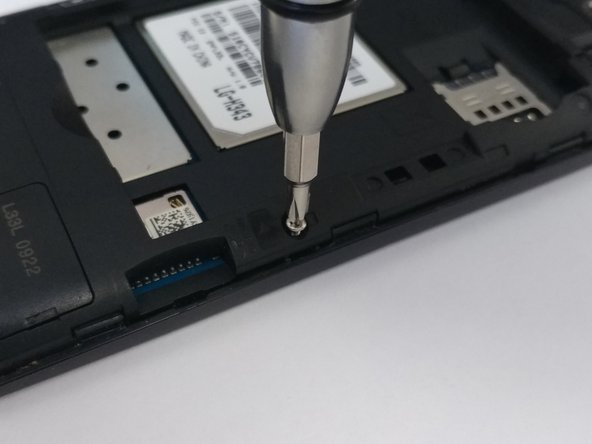
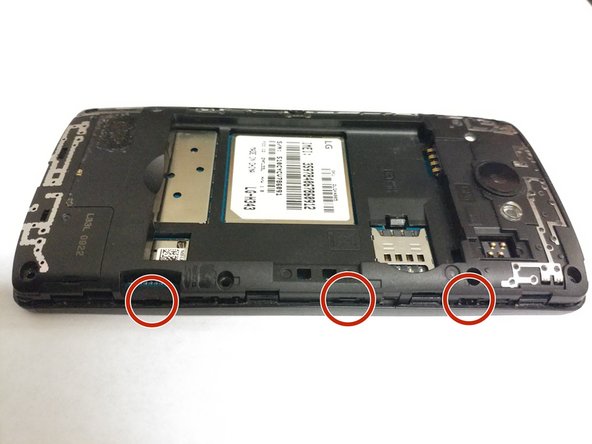
    • Press down on the SIM eject tab with a fingernail (or iFixit opening tool), and slide the SIM card out.

  4. LG Risio Motherboard Replacement: 4 단계, 이미지 1/2 LG Risio Motherboard Replacement: 4 단계, 이미지 2/2
    • Remove the eight Phillips #0 screws from the internal support frame.

  5. LG Risio Motherboard Replacement: 5 단계, 이미지 1/3 LG Risio Motherboard Replacement: 5 단계, 이미지 2/3 LG Risio Motherboard Replacement: 5 단계, 이미지 3/3
    • Use an opening tool on the marked locations to lift the edges up. There should be a small click when lifting these edges up.

  6. LG Risio Motherboard Replacement: 6 단계, 이미지 1/1
    • Using your hand, pick up the midframe to separate it from the phone.

  7. LG Risio Motherboard Replacement, Motherboard: 7 단계, 이미지 1/2 LG Risio Motherboard Replacement, Motherboard: 7 단계, 이미지 2/2
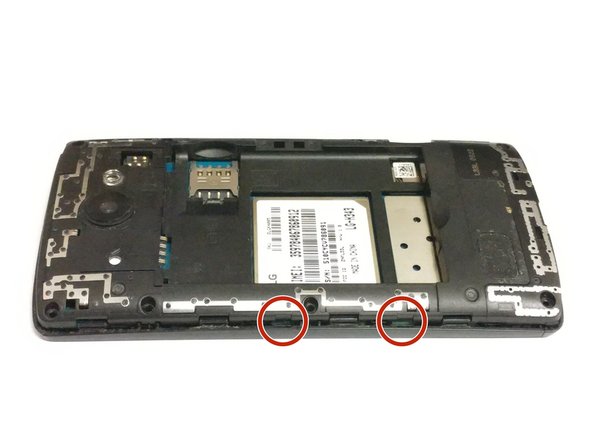
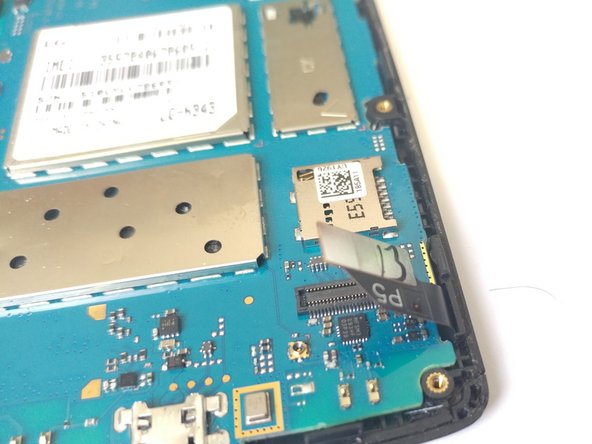
    • Detach the screen connector from the motherboard by putting your thumb underneath it and lifting up.

    • The screen connector is the part that has P5 written on it.

  8. LG Risio Motherboard Replacement: 8 단계, 이미지 1/1
    • On the side with the screen connector, pull the two tabs away from the device.

    • Use the plastic opening tool to lift the motherboard starting on the bottom right corner and pulling upwards.

결론

To reassemble your device, follow these instructions in reverse order.

다른 한 분이 해당 안내서를 완성하였습니다.

Erika Heppner

회원 가입일: 02/21/18

316 평판

안내서 4개 작성하였습니다

댓글 0개

댓글 쓰기

조회 통계:

24 시간 전: 0

7일 전: 0

30일 전: 1

전체 시간: 250