주요 콘텐츠로 건너뛰기

이 버전에는 잘못된 편집 사항이 있을 수 있습니다. 최신 확인된 스냅샷으로 전환하십시오.

필요한 것

  1. 이 단계는 번역되지 않았습니다. 번역을 도와주십시오

    : 1 단계, 이미지 1/1
    • Remove the phone's back cover by placing your thumb the above charging port, located at the bottom of the phone, and sliding the back cover upward.

  2. 이 단계는 번역되지 않았습니다. 번역을 도와주십시오

    : 2 단계, 이미지 1/2 : 2 단계, 이미지 2/2
    • Gently pry the battery out of the phone with the spudger.

  3. 이 단계는 번역되지 않았습니다. 번역을 도와주십시오

    : 3 단계, 이미지 1/1
    • Unscrew the 5 #1 5mm screws.

  4. 이 단계는 번역되지 않았습니다. 번역을 도와주십시오

    : 4 단계, 이미지 1/1
    • Lift the inner shell from the phone.

  5. 이 단계는 번역되지 않았습니다. 번역을 도와주십시오

    : 5 단계, 이미지 1/1
    • Unscrew two 2mm #00 screws located behind the white serial code sticker.

  6. 이 단계는 번역되지 않았습니다. 번역을 도와주십시오

    : 6 단계, 이미지 1/1
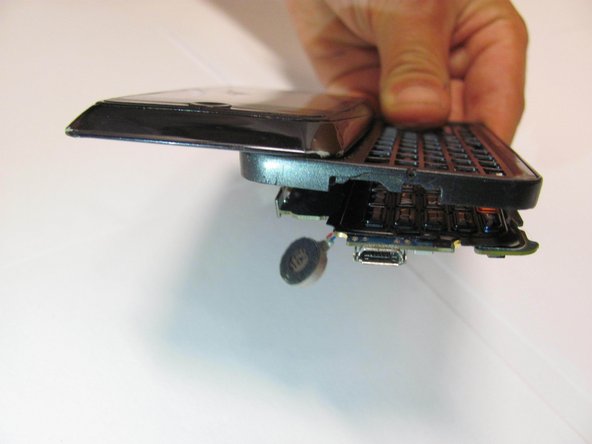
    • Disconnect the ribbon found in the middle of the phone

    • Gently pull the ribbon out of the way.

  7. 이 단계는 번역되지 않았습니다. 번역을 도와주십시오

    : 7 단계, 이미지 1/2 : 7 단계, 이미지 2/2
    • Slide open the phone, revealing the QWERTY keyboard.

  8. 이 단계는 번역되지 않았습니다. 번역을 도와주십시오

    : 8 단계, 이미지 1/2 : 8 단계, 이미지 2/2
    • Carefully push the mother board through by pressing into the keyboard.

  9. 이 단계는 번역되지 않았습니다. 번역을 도와주십시오

    : 9 단계, 이미지 1/1
    • The mother board will fall out of the back along with the silicon keyboard pad.

결승점

다른 한 분이 해당 안내서를 완성하였습니다.

Jose Rivas

회원 가입일: 01/14/14

134 평판

안내서 1개 작성함

Cal Poly, Team 17-2, Forte Winter 2014 Cal Poly, Team 17-2, Forte Winter 2014 회원

CPSU-FORTE-W14S17G2

5 회원들

안내서 12개 작성하였습니다

댓글 0개

댓글 쓰기

조회 통계:

24 시간 전: 0

7일 전: 5

30일 전: 8

전체 시간: 718