이 버전에는 잘못된 편집 사항이 있을 수 있습니다. 최신 확인된 스냅샷으로 전환하십시오.
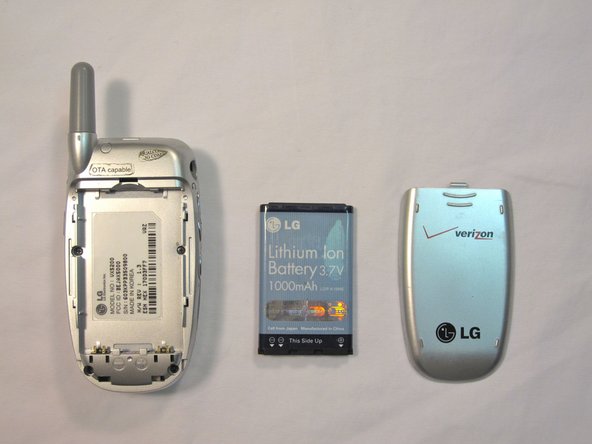
필요한 것
-
이 단계는 번역되지 않았습니다. 번역을 도와주십시오
-
Orient the phone as shown.
-
Remove the battery cover by pushing upward with your thumb.
-
-
이 단계는 번역되지 않았습니다. 번역을 도와주십시오
-
Place your fingernail at the top of the battery and pry the battery out towards you.
-
-
이 단계는 번역되지 않았습니다. 번역을 도와주십시오
-
Flip the phone open.
-
Remove the four rubber plugs, located at the corners of the LCD screen, with a push-pin.
-
Use a Phillips #00 screwdriver to remove the four screws located underneath the rubber plugs.
-
-
이 단계는 번역되지 않았습니다. 번역을 도와주십시오
-
Insert the opening tool in the seam of the top portion of the flip phone.
-
Gently pry the seam open.
-
Move the opening tool around the perimeter of the seam and gently take the front LCD face plate out.
-
-
이 단계는 번역되지 않았습니다. 번역을 도와주십시오
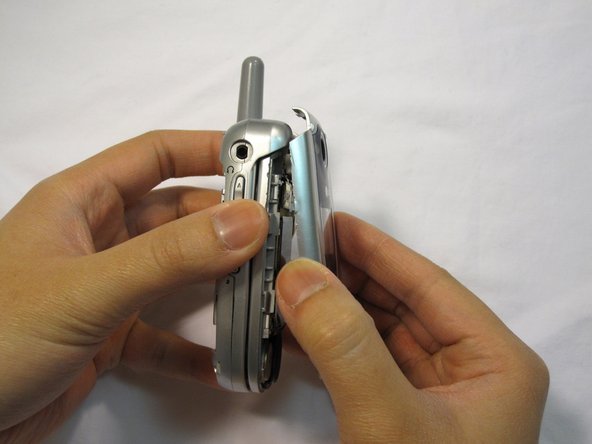
-
Close the flip phone.
-
Hold the base of the phone and gently remove the faceplate.
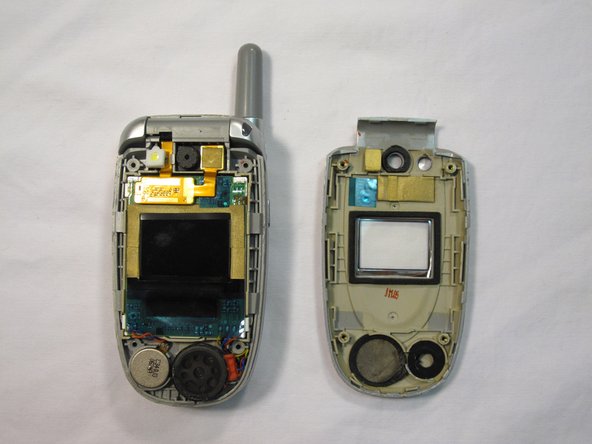
-
Place the phone and the faceplate on a clean, flat surface.
-


다른 한 분이 해당 안내서를 완성하였습니다.

팀

Cal Poly, Team 4-13, Forte Winter 2010 Cal Poly, Team 4-13, Forte Winter 2010 회원
CPSU-FORTE-W10S4G13
5 회원들
안내서 15개 작성하였습니다