이 버전에는 잘못된 편집 사항이 있을 수 있습니다. 최신 확인된 스냅샷으로 전환하십시오.
필요한 것
-
이 단계는 번역되지 않았습니다. 번역을 도와주십시오
-
Remove the battery cover by placing your thumb on the small ridge near the top of the phone back and push downward, exposing the battery.
-
Remove the battery using your finger to pry it out of the battery housing.
-
-
이 단계는 번역되지 않았습니다. 번역을 도와주십시오
-
Remove the (2) rubber screw covers located near the hinge of the phone using tweezers or a thumb tack.
-
Unscrew the (4) 3.6mm screws using a #00 Phillip's head screw driver.
-
-
이 단계는 번역되지 않았습니다. 번역을 도와주십시오
-
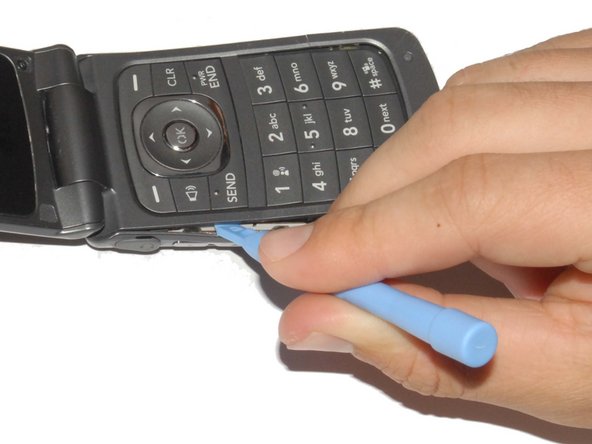
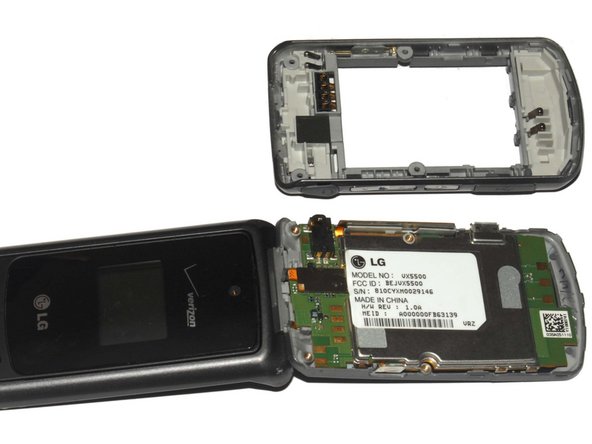
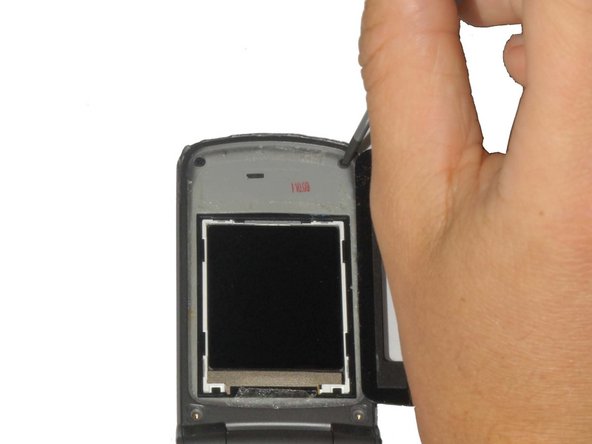
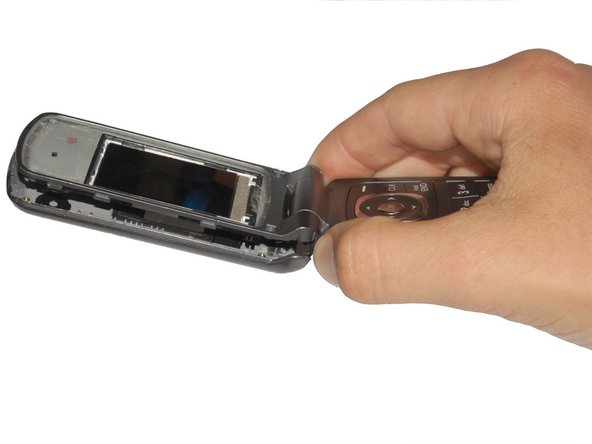
Carefully pry off the phone's backing using a plastic opening tool.
-
Slip the tool into the crack between the keypad (front panel) and the back panel.
-
Slide the tool along the sides of the phone to detach the tabs holding the backing on.
-
-
이 단계는 번역되지 않았습니다. 번역을 도와주십시오
-
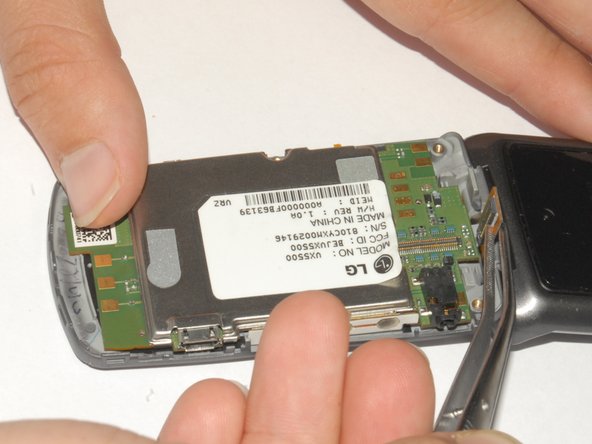
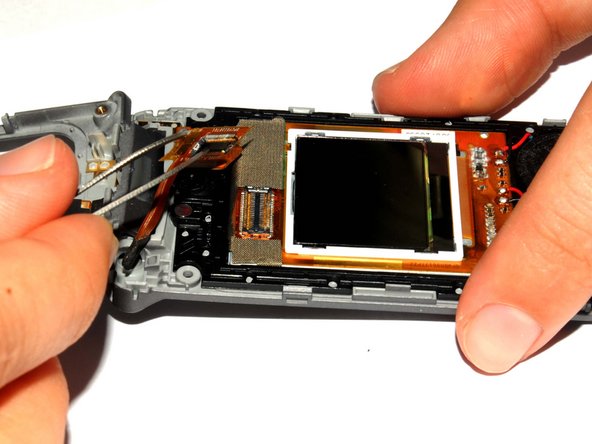
Peel back the sticker with tweezers and hold it back with your finger.
-
Use the tweezers to lift the display adapter off the logic board.
-
-
이 단계는 번역되지 않았습니다. 번역을 도와주십시오
-
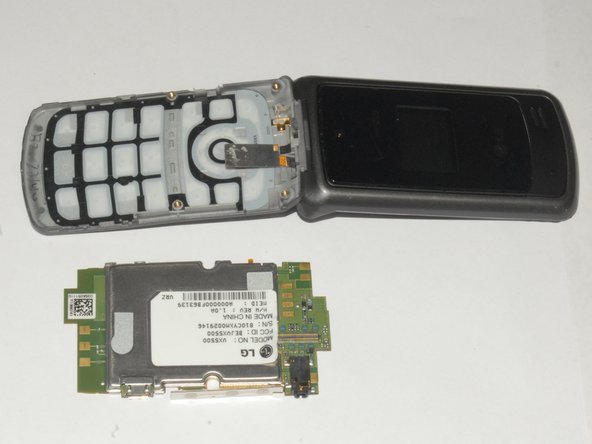
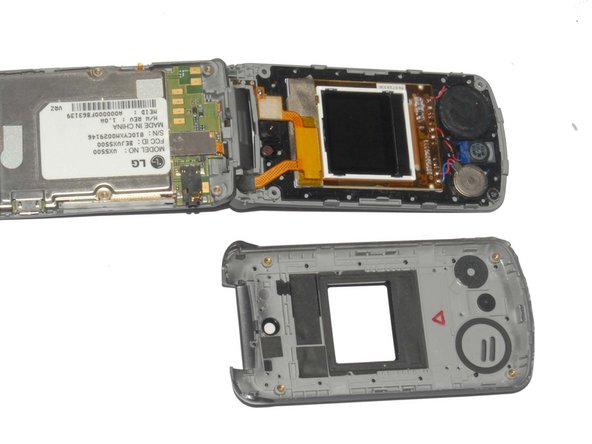
Lift the mother board out of the phone casing.
-
The keyboard can be easily removed once the mother board is out of the phone.
-
-
-
이 단계는 번역되지 않았습니다. 번역을 도와주십시오
-
Carefully pry off the black plastic screen cover using the iSesamo tool or another thin, flat tool.
-
-
이 단계는 번역되지 않았습니다. 번역을 도와주십시오
-
Unscrew the (4) 3.6mm screws near each corner of the phone's display panel by using a #00 Phillips head screwdriver.
-
-
이 단계는 번역되지 않았습니다. 번역을 도와주십시오
-
Pry off the front panel of the phone using a Plastic Opening Tool.
-
Push the tool into the crack along the side of the phone.
-
Slide the tool along the crack to detach the tabs holding the backing on the phone.
-
-
이 단계는 번역되지 않았습니다. 번역을 도와주십시오
-
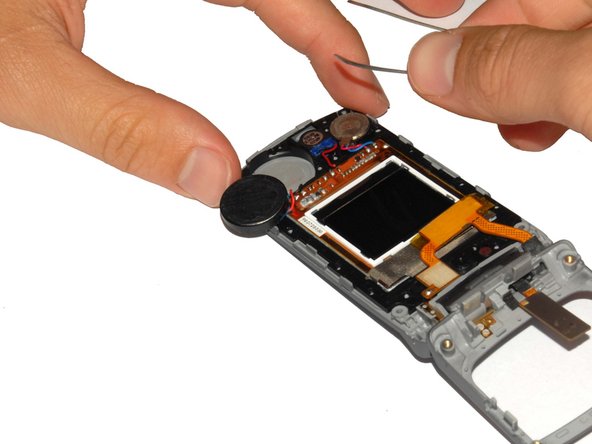
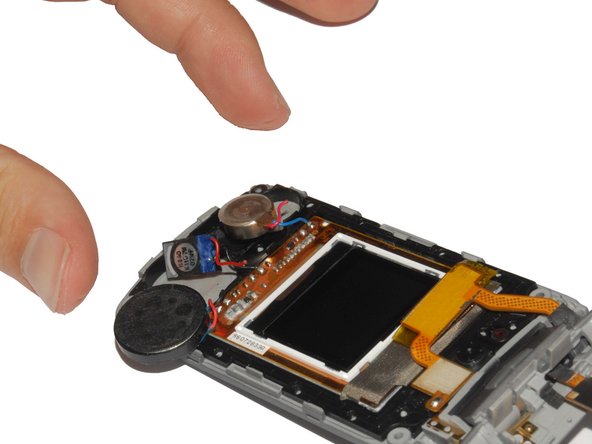
Remove the earpiece and gyroscope by lifting them out of the phone casing using tweezers.
-
-
이 단계는 번역되지 않았습니다. 번역을 도와주십시오
-
The phone is now fully disassembled.
-
Replace the parts indicated with your new phone casing.
-


다른 3명이 해당 안내서를 완성하였습니다.

팀

Cal Poly, Team 7-33, Maness Spring 2012 Cal Poly, Team 7-33, Maness Spring 2012 회원
CPSU-MANESS-S12S7G33
4 회원들
안내서 10개 작성하였습니다