필요한 것
-
이 단계는 번역되지 않았습니다. 번역을 도와주십시오
-
Locate the horizontal grip located on the back cover of the phone.
-
Slide the back cover down and off of the phone.
-
-
이 단계는 번역되지 않았습니다. 번역을 도와주십시오
-
Insert a plastic opening tool into the battery release point located above the battery.
-
Pull outwards in order to release the battery.
-
-
이 단계는 번역되지 않았습니다. 번역을 도와주십시오
-
Locate the 5 screws holding the body of the phone together.
-
Using a Philips head screwdriver, twist counterclockwise to remove the screws.
-
Take special care with the screw located at the top of the phone. It is smaller and more likely to be damaged or improperly attached.
-
-
-
이 단계는 번역되지 않았습니다. 번역을 도와주십시오
-
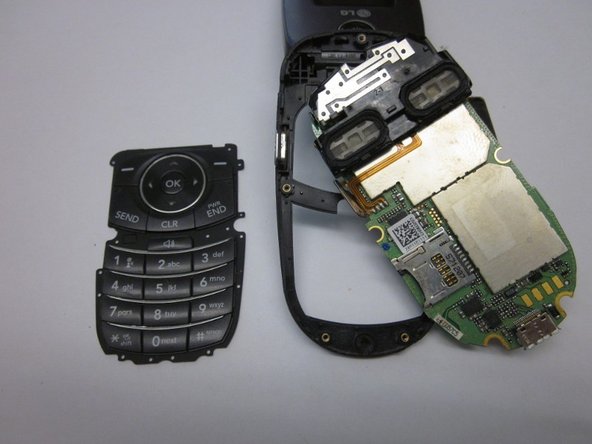
Locate the clamp at bottom right side of the Circuit Board.
-
Pull the circuit board from the phone being cautious to pull out underneath the clamp.
-
-
이 단계는 번역되지 않았습니다. 번역을 도와주십시오
-
Locate the ribbon connecting the circuit board to the phone display.
-
Using the spudger, disconnect the ribbon connecting the phone's display and the circuit board.
-
Remove the circuit board
-
-
이 단계는 번역되지 않았습니다. 번역을 도와주십시오
-
Locate the two rubber circles covering the screws.
-
Remove the rubber covers using tweezers.
-
Using the Phillips head screwdriver, unscrew and remove the two screws.
-
-
이 단계는 번역되지 않았습니다. 번역을 도와주십시오
-
Close the phone and gently pull outwards from the bottom left portion of the phone cover.
-
Completely remove the cover from the phone.
-


팀

Clemson, Team 14-7, Benson Fall 2013 Clemson, Team 14-7, Benson Fall 2013 회원
CLEM-BENSON-F13S14G7
3 회원들
안내서 16개 작성하였습니다