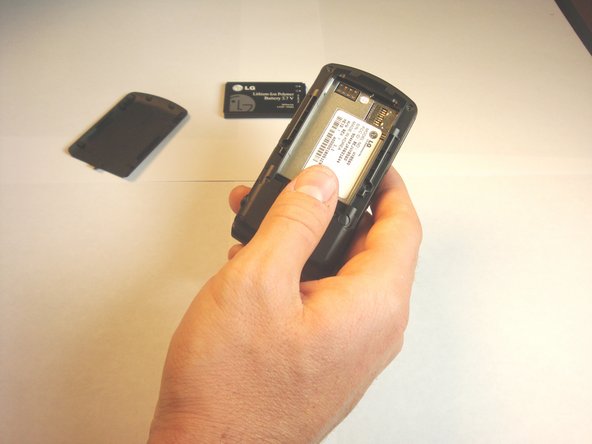
주요 콘텐츠로 건너뛰기

LG VX8560 Side Key Replacement

필요한 것

  1. LG VX8560 Side Key Replacement, Battery: 1 단계, 이미지 1/1
    • Flip the phone over so its backside is facing up

  2. LG VX8560 Side Key Replacement: 2 단계, 이미지 1/1
    • Push the battery cover from the indentation and slide the battery cover away from phone to remove battery cover

  3. LG VX8560 Side Key Replacement: 3 단계, 이미지 1/2 LG VX8560 Side Key Replacement: 3 단계, 이미지 2/2
    • Remove the battery from the phone

  4. LG VX8560 Side Key Replacement, Side Keys: 4 단계, 이미지 1/2 LG VX8560 Side Key Replacement, Side Keys: 4 단계, 이미지 2/2
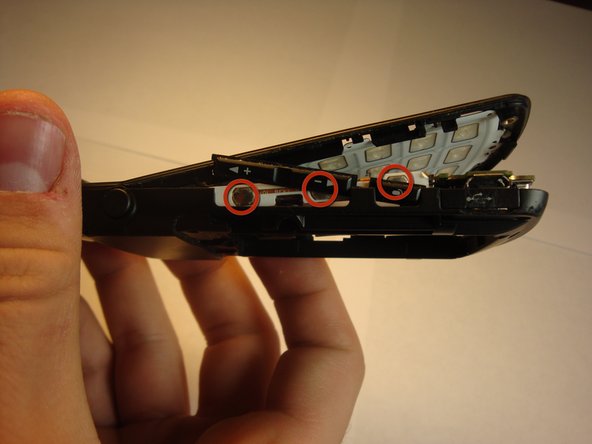
    • Using a Phillips #00 screwdriver, remove all four screws that are visible along the edge of the phone

  5. LG VX8560 Side Key Replacement: 5 단계, 이미지 1/3 LG VX8560 Side Key Replacement: 5 단계, 이미지 2/3 LG VX8560 Side Key Replacement: 5 단계, 이미지 3/3
    • Find the seam between the phone’s keypad cover and back cover, and slide a plastic pry tool along the edge to gently pry the two pieces apart without completely separating them.

    • The motherboard should be visible. Do not separate the two covers. They should be held together by a screw at the axis of the phone.

  6. LG VX8560 Side Key Replacement: 6 단계, 이미지 1/2 LG VX8560 Side Key Replacement: 6 단계, 이미지 2/2
    • Place the side keys so that they are aligned with the silver circles located on the side of the motherboard.

결론

To reassemble your device, follow these instructions in reverse order.

다른 한 분이 해당 안내서를 완성하였습니다.

Kevin

회원 가입일: 04/18/13

7 평판

안내서 2개 작성하였습니다

Cal Poly, Team 13-62, Johann Spring 2013 Cal Poly, Team 13-62, Johann Spring 2013 회원

CPSU-JOHANN-S13S13G62

4 회원들

안내서 12개 작성하였습니다

댓글 0개

댓글 쓰기

조회 통계:

24 시간 전: 0

7일 전: 8

30일 전: 21

전체 시간: 232