주요 콘텐츠로 건너뛰기
수리 커뮤니티 가입 - 계정 만들기

LG Xenon LCD Replacement

필요한 것

  1. LG Xenon LCD Replacement, Back Case: 1 단계, 이미지 1개 중 1개
    • Turn the phone so the back side is face up.

  2. LG Xenon LCD Replacement: 2 단계, 이미지 2개 중 1개 LG Xenon LCD Replacement: 2 단계, 이미지 2개 중 2개
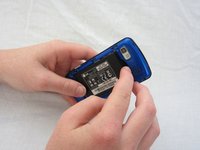
    • Use your thumb to press on the small ridge at the bottom of the phone, then push upward to slide off the back casing.

  3. LG Xenon LCD Replacement, Battery: 3 단계, 이미지 2개 중 1개 LG Xenon LCD Replacement, Battery: 3 단계, 이미지 2개 중 2개
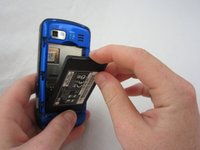
    • Use your index finger to pull the top of the battery out from the top center divot. Then pull the battery towards yourself to remove it from the compartment.

  4. LG Xenon LCD Replacement, Motherboard: 4 단계, 이미지 2개 중 1개 LG Xenon LCD Replacement, Motherboard: 4 단계, 이미지 2개 중 2개
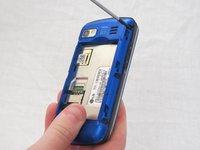
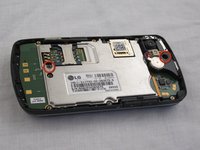
    • Use a Phillips #00 screwdriver to remove the six 2.4mm screws, which secure the back panel.

  5. LG Xenon LCD Replacement: 5 단계, 이미지 1개 중 1개
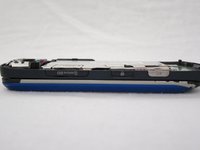
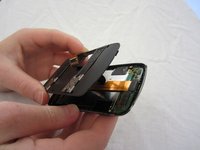
    • Push a spudger or small tool under the inner edge of the back panel and gently pry upward to separate it from the main body.

  6. LG Xenon LCD Replacement: 6 단계, 이미지 2개 중 1개 LG Xenon LCD Replacement: 6 단계, 이미지 2개 중 2개
    • Pop off the camera, lock, and volume buttons from the side of the phone using tweezers.

  7. LG Xenon LCD Replacement: 7 단계, 이미지 2개 중 1개 LG Xenon LCD Replacement: 7 단계, 이미지 2개 중 2개
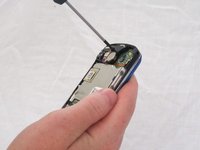
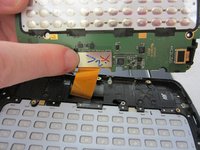
    • Use the Phillips #00 screwdriver to remove the two 3mm screws, which secure the motherboard.

  8. LG Xenon LCD Replacement: 8 단계, 이미지 2개 중 1개 LG Xenon LCD Replacement: 8 단계, 이미지 2개 중 2개
    • Carefully lift and remove the motherboard from the main body.

    • The connector cable will still be attached to the motherboard. Any damage to the connector cable may permanently disable the phone.

  9. LG Xenon LCD Replacement: 9 단계, 이미지 2개 중 1개 LG Xenon LCD Replacement: 9 단계, 이미지 2개 중 2개
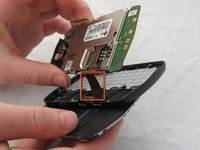
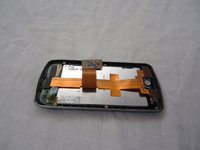
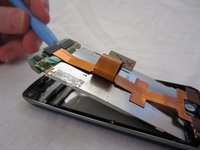
    • Carefully unclip the metal tab to separate the connector cable from the motherboard.

  10. LG Xenon LCD Replacement: 10 단계, 이미지 2개 중 1개 LG Xenon LCD Replacement: 10 단계, 이미지 2개 중 2개
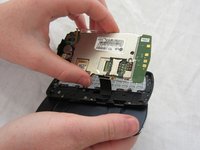
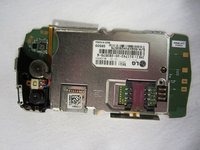
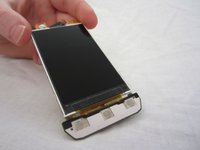
    • Once the connector cable is detached from the motherboard, you have successfully removed the motherboard from the phone.

  11. LG Xenon LCD Replacement, Keyboard: 11 단계, 이미지 1개 중 1개
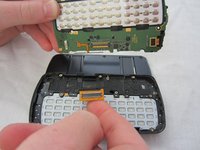
    • Turn the motherboard over and carefully remove the keypad from the motherboard.

    • The keyboard may be sitting loosely in the case (not attached to the motherboard). Carefully remove keyboard from case.

  12. LG Xenon LCD Replacement, LCD: 12 단계, 이미지 1개 중 1개
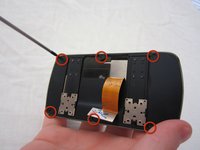
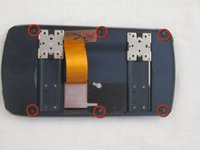
    • After removing the motherboard and keyboard, unscrew eight 1.6mm Phillips #00 screws in the middle of the phone.

  13. LG Xenon LCD Replacement: 13 단계, 이미지 1개 중 1개
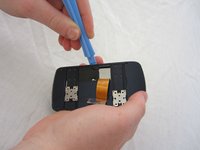
    • Remove slider piece.

    • Pay close attention that you don’t lose the spring.

    • Carefully remove the spring.

  14. LG Xenon LCD Replacement: 14 단계, 이미지 2개 중 1개 LG Xenon LCD Replacement: 14 단계, 이미지 2개 중 2개
    • Remove six 2.25mm Phillips #00 screws along the outside of the case.

  15. LG Xenon LCD Replacement: 15 단계, 이미지 2개 중 1개 LG Xenon LCD Replacement: 15 단계, 이미지 2개 중 2개
    • Using the plastic opening tool, carefully open and remove the case. Slide the tool along the edge and pry upwards to open.

  16. LG Xenon LCD Replacement: 16 단계, 이미지 1개 중 1개
    • Remove the black electrical tape holding the LCD to the screen.

  17. LG Xenon LCD Replacement: 17 단계, 이미지 1개 중 1개
    • Un-clasp the small tab in the top right corner.

  18. LG Xenon LCD Replacement: 18 단계, 이미지 3개 중 1개 LG Xenon LCD Replacement: 18 단계, 이미지 3개 중 2개 LG Xenon LCD Replacement: 18 단계, 이미지 3개 중 3개
    • Unhook the LCD from tabs on the bottom using the plastic opening tool.

    • Remove the LCD. Be careful, the LCD screen is fragile.

결론

To reassemble your device, follow these instructions in reverse order.

다른 2명이 해당 안내서를 완성하였습니다.

작성자

7다른 기여자 명과 함께

Micaela Saqui

회원 가입일: 04/19/12

78 평판

안내서 7개를 작성함

Cal Poly, Team 9-41, Regan Spring 2012 Cal Poly, Team 9-41, Regan Spring 2012 회원

CPSU-REGAN-S12S9G41

5 회원들

안내서 19개를 작성함

0가이드 댓글

댓글 쓰기

조회 통계:

지난 24시간: 1

지난 7일: 10

지난 30일: 27

전체 시간: 2,667