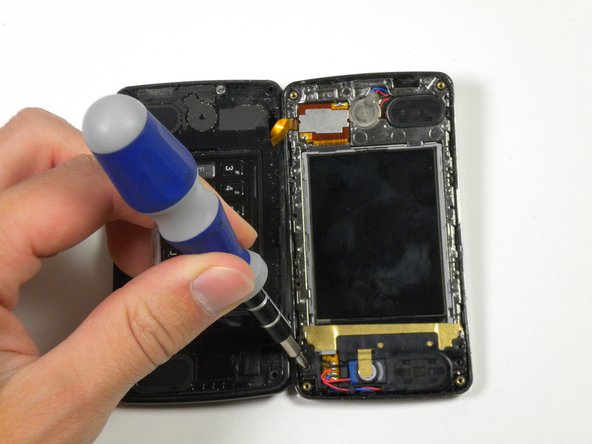
주요 콘텐츠로 건너뛰기

LG env2 vx9100 Front Panel Replacement

필요한 것

  1. LG env2 vx9100 Front Panel Replacement, Battery: 1 단계, 이미지 1/3 LG env2 vx9100 Front Panel Replacement, Battery: 1 단계, 이미지 2/3 LG env2 vx9100 Front Panel Replacement, Battery: 1 단계, 이미지 3/3
    • Before disassembling your phone, be sure it is powered off to avoid minor electric shock or possible fire.

    • Place the phone face down on the table.

    • Use your fingernail or an opening tool to pull down the tab below the battery.

    • Lift the battery out.

  2. LG env2 vx9100 Front Panel Replacement, Back Panel: 2 단계, 이미지 1/2 LG env2 vx9100 Front Panel Replacement, Back Panel: 2 단계, 이미지 2/2
    • Locate the five rubber covers on the back panel of the phone.

    • Use the metal probe to pop out each rubber cover to reveal the screws underneath.

  3. LG env2 vx9100 Front Panel Replacement: 3 단계, 이미지 1/2 LG env2 vx9100 Front Panel Replacement: 3 단계, 이미지 2/2
    • Locate the six 2.5mm screws on the back panel of the phone.

    • Use a #00 Phillips screwdriver to remove each 2.5mm screw.

  4. LG env2 vx9100 Front Panel Replacement: 4 단계, 이미지 1/2 LG env2 vx9100 Front Panel Replacement: 4 단계, 이미지 2/2
    • Locate the seam around the edge of the phone.

    • Insert the plastic opening tool into the seam and pry gently to release the tabs.

    • Work your way around the phone until all tabs are released.

    • Remove the back panel of the phone.

  5. LG env2 vx9100 Front Panel Replacement, Front Panel: 5 단계, 이미지 1/2 LG env2 vx9100 Front Panel Replacement, Front Panel: 5 단계, 이미지 2/2
    • Use a spudger to pry the two rubber covers out of the device.

  6. LG env2 vx9100 Front Panel Replacement: 6 단계, 이미지 1/2 LG env2 vx9100 Front Panel Replacement: 6 단계, 이미지 2/2
    • Use a Phillips #00 screwdriver to remove two 2.5 mm screws.

  7. LG env2 vx9100 Front Panel Replacement: 7 단계, 이미지 1/2 LG env2 vx9100 Front Panel Replacement: 7 단계, 이미지 2/2
    • Use a Phillips #00 screwdriver to remove two 2.5 mm screws.

    • These screws will not be visible or accessible unless the two sides of the phone are at approximately 90 degrees relative to each other.

  8. LG env2 vx9100 Front Panel Replacement: 8 단계, 이미지 1/2 LG env2 vx9100 Front Panel Replacement: 8 단계, 이미지 2/2
    • Insert the plastic opening tool in the crease and move it along each edge of the phone.

    • Separate the front panel from the rest of the phone.

    • Be careful not to damage the orange ribbon that connects to the motherboard through the hinge in the phone. If the ribbon is damaged, the phone will not function properly.

    • Open the phone to reveal the inside monitor.

  9. LG env2 vx9100 Front Panel Replacement: 9 단계, 이미지 1/3 LG env2 vx9100 Front Panel Replacement: 9 단계, 이미지 2/3 LG env2 vx9100 Front Panel Replacement: 9 단계, 이미지 3/3
    • Use a Phillips #00 screwdriver to remove two 2.5mm screws.

    • Using your hands, separate the front panel from the phone by carefully pulling it straight off.

결론

To reassemble your device, follow these instructions in reverse order.

Reed Williston

회원 가입일: 09/26/12

34 평판

안내서 7개 작성하였습니다

Cal Poly, Team 16-55, Forte Fall 2012 Cal Poly, Team 16-55, Forte Fall 2012 회원

CPSU-FORTE-F12S16G55

5 회원들

안내서 14개 작성하였습니다

댓글 0개

댓글 쓰기

조회 통계:

24 시간 전: 1

7일 전: 1

30일 전: 4

전체 시간: 1,533