주요 콘텐츠로 건너뛰기

Lasko CD08200 Disassembly

필요한 것

  1. Lasko CD08200 Disassembly, Lasko CD08200 Disassembly: 1 단계, 이미지 1/2 Lasko CD08200 Disassembly, Lasko CD08200 Disassembly: 1 단계, 이미지 2/2
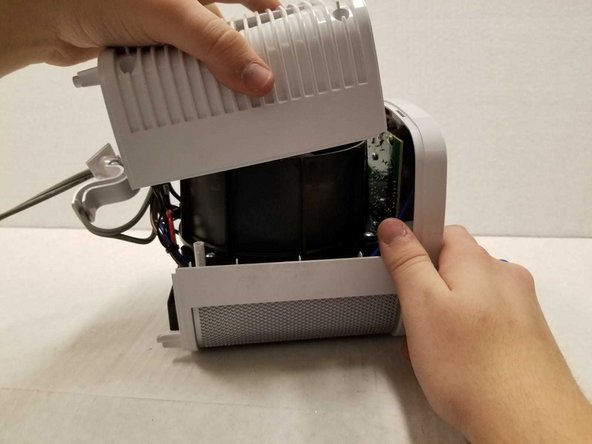
    • Turn over the device and place it on its head.

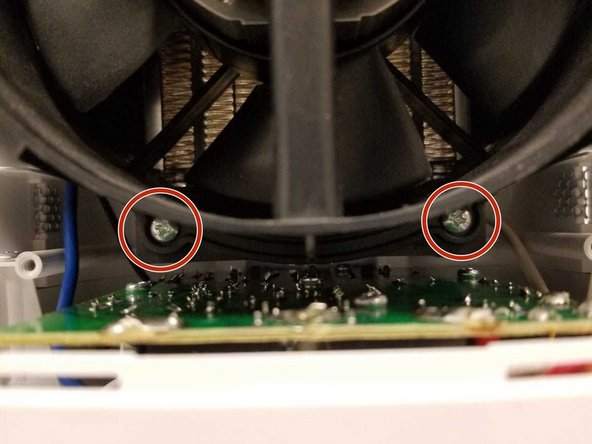
    • Remove the four 14mm screws holding the bottom using a TR15 screwdriver.
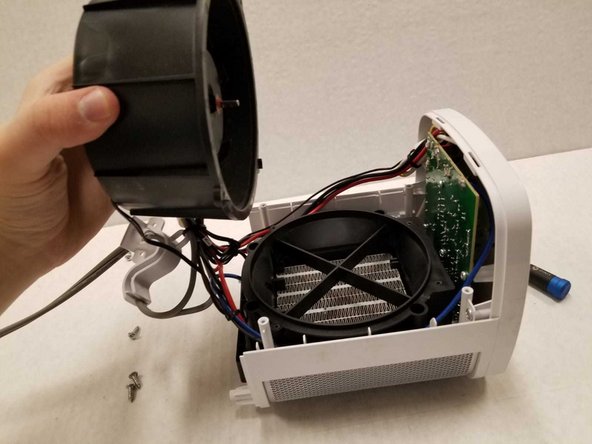
  2. Lasko CD08200 Disassembly: 2 단계, 이미지 1/1
    • Remove both 14mm screws from the power cord casing using a Phillips #2 screwdriver.

    • Remove the power cord casing from the device case.

  3. Lasko CD08200 Disassembly: 3 단계, 이미지 1/3 Lasko CD08200 Disassembly: 3 단계, 이미지 2/3 Lasko CD08200 Disassembly: 3 단계, 이미지 3/3
    • Cut the sticker on the right side of the device using a Jimmy.

    • Unscrew the four 14mm screws with a Phillips #2 bit on the back of the device.

    • If your screwdriver cannot reach the screw, you can use the metal spudger.

    • Remove the back casing from the device.

  4. Lasko CD08200 Disassembly: 4 단계, 이미지 1/3 Lasko CD08200 Disassembly: 4 단계, 이미지 2/3 Lasko CD08200 Disassembly: 4 단계, 이미지 3/3
    • Remove the four 14mm screws housing the fan using the Phillips #2 screwdriver.

    • Remove the top of the fan housing with the fan attached and place it on the table.

결론

To reassemble your device, follow these instructions in reverse order.

Artur Komissarov

회원 가입일: 01/14/20

382 평판

안내서 2개 작성하였습니다

York University, Team S1-G1, Woodhouse Winter 2020 York University, Team S1-G1, Woodhouse Winter 2020 회원

YORK-WOODHOUSE-W20S1G1

3 회원들

안내서 9개 작성하였습니다

댓글 0개

댓글 쓰기

조회 통계:

24 시간 전: 0

7일 전: 3

30일 전: 8

전체 시간: 256