이 버전에는 잘못된 편집 사항이 있을 수 있습니다. 최신 확인된 스냅샷으로 전환하십시오.
필요한 것
-
이 단계는 번역되지 않았습니다. 번역을 도와주십시오
-
Flip over the Pad to its back side to begin the removal of the back panel.
-
Begin by removing the blue rim along the edge of the device. It runs along the green silicone lining.
-
-
이 단계는 번역되지 않았습니다. 번역을 도와주십시오
-
Once the blue rim is removed, the 12 screws will be visible.
-
Use the Phillips #1 screwdriver to unscrew all 12 screws.
-
-
-
이 단계는 번역되지 않았습니다. 번역을 도와주십시오
-
Begin with the removal of the battery from its place.
-
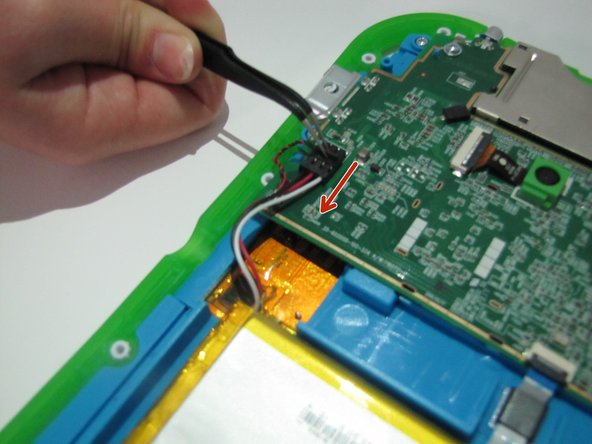
Flip the black switch that is connecting the battery to the motherboard.
-
Then pull gently and should disconnect.
-
-
이 단계는 번역되지 않았습니다. 번역을 도와주십시오
-
Remove the black and white ribbon structures from the side of the motherboard.
-
Next, remove the three screws along the corners of the motherboard using the Phillips # 1 screwdriver.
-
-
이 단계는 번역되지 않았습니다. 번역을 도와주십시오
-
Use a Phillips #1 screwdriver to unscrew the 7 screws from the speaker with the bronze plate sound board.
-
Unscrew the 8 screws from the blue sub-panel.
-
-
이 단계는 번역되지 않았습니다. 번역을 도와주십시오
-
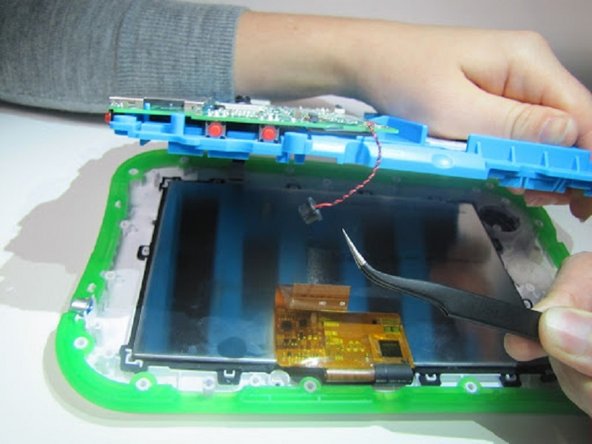
Take off the sub-panel exposing the motherboard.
-
Flip the motherboard on its back side and flip the switch to remove the wide orange ribbon and pull the twisted black and white wires from its place.
-


