주요 콘텐츠로 건너뛰기

이 버전에는 잘못된 편집 사항이 있을 수 있습니다. 최신 확인된 스냅샷으로 전환하십시오.

필요한 것

  1. 이 단계는 번역되지 않았습니다. 번역을 도와주십시오

    : 1 단계, 이미지 1/1
    • Unscrew the two 5.1 mm screws that secure the bottom cover.

    • Note that the screws will not come all the way out of the sockets.

  2. 이 단계는 번역되지 않았습니다. 번역을 도와주십시오

    : 2 단계, 이미지 1/1
    • Lift from the notch until the back panel comes up.

  3. 이 단계는 번역되지 않았습니다. 번역을 도와주십시오

    : 3 단계, 이미지 1/3 : 3 단계, 이미지 2/3 : 3 단계, 이미지 3/3
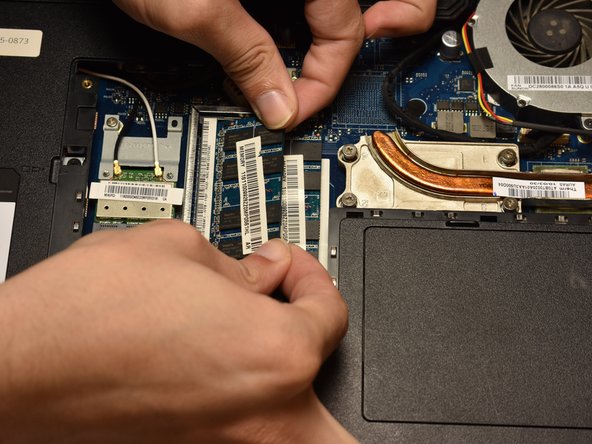
    • Push apart hinges shown in picture until RAM pushes itself up to approximately a 30 degree angle.

  4. 이 단계는 번역되지 않았습니다. 번역을 도와주십시오

    : 4 단계, 이미지 1/1
    • Pull the RAM stick out of its socket.

  5. 이 단계는 번역되지 않았습니다. 번역을 도와주십시오

    : 5 단계, 이미지 1/1
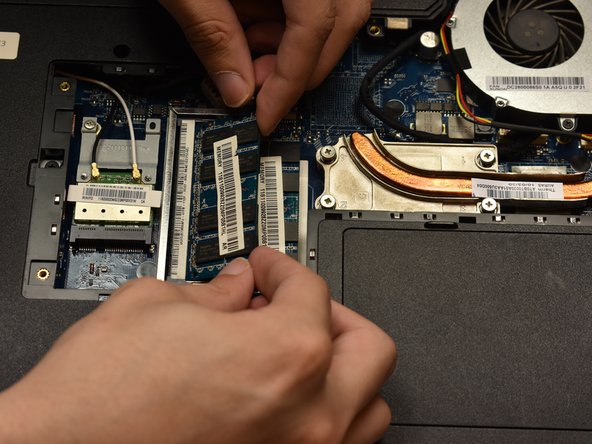
    • Push apart hinges of lower RAM stick until it pops up to a similar angle.

  6. 이 단계는 번역되지 않았습니다. 번역을 도와주십시오

    : 6 단계, 이미지 1/1
    • Pull out second RAM stick in the same way as the first.

  7. 이 단계는 번역되지 않았습니다. 번역을 도와주십시오

    : 7 단계, 이미지 1/2 : 7 단계, 이미지 2/2
    • Push RAM sticks in diagonally, then push down and snap it in with hinges.

    • Make sure that the RAM stick is aligned with the notch on the port when inserting it.

결승점

다른 한 분이 해당 안내서를 완성하였습니다.

Michael Elledge

회원 가입일: 02/05/19

869 평판

안내서 7개 작성하였습니다

댓글 0개

댓글 쓰기

조회 통계:

24 시간 전: 1

7일 전: 4

30일 전: 6

전체 시간: 239