주요 콘텐츠로 건너뛰기

Lenovo Flex 2-14 Hard Drive Replacement

필요한 것

  1. Lenovo Flex 2-14 Hard Drive Replacement, Hard Drive: 1 단계, 이미지 1/3 Lenovo Flex 2-14 Hard Drive Replacement, Hard Drive: 1 단계, 이미지 2/3 Lenovo Flex 2-14 Hard Drive Replacement, Hard Drive: 1 단계, 이미지 3/3
    • Make sure your laptop is off before you begin.

    • Flip the laptop over so the bottom is facing upwards.

    • Remove all nine 6mm Phillips #0 screws located along the edges and in the centre of the back panel.

  2. Lenovo Flex 2-14 Hard Drive Replacement: 2 단계, 이미지 1/2 Lenovo Flex 2-14 Hard Drive Replacement: 2 단계, 이미지 2/2
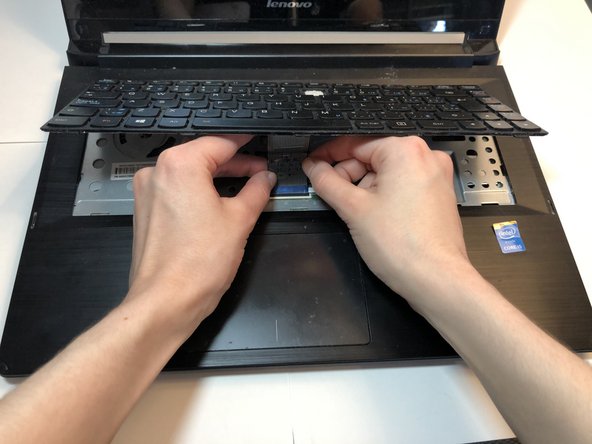
    • Using a prying tool, carefully lift up the keyboard.

  3. Lenovo Flex 2-14 Hard Drive Replacement: 3 단계, 이미지 1/3 Lenovo Flex 2-14 Hard Drive Replacement: 3 단계, 이미지 2/3 Lenovo Flex 2-14 Hard Drive Replacement: 3 단계, 이미지 3/3
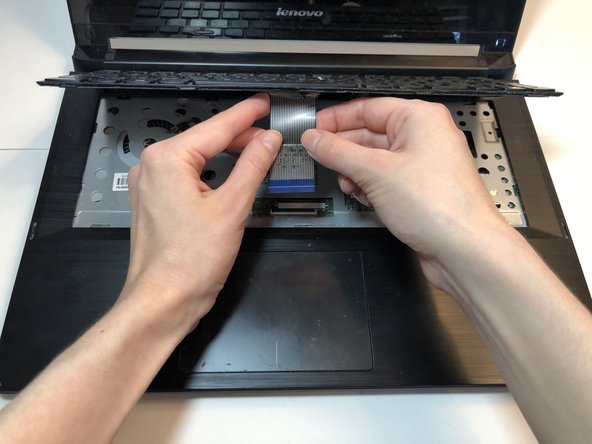
    • Take out the keyboard by disconnecting the cable.

  4. Lenovo Flex 2-14 Hard Drive Replacement: 4 단계, 이미지 1/2 Lenovo Flex 2-14 Hard Drive Replacement: 4 단계, 이미지 2/2
    • Remove all four 3.5 mm Phillips screws underneath the keyboard.

  5. Lenovo Flex 2-14 Hard Drive Replacement: 5 단계, 이미지 1/3 Lenovo Flex 2-14 Hard Drive Replacement: 5 단계, 이미지 2/3 Lenovo Flex 2-14 Hard Drive Replacement: 5 단계, 이미지 3/3
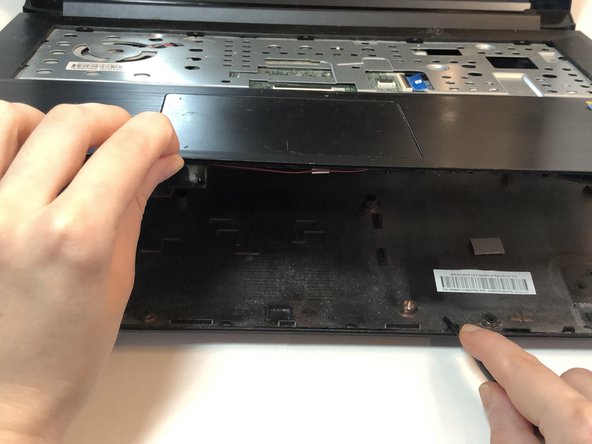
    • Separate the top and bottom panels of the laptop using a prying tool.

    • Slide the prying tool along the edges of the laptop until the bottom panel is completely separated.

    • Remove the back cover of the laptop once you have finished prying it open.

  6. Lenovo Flex 2-14 Hard Drive Replacement: 6 단계, 이미지 1/1
    • Remove the two 4 mm Phillips screws holding the hard drive adapter in place.

  7. Lenovo Flex 2-14 Hard Drive Replacement: 7 단계, 이미지 1/3 Lenovo Flex 2-14 Hard Drive Replacement: 7 단계, 이미지 2/3 Lenovo Flex 2-14 Hard Drive Replacement: 7 단계, 이미지 3/3
    • Take out the adapter containing the hard drive from the laptop.

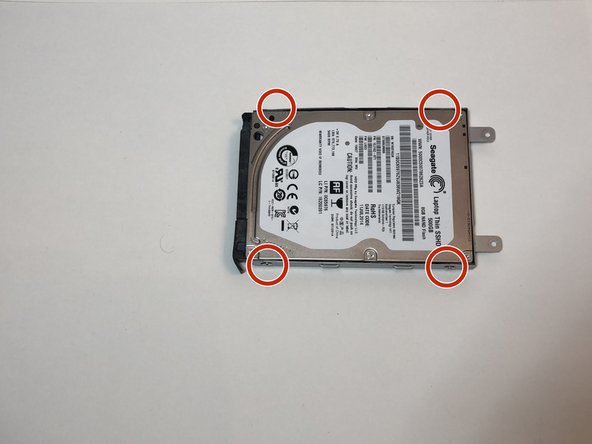
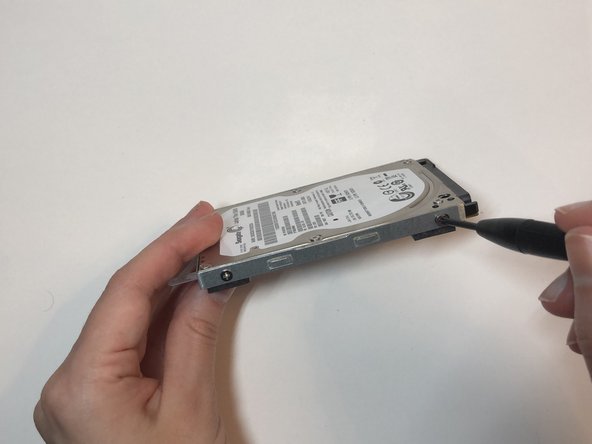
    • Remove all four 4mm Phillips screws from the adapter.

  8. Lenovo Flex 2-14 Hard Drive Replacement: 8 단계, 이미지 1/3 Lenovo Flex 2-14 Hard Drive Replacement: 8 단계, 이미지 2/3 Lenovo Flex 2-14 Hard Drive Replacement: 8 단계, 이미지 3/3
    • Remove the hard drive from the adapter.

    • Insert the new hard drive into the adapter.

  9. Lenovo Flex 2-14 Hard Drive Replacement: 9 단계, 이미지 1/3 Lenovo Flex 2-14 Hard Drive Replacement: 9 단계, 이미지 2/3 Lenovo Flex 2-14 Hard Drive Replacement: 9 단계, 이미지 3/3
    • Put all four 4mm Phillips screws back into the adapter with the hard drive, in order to hold it in place.

    • Put the adapter back in and reassemble the laptop.

    • Before reassembling, make sure the hard drive is securely in the case.

결론

To reassemble your device, follow these instructions in reverse order.

다른 2명이 해당 안내서를 완성하였습니다.

Eva Beilin

회원 가입일: 05/10/20

223 평판

안내서 1개 작성함

York University, Team S1-G3, O'Regan Summer 2020 York University, Team S1-G3, O'Regan Summer 2020 회원

YORK-O'REGAN-SU20S1G3

1 회원

안내서 1개 작성하였습니다

댓글 0개

댓글 쓰기

조회 통계:

24 시간 전: 0

7일 전: 9

30일 전: 56

전체 시간: 3,804