주요 콘텐츠로 건너뛰기

Lenovo Flex 6-11IGM Motherboard Replacement

보관된 가이드
해당 안내서는 단지 역사적인 목적으로 보관됩니다. 최신 버전 안내서를 사용하여 수리 하십시오.

필요한 것

  1. Lenovo Flex 6-11IGM Motherboard Replacement, Back Panel: 1 단계, 이미지 1/1
    • Flip the device over and lay it down with the underside facing upwards.

  2. Lenovo Flex 6-11IGM Motherboard Replacement: 2 단계, 이미지 1/2 Lenovo Flex 6-11IGM Motherboard Replacement: 2 단계, 이미지 2/2
    • Remove the ten screws with a Phillips #00 screwdriver.

  3. Lenovo Flex 6-11IGM Motherboard Replacement: 3 단계, 이미지 1/1
    • Using a plastic opening tool, make your way around the edge of the laptop.

  4. Lenovo Flex 6-11IGM Motherboard Replacement: 4 단계, 이미지 1/2 Lenovo Flex 6-11IGM Motherboard Replacement: 4 단계, 이미지 2/2
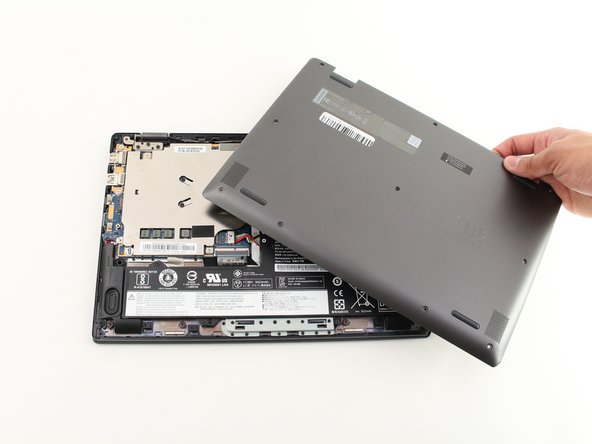
    • After making sure the back panel is completely free from the body, remove the back panel.

  5. Lenovo Flex 6-11IGM Motherboard Replacement, Speaker Unit: 5 단계, 이미지 1/3 Lenovo Flex 6-11IGM Motherboard Replacement, Speaker Unit: 5 단계, 이미지 2/3 Lenovo Flex 6-11IGM Motherboard Replacement, Speaker Unit: 5 단계, 이미지 3/3
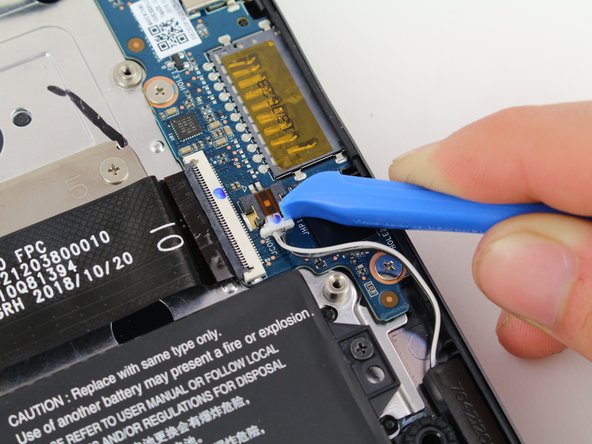
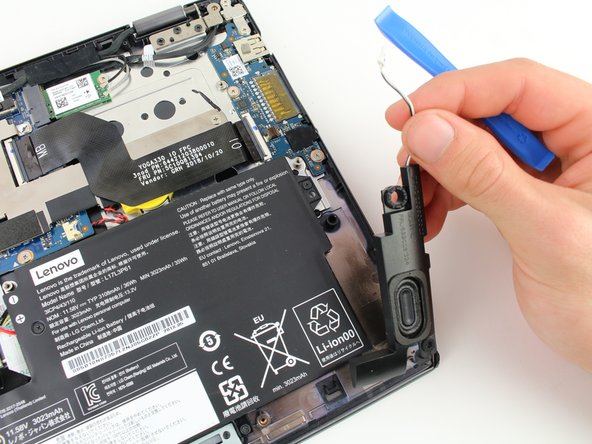
    • For the right speaker, disconnect the wire using the iFixit opening tool.

    • Pull the speaker out.

  6. Lenovo Flex 6-11IGM Motherboard Replacement: 6 단계, 이미지 1/2 Lenovo Flex 6-11IGM Motherboard Replacement: 6 단계, 이미지 2/2
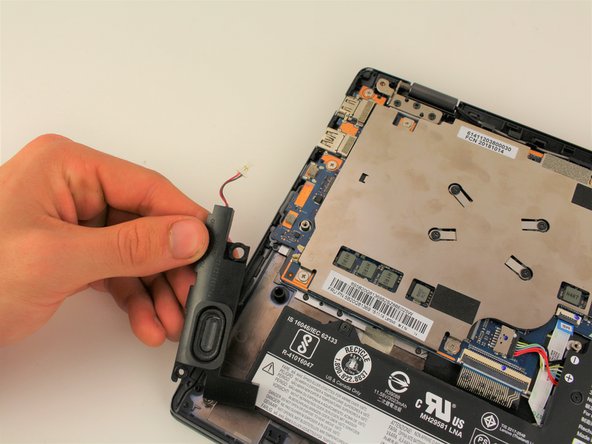
    • For the speaker on the left, disconnect the wire using the iFixit opening tool.

    • Pull the speaker out.

  7. Lenovo Flex 6-11IGM Motherboard Replacement, Battery: 7 단계, 이미지 1/2 Lenovo Flex 6-11IGM Motherboard Replacement, Battery: 7 단계, 이미지 2/2
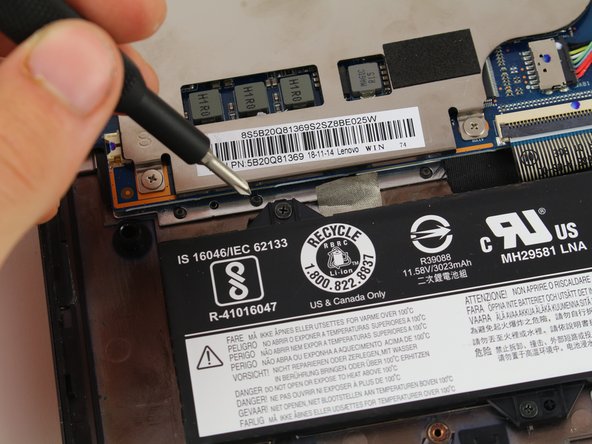
    • Remove the five 3.9 mm Phillips #00 black screws holding the battery in place.

  8. Lenovo Flex 6-11IGM Motherboard Replacement: 8 단계, 이미지 1/3 Lenovo Flex 6-11IGM Motherboard Replacement: 8 단계, 이미지 2/3 Lenovo Flex 6-11IGM Motherboard Replacement: 8 단계, 이미지 3/3
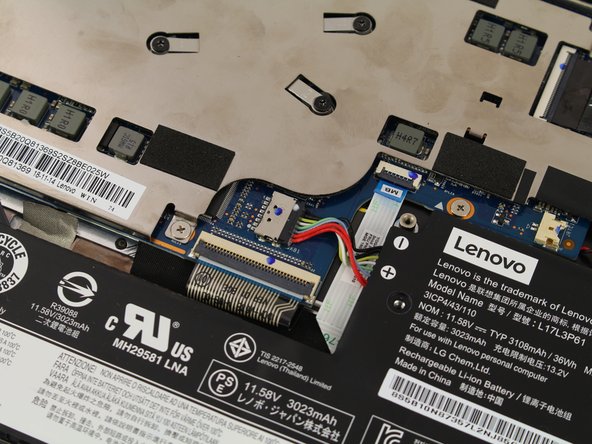
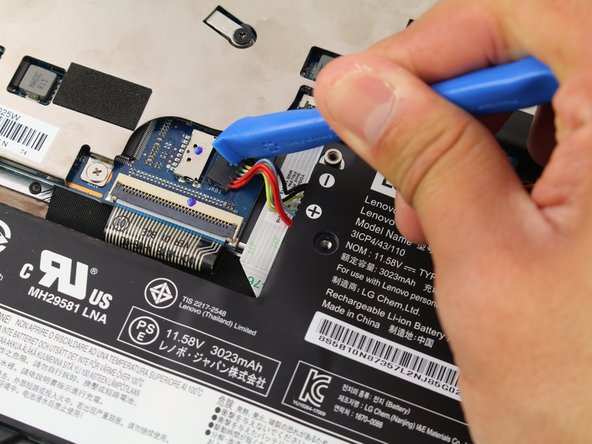
    • Pull out the multicolored connecting cables using an iFixit opening tool.

  9. Lenovo Flex 6-11IGM Motherboard Replacement: 9 단계, 이미지 1/1
    • Remove the now disconnected battery from the laptop.

  10. Lenovo Flex 6-11IGM Motherboard Replacement, Heat Sink: 10 단계, 이미지 1/3 Lenovo Flex 6-11IGM Motherboard Replacement, Heat Sink: 10 단계, 이미지 2/3 Lenovo Flex 6-11IGM Motherboard Replacement, Heat Sink: 10 단계, 이미지 3/3
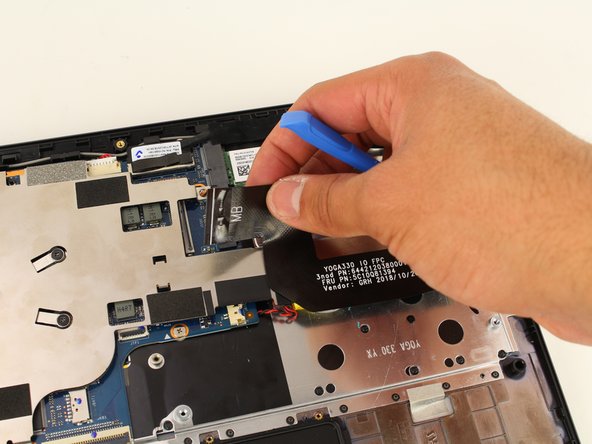
    • Disconnect the ribbon connector from both ends by disengaging the black latch and pulling it directly from its port.

  11. Lenovo Flex 6-11IGM Motherboard Replacement: 11 단계, 이미지 1/2 Lenovo Flex 6-11IGM Motherboard Replacement: 11 단계, 이미지 2/2
    • Remove the 3.5 mm length screws in the numbered order from 1-10 using the Phillips #00 screwdriver (not all are shown in the first image).

    • Remove the heat sink.

  12. Lenovo Flex 6-11IGM Motherboard Replacement, Auxiliary and USB Port: 12 단계, 이미지 1/3 Lenovo Flex 6-11IGM Motherboard Replacement, Auxiliary and USB Port: 12 단계, 이미지 2/3 Lenovo Flex 6-11IGM Motherboard Replacement, Auxiliary and USB Port: 12 단계, 이미지 3/3
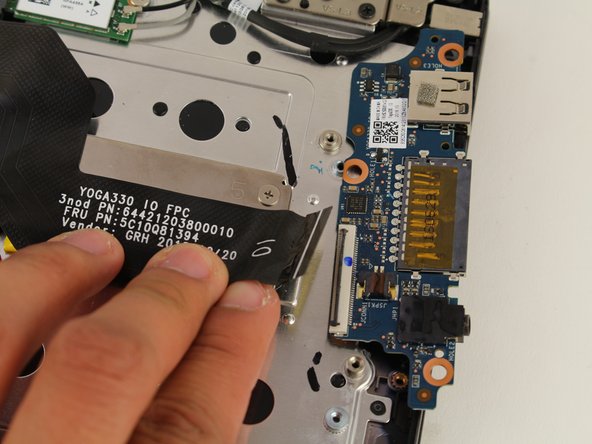
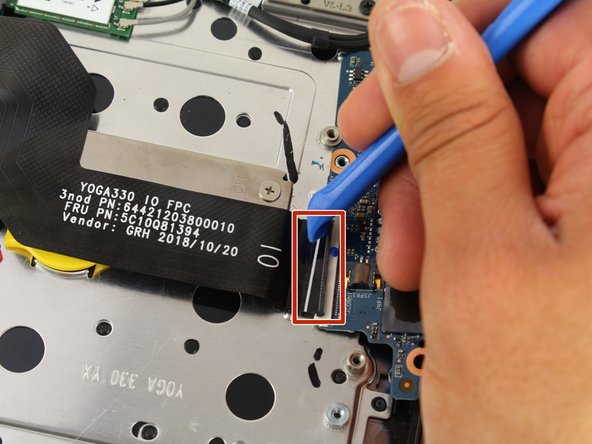
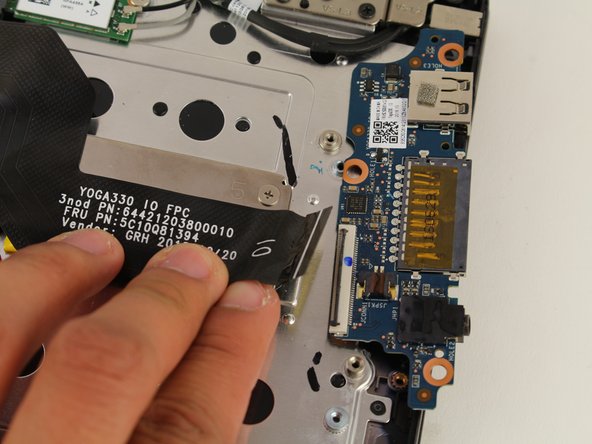
    • Disconnect the ribbon connector using the iFixit opening tool tool by flipping up the black flap and pulling the ribbon out.

  13. Lenovo Flex 6-11IGM Motherboard Replacement: 13 단계, 이미지 1/2 Lenovo Flex 6-11IGM Motherboard Replacement: 13 단계, 이미지 2/2
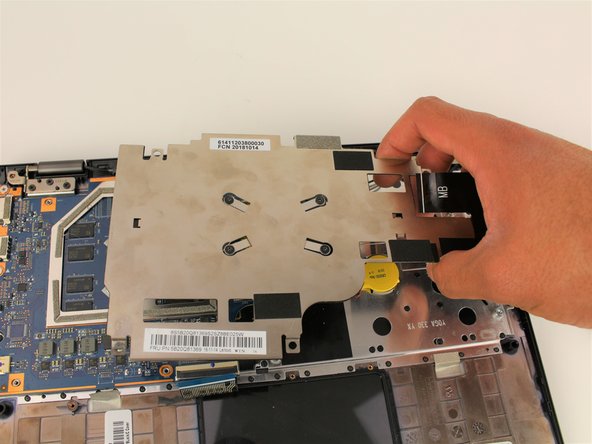
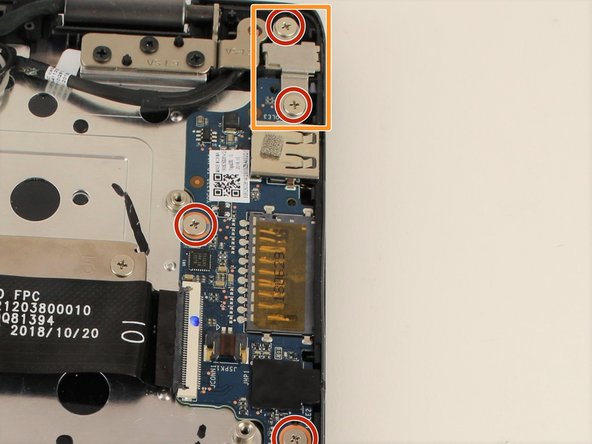
    • Take the three 3.5mm silver screws out using the Phillips #00 screwdriver.

    • Remove the protective silver shield before removing the ports.

    • Using the iFixit opening tool, insert its end underneath the ports, and pull them upwards toward you to remove them safely.

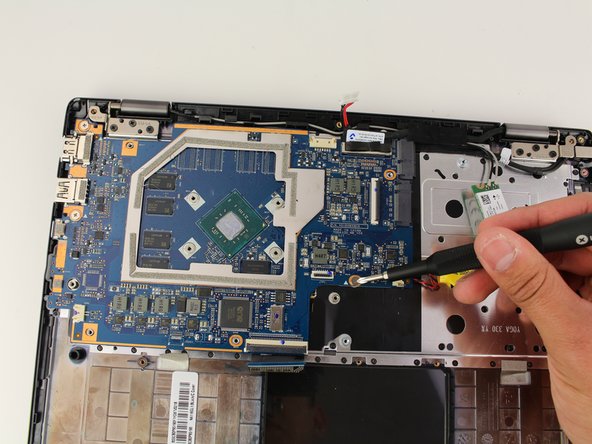
  14. Lenovo Flex 6-11IGM Motherboard Replacement, Motherboard: 14 단계, 이미지 1/2 Lenovo Flex 6-11IGM Motherboard Replacement, Motherboard: 14 단계, 이미지 2/2
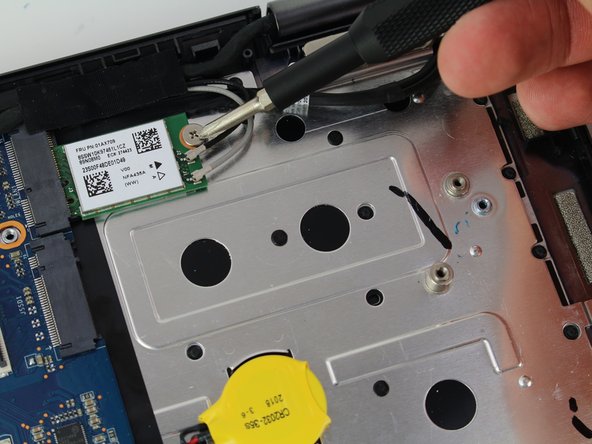
    • Unscrew the single 3.5 mm screw from the RAM card using a Phillips #00 screwdriver.

    • Unplug from motherboard.

  15. Lenovo Flex 6-11IGM Motherboard Replacement: 15 단계, 이미지 1/3 Lenovo Flex 6-11IGM Motherboard Replacement: 15 단계, 이미지 2/3 Lenovo Flex 6-11IGM Motherboard Replacement: 15 단계, 이미지 3/3
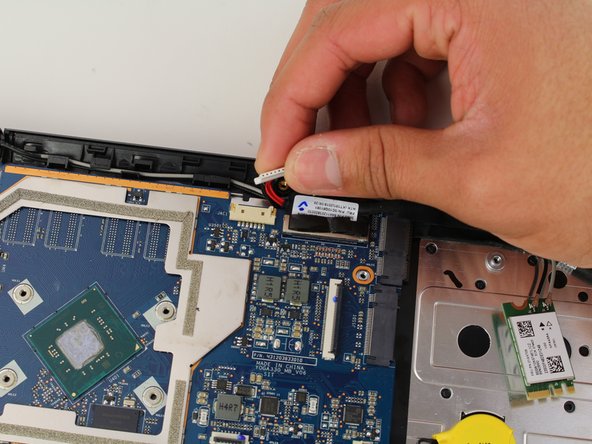
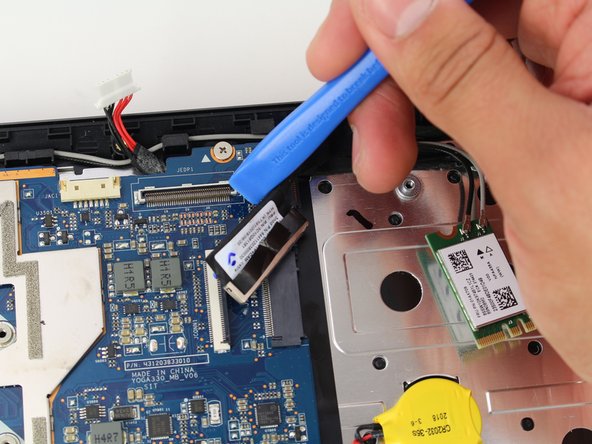
    • Use an opening tool to remove the connecting cables.

  16. Lenovo Flex 6-11IGM Motherboard Replacement: 16 단계, 이미지 1/2 Lenovo Flex 6-11IGM Motherboard Replacement: 16 단계, 이미지 2/2
    • Unscrew the three 3.5 mm retaining screws from the motherboard using a Phillips #00 screwdriver.

  17. Lenovo Flex 6-11IGM Motherboard Replacement: 17 단계, 이미지 1/1
    • Pick up and remove motherboard from laptop.

결론

To reassemble your device, follow these instructions in reverse order.

다른 한 분이 해당 안내서를 완성하였습니다.

Dustin Healy

회원 가입일: 01/23/20

241 평판

안내서 2개 작성하였습니다

Cal Poly, Team S2-G4, White Winter 2020 Cal Poly, Team S2-G4, White Winter 2020 회원

CPSU-WHITE-W20S2G4

3 회원들

안내서 4개 작성하였습니다

댓글 0개

댓글 쓰기

조회 통계:

24 시간 전: 2

7일 전: 3

30일 전: 3

전체 시간: 114