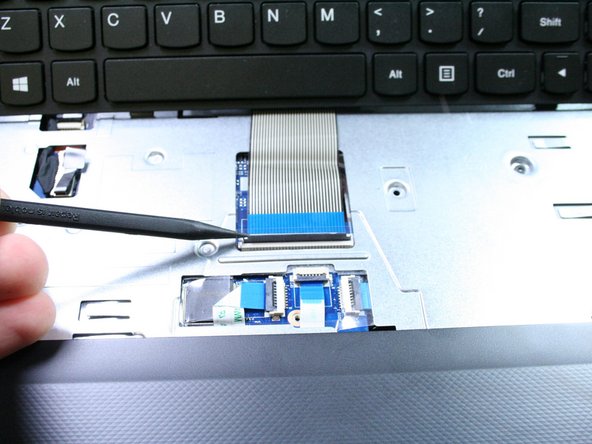
주요 콘텐츠로 건너뛰기

Lenovo IdeaPad 300-17ISK Keyboard Replacement

필요한 것

  1. Lenovo IdeaPad 300-17ISK Keyboard Replacement, Keyboard: 1 단계, 이미지 1/1
    • Unscrew the three 6mm Phillips #1 screws from the upper back cover.

  2. Lenovo IdeaPad 300-17ISK Keyboard Replacement: 2 단계, 이미지 1/3 Lenovo IdeaPad 300-17ISK Keyboard Replacement: 2 단계, 이미지 2/3 Lenovo IdeaPad 300-17ISK Keyboard Replacement: 2 단계, 이미지 3/3
    • Place the opening tool's head under any edge of the keyboard.

    • Pull upwards to unsnap the keyboard.

    • Use your fingers and the opening tool to pop the keyboard out of its place.

    • You should't use any excessive force because the keyboard is still attached to the motherboard.

  3. Lenovo IdeaPad 300-17ISK Keyboard Replacement: 3 단계, 이미지 1/2 Lenovo IdeaPad 300-17ISK Keyboard Replacement: 3 단계, 이미지 2/2
    • Push the keyboard connector latch upwards with the spudger.

    • You shouldn't use excessive force. The connector latch is very fragile.

    • The keyboard connector cable should slide right out.

결론

To reassemble your device, follow these instructions in reverse order.

다른 3명이 해당 안내서를 완성하였습니다.

Ammar Dodin

회원 가입일: 01/19/17

1,057 평판

안내서 6개 작성하였습니다

UC Davis, Team 1-3, Rodger Winter 2017 UC Davis, Team 1-3, Rodger Winter 2017 회원

UCD-RODGER-W17S1G3

4 회원들

안내서 6개 작성하였습니다

댓글 한 개

thank you so much very help full

deepak - 답글

댓글 쓰기

조회 통계:

24 시간 전: 1

7일 전: 4

30일 전: 20

전체 시간: 5,526