주요 콘텐츠로 건너뛰기

Lenovo IdeaPad 5 15ITL05 Battery Replacement

필요한 것

  1. Lenovo IdeaPad 5 15ITL05 Battery Replacement, Unfasten the back cover: 1 단계, 이미지 1/2 Lenovo IdeaPad 5 15ITL05 Battery Replacement, Unfasten the back cover: 1 단계, 이미지 2/2
    • Use a T5 Torx driver to remove nine screws securing the back cover.

    • The three screws on the hinge side will be longer.

  2. Lenovo IdeaPad 5 15ITL05 Battery Replacement, Step 2 Loosen the back cover: 2 단계, 이미지 1/3 Lenovo IdeaPad 5 15ITL05 Battery Replacement, Step 2 Loosen the back cover: 2 단계, 이미지 2/3 Lenovo IdeaPad 5 15ITL05 Battery Replacement, Step 2 Loosen the back cover: 2 단계, 이미지 3/3
    • The back cover is held on by plastic tabs around the entire perimeter of the cover.

    • Use plastic pry tools at the seam. I like to start near the hinge.

  3. Lenovo IdeaPad 5 15ITL05 Battery Replacement, Step 3 Remove the back cover: 3 단계, 이미지 1/2 Lenovo IdeaPad 5 15ITL05 Battery Replacement, Step 3 Remove the back cover: 3 단계, 이미지 2/2
    • Once all the tabs are loose, you will be able to remove the cover.

  4. Lenovo IdeaPad 5 15ITL05 Battery Replacement, Disconnect the battery: 4 단계, 이미지 1/2 Lenovo IdeaPad 5 15ITL05 Battery Replacement, Disconnect the battery: 4 단계, 이미지 2/2
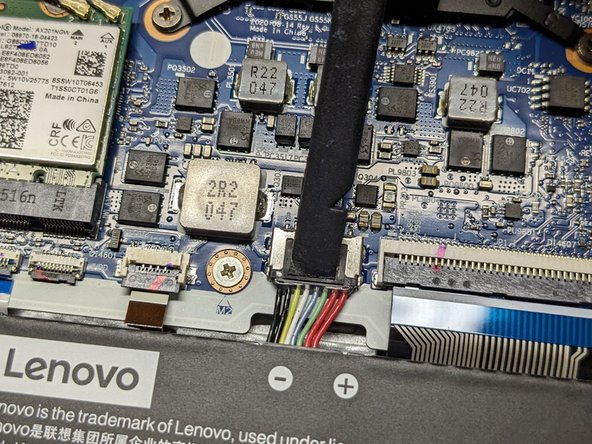
    • Use the flat end of a spudger to push the square tab on the battery connector and slide it out of its socket.

  5. Lenovo IdeaPad 5 15ITL05 Battery Replacement, Unfasten the battery: 5 단계, 이미지 1/1
    • Use a Phillips screwdriver to remove the four screws securing the battery.

    • Note: Two of the screws on the left in the image will also hold in the SATA drive bracket.

  6. Lenovo IdeaPad 5 15ITL05 Battery Replacement, Step 6 Remove the battery: 6 단계, 이미지 1/1
    • Remove the battery.

결론

To reassemble your device, follow these instructions in reverse order.

E N

회원 가입일: 11/21/22

422 평판

안내서 3개 작성하였습니다

댓글 0개

댓글 쓰기

조회 통계:

24 시간 전: 8

7일 전: 18

30일 전: 74

전체 시간: 403