주요 콘텐츠로 건너뛰기

Lenovo IdeaPad Flex 4-1470 Speaker Replacement

필요한 것

  1. Lenovo IdeaPad Flex 4-1470 Speaker Replacement, Lower Case: 1 단계, 이미지 1/1
    • Ensure your computer is completely OFF before starting this guide.

    • Remove the eight 6 mm screws using a Phillips #0 screwdriver.

    • Remove the two 11 mm screws using a Phillips #0 screwdriver.

  2. Lenovo IdeaPad Flex 4-1470 Speaker Replacement: 2 단계, 이미지 1/2 Lenovo IdeaPad Flex 4-1470 Speaker Replacement: 2 단계, 이미지 2/2
    • Pry the back cover off by inserting the plastic opening tool at the hinges and wedging it between the Back cover and the body.

    • Follow along the back edge with the plastic opening tool, lifting the cover off as you go. It is normal to hear snapping/clicking sounds as the back cover is held on by clips.

    • Remove the cover.

  3. Lenovo IdeaPad Flex 4-1470 Speaker Replacement, Battery: 3 단계, 이미지 1/2 Lenovo IdeaPad Flex 4-1470 Speaker Replacement, Battery: 3 단계, 이미지 2/2
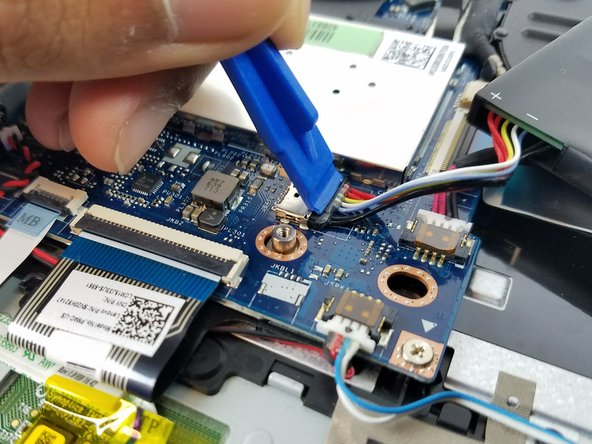
    • Disconnect the battery connector by using a plastic pry tool or your fingers to push the cable right towards the battery.

    • Do not pry or push on the socket itself or you risk damaging the motherboard.

  4. Lenovo IdeaPad Flex 4-1470 Speaker Replacement: 4 단계, 이미지 1/1
    • Remove the three 4 mm Phillips #0 screws holding the battery in place.

  5. Lenovo IdeaPad Flex 4-1470 Speaker Replacement: 5 단계, 이미지 1/1
    • Lift the battery up and out of the laptop.

  6. Lenovo IdeaPad Flex 4-1470 Speaker Replacement, Speaker: 6 단계, 이미지 1/2 Lenovo IdeaPad Flex 4-1470 Speaker Replacement, Speaker: 6 단계, 이미지 2/2
    • The speakers are not screwed or bolted in like any other components. They have two rubber grommets at each end which hold it in with friction.

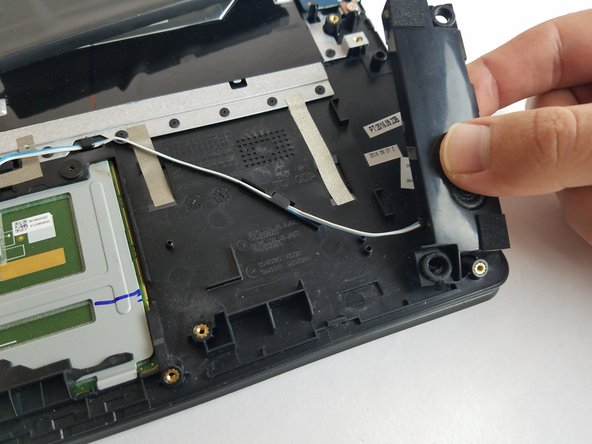
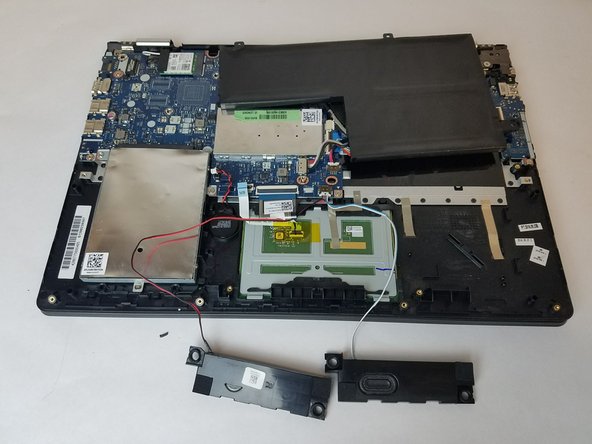
    • Starting with the speaker on the right, use your fingers to lift both ends of the speaker off.

    • The grommets may fall off when removing the speaker. When reassembling make sure you place the grommets back into the notches on the speaker before trying to mount the speaker. The specific orientation and position doesn't matter

  7. Lenovo IdeaPad Flex 4-1470 Speaker Replacement: 7 단계, 이미지 1/1
    • In addition to the grommets, the speaker wire running to the motherboard is clipped down.

    • Remove speaker wire from the clips.

  8. Lenovo IdeaPad Flex 4-1470 Speaker Replacement: 8 단계, 이미지 1/2 Lenovo IdeaPad Flex 4-1470 Speaker Replacement: 8 단계, 이미지 2/2
    • Repeat the previous steps for the other speaker.

  9. Lenovo IdeaPad Flex 4-1470 Speaker Replacement: 9 단계, 이미지 1/1
    • Remove the wire shown using the plastic opening tool.

  10. Lenovo IdeaPad Flex 4-1470 Speaker Replacement: 10 단계, 이미지 1/2 Lenovo IdeaPad Flex 4-1470 Speaker Replacement: 10 단계, 이미지 2/2
    • Use the Plastic Opening tool to flip open the ribbon cable clip shown.

    • Pull gently on the ribbon cable to disconnect it from the motherboard.

  11. Lenovo IdeaPad Flex 4-1470 Speaker Replacement: 11 단계, 이미지 1/3 Lenovo IdeaPad Flex 4-1470 Speaker Replacement: 11 단계, 이미지 2/3 Lenovo IdeaPad Flex 4-1470 Speaker Replacement: 11 단계, 이미지 3/3
    • Now that both speaker wires are free, disconnect the speakers from motherboard using two plastic opening tools.

    • Keep in mind that the red and black wires lead to the left speaker and the blue and white wires lead to the right speakers.

결론

To reassemble your device, follow these instructions in reverse order.

다른 한 분이 해당 안내서를 완성하였습니다.

Robert Cartwright

회원 가입일: 10/02/17

192 평판

안내서 1개 작성함

USF Tampa, Team S1-G6, Thompson Fall 2017 USF Tampa, Team S1-G6, Thompson Fall 2017 회원

USFT-THOMPSON-F17S1G6

3 회원들

안내서 10개 작성하였습니다

댓글 0개

댓글 쓰기

조회 통계:

24 시간 전: 0

7일 전: 0

30일 전: 3

전체 시간: 802